MicroSD basics
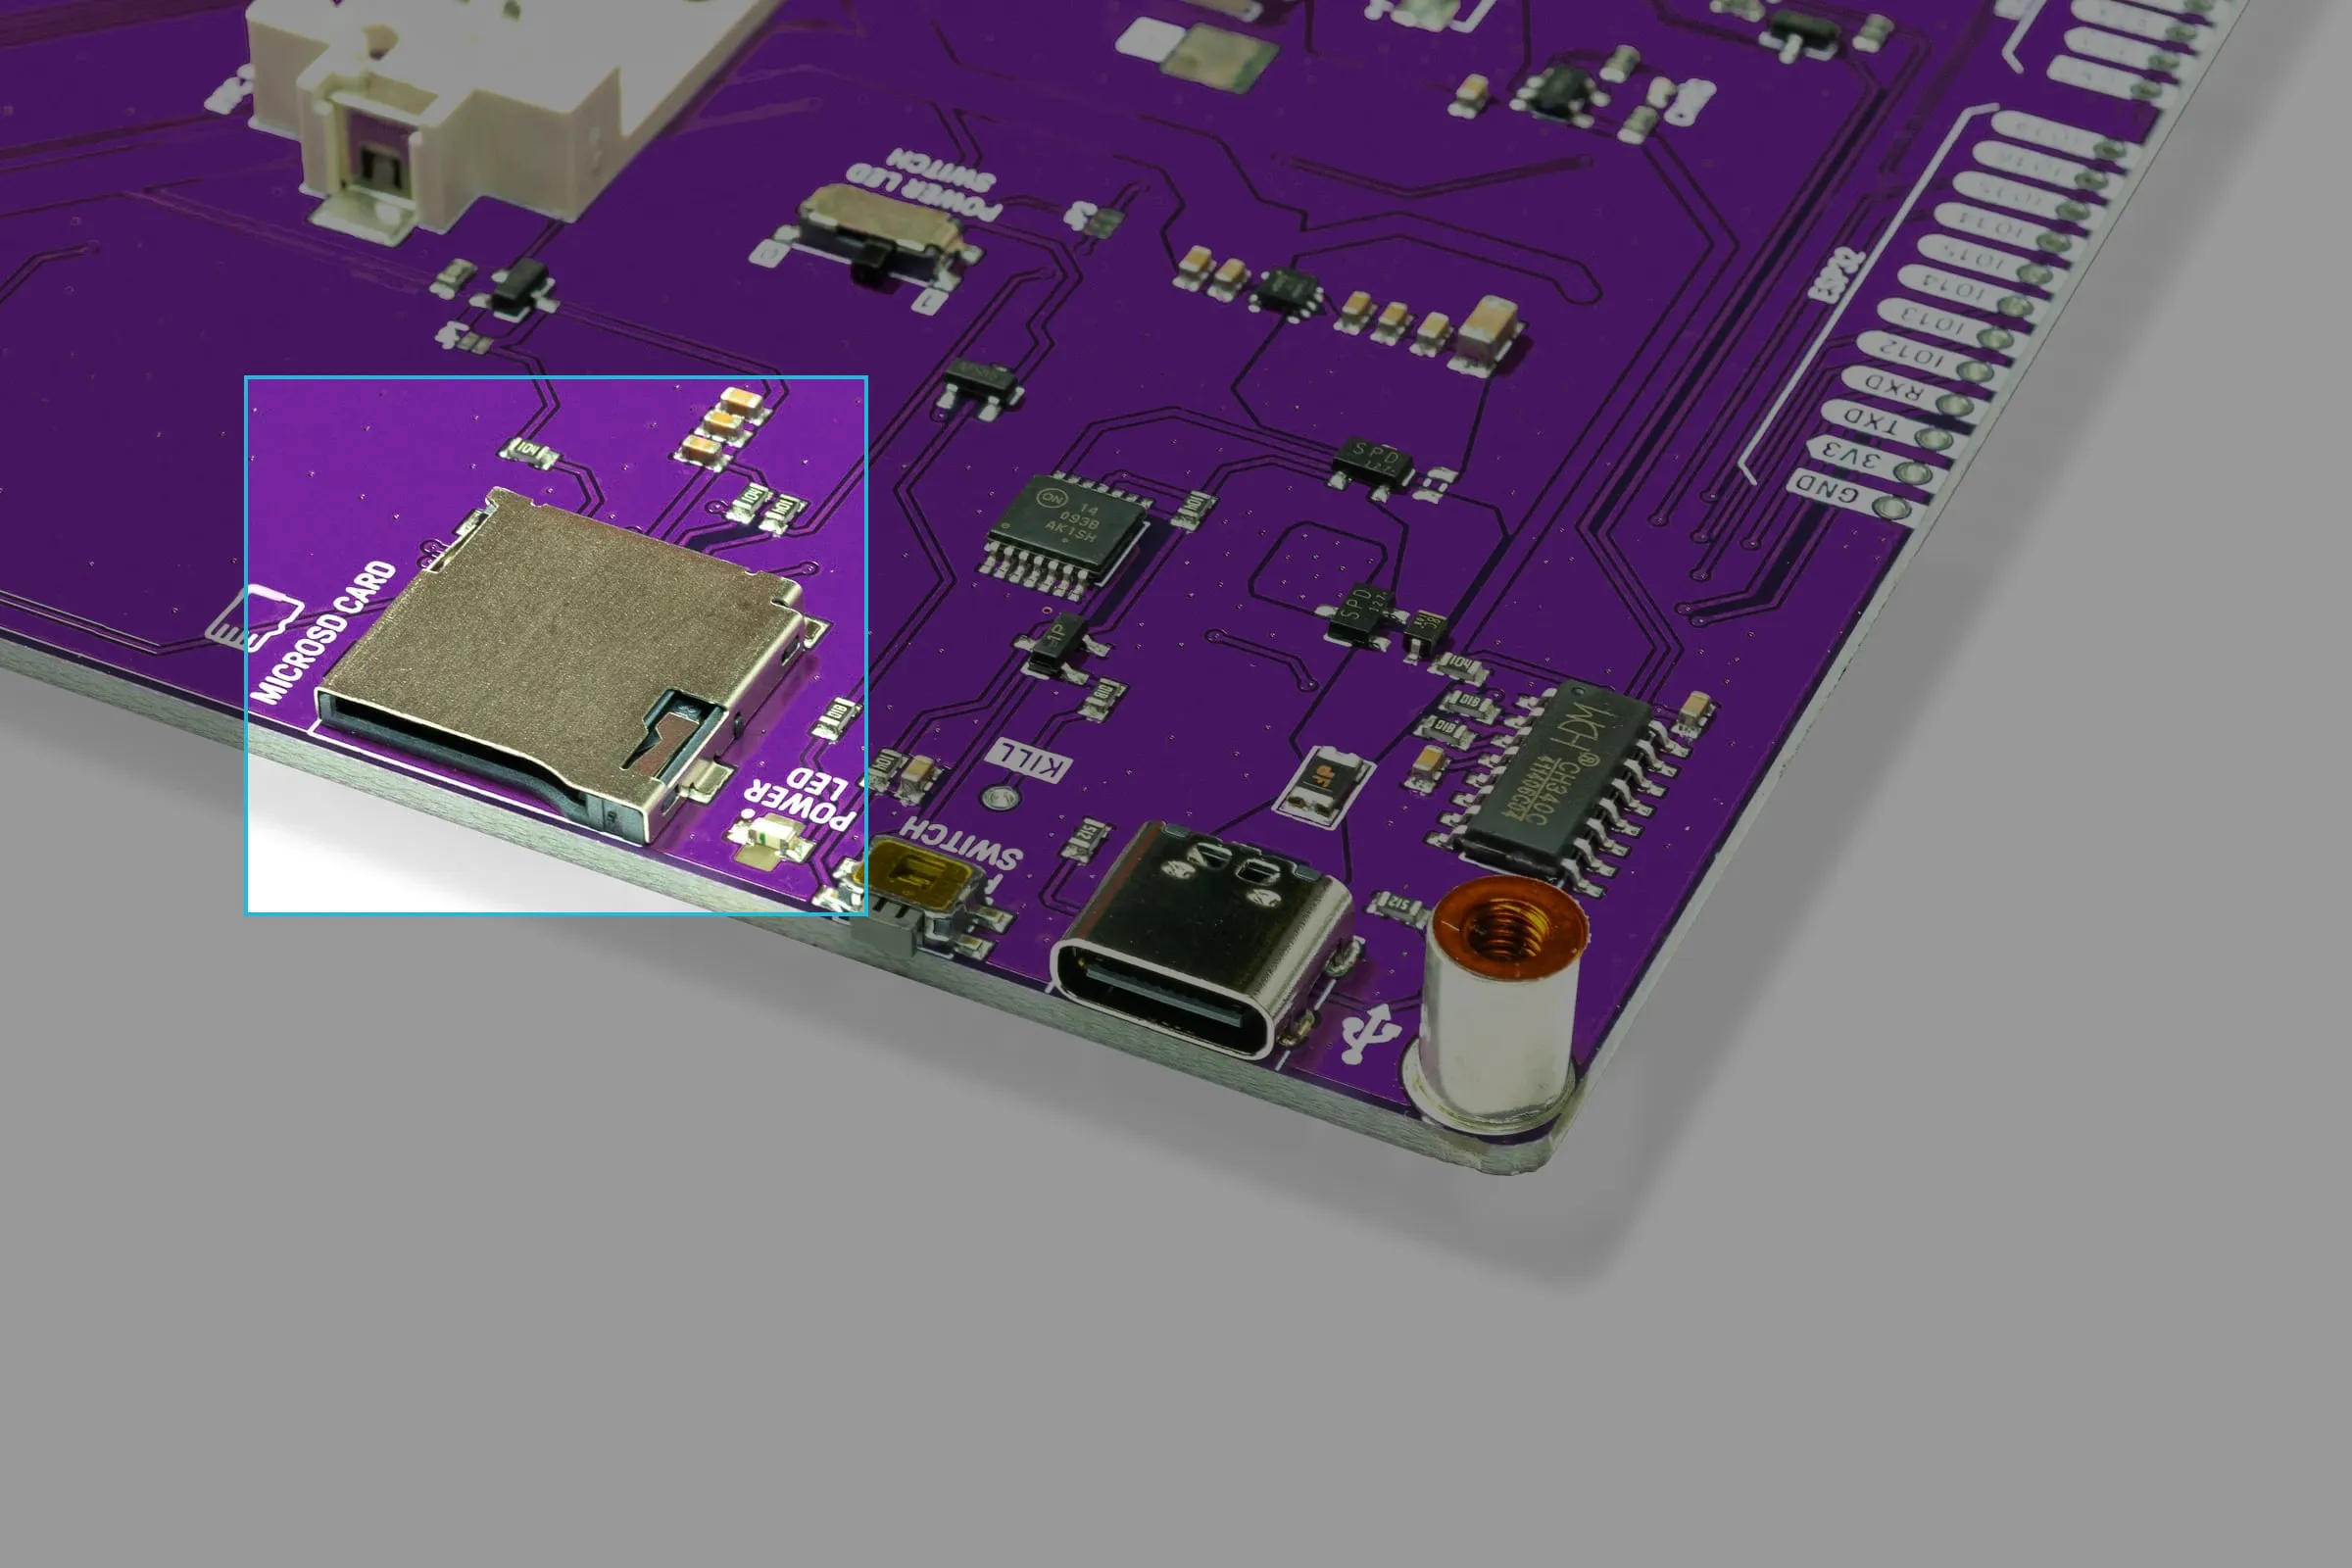
The built-in microSD card slot on Inkplate 10 can be extremely useful for your project. It can store a very large number of high-quality image files for display and manage reading and writing data between deep sleep cycles. This page contains basic examples to help you quickly get started with using the built-in microSD card slot.
Preparing the microSD card before usage
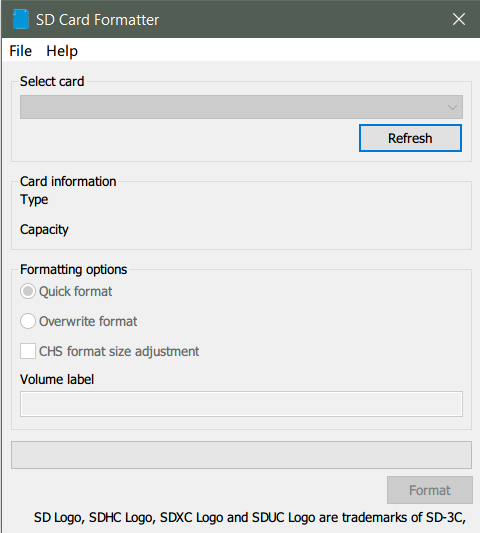
For best results, use the official SD card formatter to format the card to FAT32 before usage.
Initializing
Before the microSD card can be used in code, it must first be initialized. This powers on the microSD card circuitry and performs all of the necessary memory allocations. In this code snippet, the microSD card is initialized and the result of the initialization is checked:
#include "Inkplate.h"            // Include Inkplate library in the sketch
#include "SdFat.h"               // Include library for SD card
Inkplate inkplate(INKPLATE_1BIT); // Create an object of the Inkplate library and set the library to 1 Bit mode (BW)
SdFile file;                     // Create SdFile object used for accessing files on the SD card

void setup()
{
    inkplate.begin();        // Initialize Inkplate library (you should call this function ONLY ONCE)
    inkplate.clearDisplay(); // Clear the frame buffer of the display
    inkplate.display();      // Put a clear image on the display
    inkplate.setTextSize(5);

    // Initialize SD card. Display whether the SD card is initialized properly or not.
    if (inkplate.sdCardInit())
    {
        inkplate.println("SD Card ok! Reading data...");
        inkplate.partialUpdate();
    }
    else
    { // If card initialization was not successful, display an error on the screen, put the SD card in sleep mode, and stop the program (using an infinite loop)
        inkplate.println("SD Card error!");
        inkplate.partialUpdate();
        inkplate.sdCardSleep();
        while (true)
            ;
    }
}
void loop()
{
    // Nothing...
}
Initializes the SD card through SPI.
Returns value: Returns true if the initialization was successful, otherwise returns false.
Reading and writing
Place a sample text.txt file on the microSD card with some content in it; this code snippet will read the file and print its contents to the e-Paper:
/*
   Inkplate10_SD_TXT_Read example for Soldered Inkplate 10
   For this example you will need only a micro USB cable, Inkplate 10 and an SD card
   loaded with a text.txt file that can be found inside the folder of this example.
   Select "e-radionica Inkplate10" or "Soldered Inkplate10" from the Tools -> Board menu.
   Don't see the "e-radionica Inkplate10" or "Soldered Inkplate10" option? Follow our tutorial and add it:
   https://soldered.com/learn/add-inkplate-6-board-definition-to-arduino-ide/

   To work with the SD card on Inkplate, you will need to add one extra library.
   Download and install it from here: https://github.com/e-radionicacom/Inkplate-6-SDFat-Arduino-Library

   You can use your own .txt file, but for this example to work properly it should
   not have more than 200 characters and you should name it text.txt

   This example will show you how to open .txt files and display the content of that file on the Inkplate e-paper display.

   Want to learn more about Inkplate? Visit www.inkplate.io
   Looking for support? Write on our forums: https://forum.soldered.com/
   11 February 2021 by Soldered
*/

// Next 3 lines are a precaution; you can ignore them, and the example would also work without them
#if !defined(ARDUINO_INKPLATE10) && !defined(ARDUINO_INKPLATE10V2)
#error "Wrong board selection for this example, please select e-radionica Inkplate10 or Soldered Inkplate10 in the boards menu."
#endif

#include "Inkplate.h"            // Include Inkplate library in the sketch
#include "SdFat.h"               // Include library for SD card
Inkplate display(INKPLATE_1BIT); // Create an object of the Inkplate library and set the library to 1 Bit mode (BW)
SdFile file;                     // Create SdFile object used for accessing files on the SD card

void setup()
{
    display.begin();        // Initialize the Inkplate library (you should call this function ONLY ONCE)
    display.clearDisplay(); // Clear the frame buffer of the display
    display.display();      // Put a clear image on the display
    display.setTextSize(5);

    // Initialize SD card. Display whether the SD card is initialized properly or not.
    if (display.sdCardInit())
    {
        display.println("SD Card ok! Reading data...");
        display.partialUpdate();

        // Try to load text with a maximum length of 200 characters.
        if (!file.open("/text.txt", O_RDONLY))
        { // If it fails to open, send an error message to the display; otherwise, read the file.
            display.println("File open error");
            display.display();
            display.sdCardSleep();
        }
        else
        {
            display.clearDisplay();    // Clear everything that is stored in the frame buffer of the e-paper display
            display.setCursor(0, 0);   // Set the print position at the beginning of the screen
            char text[201];            // Array where data from the SD card is stored (max 200 characters here)
            int len = file.fileSize(); // Read the size of the file that is being opened
            if (len > 200)
                len = 200;         // If it's more than 200 bytes (200 characters), limit it to the maximum of 200 bytes
            file.read(text, len);  // Read data from the file and save it in the text array
            text[len] = 0;         // Place a null-terminating character at the end of the data
            display.print(text);   // Print the data/text
            display.display();     // Do a full refresh of the display
            display.sdCardSleep(); // Put the SD card in sleep mode
        }
    }
    else
    { // If the card initialization was not successful, display an error on the screen, put the SD card in sleep mode, and stop the program (using an infinite loop)
        display.println("SD Card error!");
        display.partialUpdate();
        display.sdCardSleep();
        while (true)
            ;
    }
}

void loop()
{
    // Nothing...
}
file.open()
Opens a file in the current working directory.
Returns value: Returns true if opening is successful, otherwise returns false.
Function parameters:
| Type | Name | Description |
|---|---|---|
const char * | path | The path to the file which is being opened. If it's in the root folder, just use the filename. |
oflag_t | oflag | The settings for opening the file. The different flags have to be OR'd, e.g., O_CREAT | O_RDWR. Below is a table of these flags and what they mean. |
| Flag | Hex Value | Description |
|---|---|---|
| O_RDONLY | 0x00 | Open for reading only. |
| O_WRONLY | 0x01 | Open for writing only. |
| O_RDWR | 0x02 | Open for reading and writing. |
| O_AT_END | 0x04 | Open at the end-of-file (EOF). |
| O_APPEND | 0x08 | Set append mode (writes are added to EOF). |
| O_CREAT | 0x10 | Create file if it does not exist. |
| O_TRUNC | 0x20 | Truncate file to zero length. |
| O_EXCL | 0x40 | Fail if the file already exists. |
| O_SYNC | 0x80 | Synchronized write I/O operations. |
file.fileSize()
Returns the total number of bytes in a file.
Returns type: uint32_t
file.read()
Reads data from the file into the provided buffer. The function attempts to read up to a given number of bytes starting from the current file pointer.
Returns value: Returns the number of bytes read, or -1 if an error occurs.
Function parameters:
| Type | Name | Description |
|---|---|---|
void * | buf | A pointer to the buffer where the read file data will be stored. |
size_t | count | The maximum number of bytes to read from the file. |
file.print() will continue from where you left off.Inkplate10_SD_TXT_Read.ino
This example will show you how to open .txt files and display the content of that file on the Inkplate e-paper display.
Inkplate10_SD_TXT_Write.ino
This example will show you how to write in a .txt file.