How to Reprogram
Introduction
On this page, we'll show you how to reprogram your Pomodoro Solder Kit and upload new firmware to it.
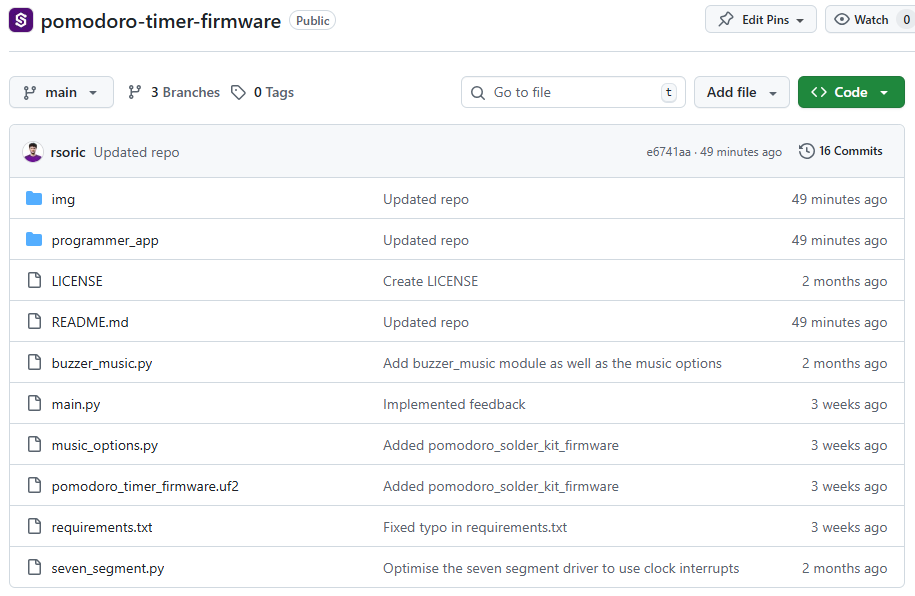
.py files and don’t remove essential system files from your board.Pomodoro Timer Solder Kit Firmware Repository
Source code and official MicroPython firmware files
MicroPython Firmware (RP2040)
The Pomodoro Timer Solder Kit uses a specific and tested version of the MicroPython firmware for the RP2040 chip.
This exact firmware binary is included in the official repository and should be used whenever reinstalling or reflashing MicroPython on the board.
RP2040 MicroPython firmware
Source code and official MicroPython firmware files
This UF2 contains the correct MicroPython interpreter version used during development and testing of the Pomodoro Timer firmware.
Using other or newer MicroPython builds may lead to unexpected behavior or incompatibilities with board drivers, file handling or timing.
Only the provided binary is guaranteed to work with this project.
1. What You’ll Need
Before we start, make sure you have:
- A Soldered Pomodoro Solder Kit
- A USB-C cable (data-capable)
- A computer with Python 3 installed
- Either:
- Visual Studio Code with the Soldered MicroPython Helper, or
- The mpremote command-line tool.
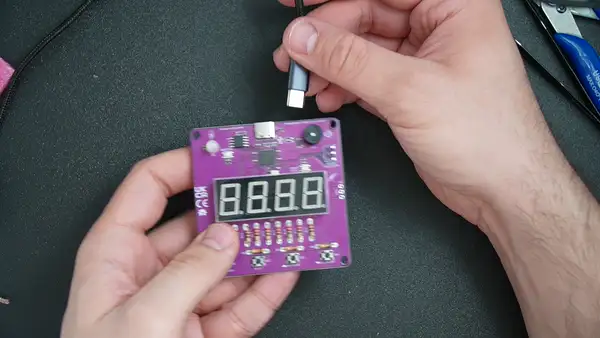
2. Connecting the Kit
- Plug your Pomodoro Kit into your computer using a USB-C cable.
- Wait for it to appear as a serial device (on Windows:
COMx, on macOS/Linux:/dev/ttyACMxor/dev/ttyUSBx).
You can verify the connection using:
ls /dev/tty*
or on Windows:
mode
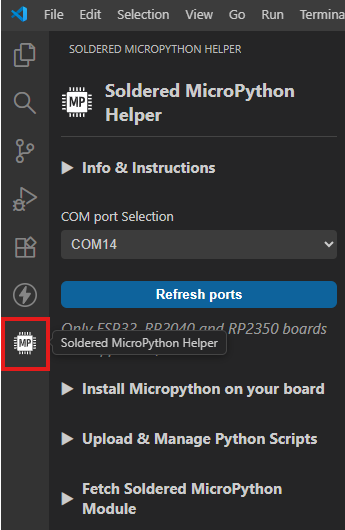
3. Recommended Method: Soldered MicroPython Helper (VS Code Extension)
This is the easiest and most beginner-friendly way to upload and manage firmware on your Pomodoro Timer.
Soldered MicroPython Helper extension
Recommended way to upload firmware and manage files
3.1 Install the Extension
-
Install the Soldered MicroPython Helper extension from the VS Code Marketplace
-
Open Visual Studio Code.
-
Click on the Soldered MicroPython Helper icon in the left sidebar.
3.2 Connect to Your Pomodoro Timer
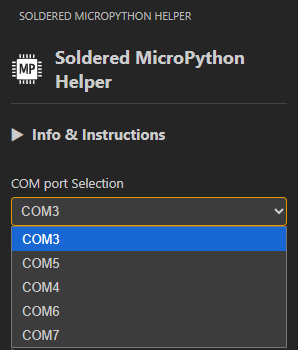
Find "COM port selection" right below "Info & Instructions" and select the correct COM port.
• Try another USB cable (must support data)
• Close applications that may be using the serial port
• Reconnect the board
3.3 Open the Firmware Repository
Inside VS Code, open the project folder you downloaded or cloned:
https://github.com/SolderedElectronics/pomodoro-timer-firmware
main.py, seven_segment.py, buzzer_music.py and music_options.py.3.4 Manage Files (Upload & Edit)
Open the tab Upload & Manage Python Scripts
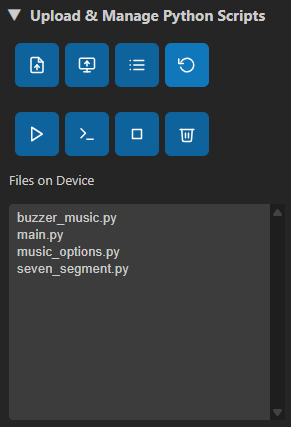
In this tab you can:
Download files from the board
Double-click any file to download it locally and open it for editing.
Upload individual files
Upload modified Python files back to the RP2040.
Upload the entire firmware repository
Choose Upload Python File(s) From PC, then select the top-level firmware folder you downloaded.
The extension will automatically scan that folder and all of its subfolders, detect every .py file, and upload them to the board.
3.5 Upload Required Firmware Files
Make sure these files are uploaded:
- main.py
- seven_segment.py
- buzzer_music.py
- music_options.py
3.6 Apply the Firmware (Reset the Board)
After uploading the files:
- Press "RESET MCU" in the extension
or - Unplug and reconnect your Pomodoro Timer
The board will restart and run the newly uploaded firmware.
4. Alternative Method: mpremote (CLI)
mpremote (CLI Tool)
Official MicroPython command-line interface for RP2040 boards
mpremote is the official command-line tool for communicating with MicroPython devices, including the RP2040 used in the Pomodoro Timer.
It provides access to the file system, allows uploading .py files, running scripts, and performing board resets.
4.1 Install mpremote
pip install mpremote
mpremote --version
4.2 Detect and Connect to Your Board
List available MicroPython-compatible devices
This command scans all connected serial ports and shows devices that respond as MicroPython boards:
mpremote devs
Use this to confirm that your computer detects the Pomodoro Timer and to identify which serial port it uses.
Show detailed list of connectable ports
This gives a more explicit view of all ports and their identifiers:
mpremote connect list
Helpful if you have multiple USB devices connected and need to distinguish which one is the RP2040.
Connect to the board manually
Once you know the correct port, connect using:
mpremote connect COM4
mpremote connect /dev/ttyACM0
mpremote connect /dev/tty.usbmodemXXXX
After a successful connection, you can run mpremote commands directly on the device.
4.3 Managing Files on the Board
Upload files to the device
This command copies one or more Python files from your computer to the root of the RP2040 filesystem:
mpremote cp main.py seven_segment.py buzzer_music.py music_options.py :
The colon (:) represents the device filesystem.
You can also specify the connection inline:
mpremote connect COM4 cp main.py seven_segment.py buzzer_music.py music_options.py :
Use this when you want to upload updated firmware files or replace existing files on the device.
List files stored on the device
Shows all files currently present on the RP2040 filesystem:
mpremote ls
This is equivalent to:
mpremote fs ls
Use this to verify that the correct firmware files are present after uploading.
Remove a file from the device
Deletes a file from board storage:
mpremote rm old_script.py
Explicit path variant:
mpremote rm :old_script.py
4.4 Running and Resetting Your Board
Run a script directly (without saving it)
Executes a Python script from your computer on the RP2040:
mpremote run main.py
The script runs in RAM and is not stored on the device.
Useful for quick testing or debugging without overwriting your firmware.
Reset the board
Performs a soft hardware reset, like pressing the reset button:
mpremote reset
After a reset, the board automatically runs main.py if it exists on the device.
5. Checking if Everything Works
After flashing, when you power on the Pomodoro Timer, it should:
- Light up the RGB LED (purple)
- Play a short jingle
- Display the settings menu on the 7-segment display
If all this works, your firmware upload was successful.
6. Next Steps: Simple Mods
Now that your Pomodoro Kit is up and running, here are a few simple and safe modifications you can make to customize it to your liking.
1. Change Default Session Durations
In main.py, find the set_times() function and modify:
study = 25
rest = 5
For example:
study = 50
rest = 10
2. Adjust Step Size
Still in set_times(), change how fast the time increases or decreases:
study = min(study + 5, 95)
rest  = min(rest + 5, 95)
You can replace 5 with 1 for smaller steps or 10 for faster adjustments.
3. Change LED Colors
In main(), edit the LED color for each mode:
update_led((0, 255, 0))    # Study
update_led((255, 0, 0))    # Rest
For example:
update_led((0, 0, 255))    # Blue study
update_led((255, 100, 0))  # Orange rest
4. Adjust LED Brightness
In main.py, change the brightness level:
brightness_level = 0.3
You can use any value between 0.0 (off) and 1.0 (maximum brightness).
5. Customize the Jingles
You can easily replace the default melodies in music_options.py using onlinesequencer.net.
Steps:
- Go to onlinesequencer.net and create your melody.
- Copy the sequence and paste it into one of the variables, for example:
intro_default = "Online Sequencer: 120; E4 B4 C5"
- Remove the
"Online Sequencer"text and any trailing characters like;: - Save and upload your modified file.
Example:
Change the startup tune in music_options.py:
intro_default = "T120 O5 C D E F G"
Then re-upload your firmware as before. Upon startup, your new melody will play.
You can modify a lot more. For example, you can change how the buttons behave, create new LED patterns, or even write your own timer logic.
Feel free to experiment and explore the code. If something stops working, you can always follow this guide again to restore the original firmware.
Everything is open-source, so have fun and make it your own!