Arduino - Burning the Arduino Bootloader
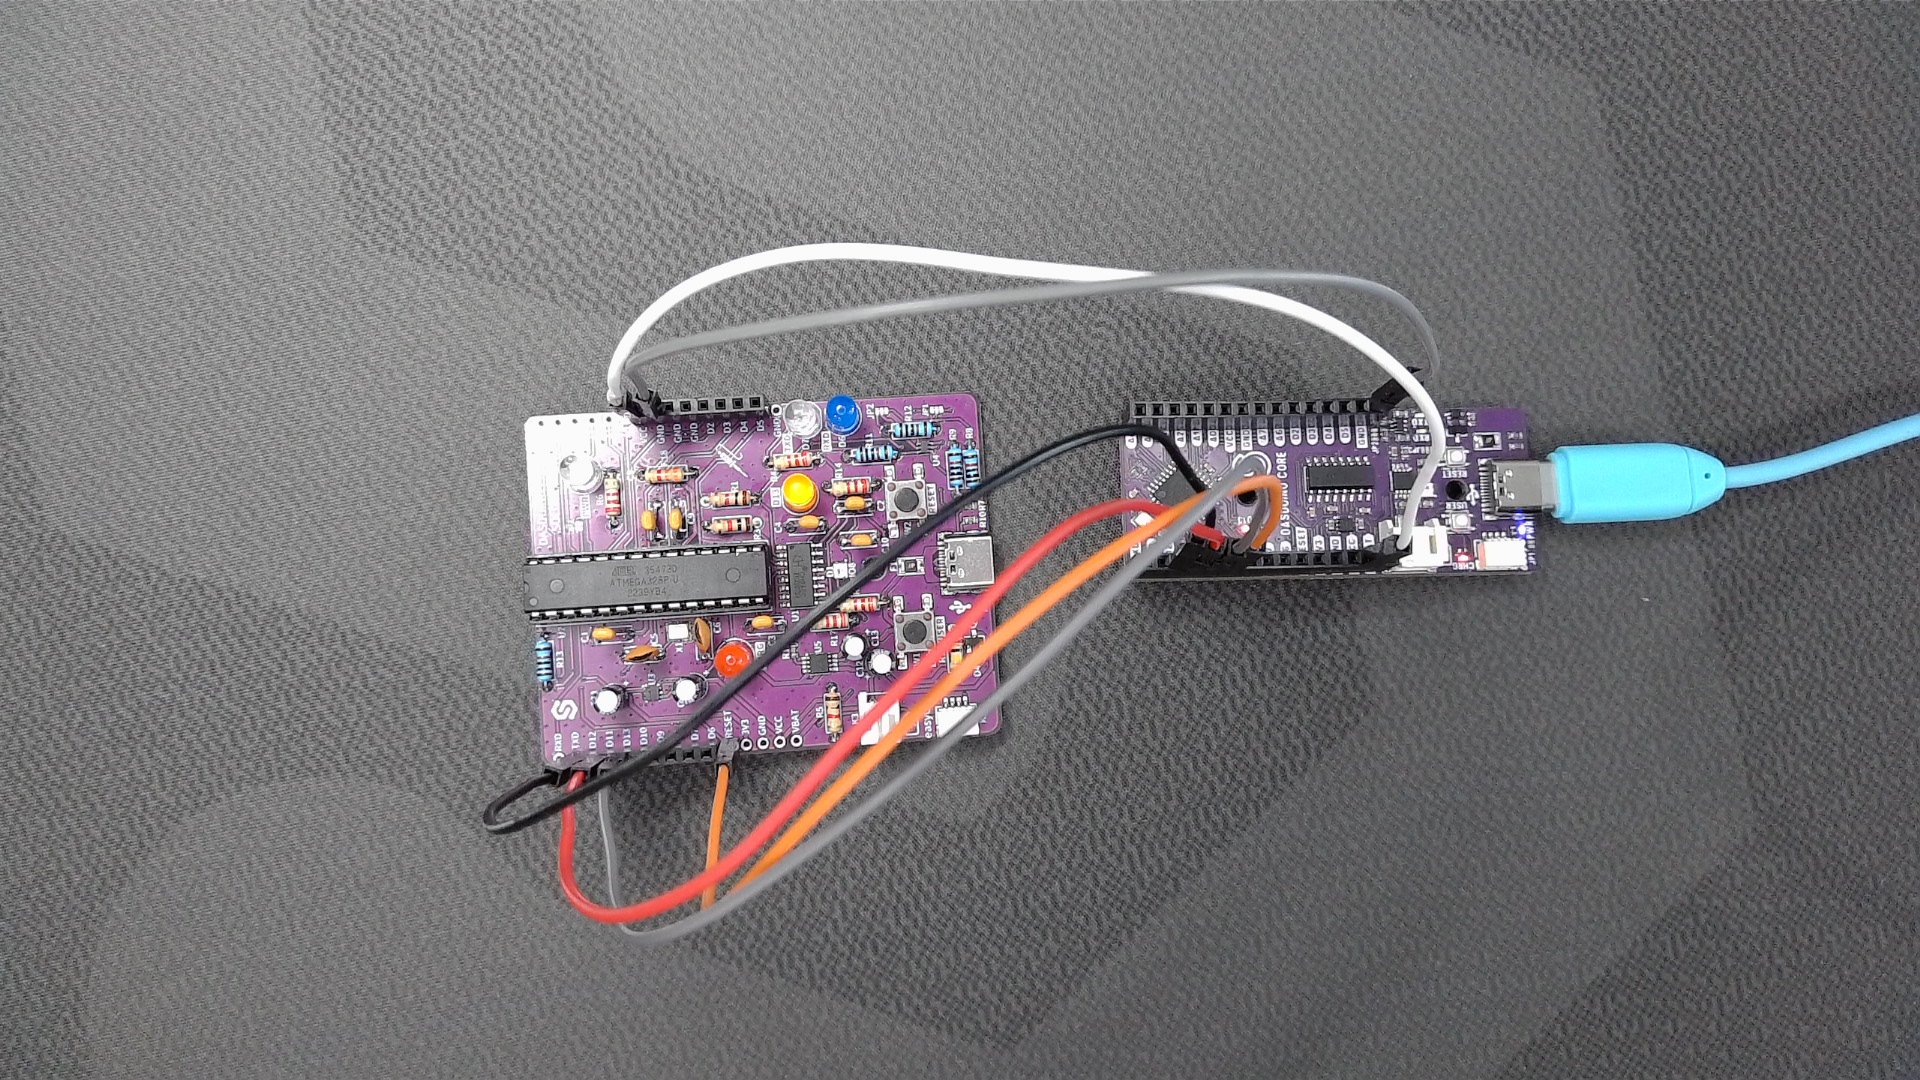
The bootloader is a small piece of software that allows uploading of sketches onto the Arduino board. It comes preprogrammed on the Arduino boards, but when the MCU is bought on its own it usually doesn't have the bootloader preprogrammed. The easiest way to burn the bootloader to standard Atmel chips (ATTINY, ATMEGA ...) is by using a second preprogrammed board as a programmer, which will be covered below. It this example, we will be using a Dasduino CORE to bootload another Dasduino CORE
1. Connect the boards
Atmel boards are programmed with the SPI interface (MOSI, MISO, SCK signals). Check pinout schemes for both of your boards to find those pins! For this example, both programmer and target board will be Dasduino CORE boards. Connections are available below:
| Programmer board | Target board |
|---|---|
| MISO (D12) | MISO (D12) |
| MOSI (D11) | MOSI (D11) |
| SCK (D13) | SCK (D13) |
| D(10), or any digital pin! | RESET |
| VCC | VCC |
| GND | GND |
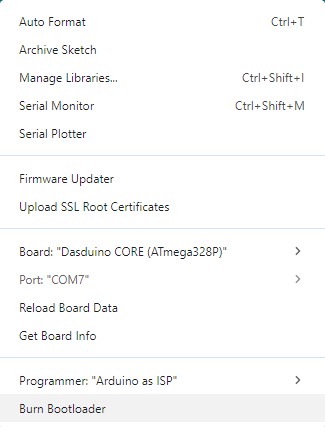
2. Burn the bootloader
Connect the programmer board to the computer via USB. In Arduino IDE open the ArduinoISP example by going to: File->Examples->11.ArduinoISP->ArduinoISP.
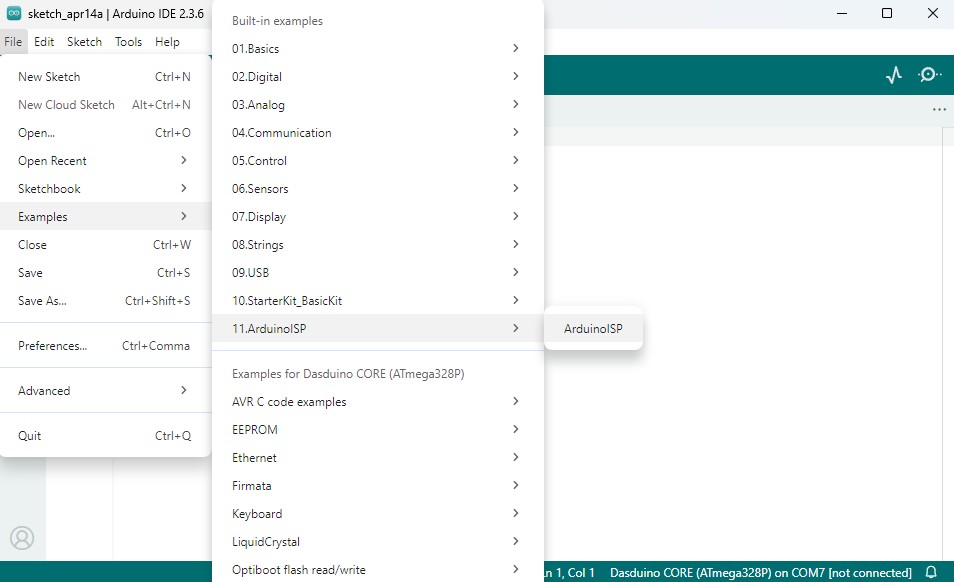
Upload the code to the programmer board.
After succesfully uploading the code, go to Tools->Board and change it to the target board. For Tools->Programmer select Arduino as ISP and click Burn Bootloader