DRV8825 - Getting started
This page provides the essential information for getting started, including board and library installation and wiring the breakout board to your microcontroller.
Acknowledgement

Arduino library
To install the Arduino library, you can use the Arduino library manager or download it from the GitHub repository:
Soldered-Basic-Stepper-Driver-Arduino-Library
Stepper driver Arduino library by Soldered
First time Arduino user? For a detailed tutorial on how to get started with Arduino, see this section of our docs:
Getting started with Arduino
A full, comprehensive tutorial on how to fully set up and upload code for the first time on an Arduino board, from scratch!
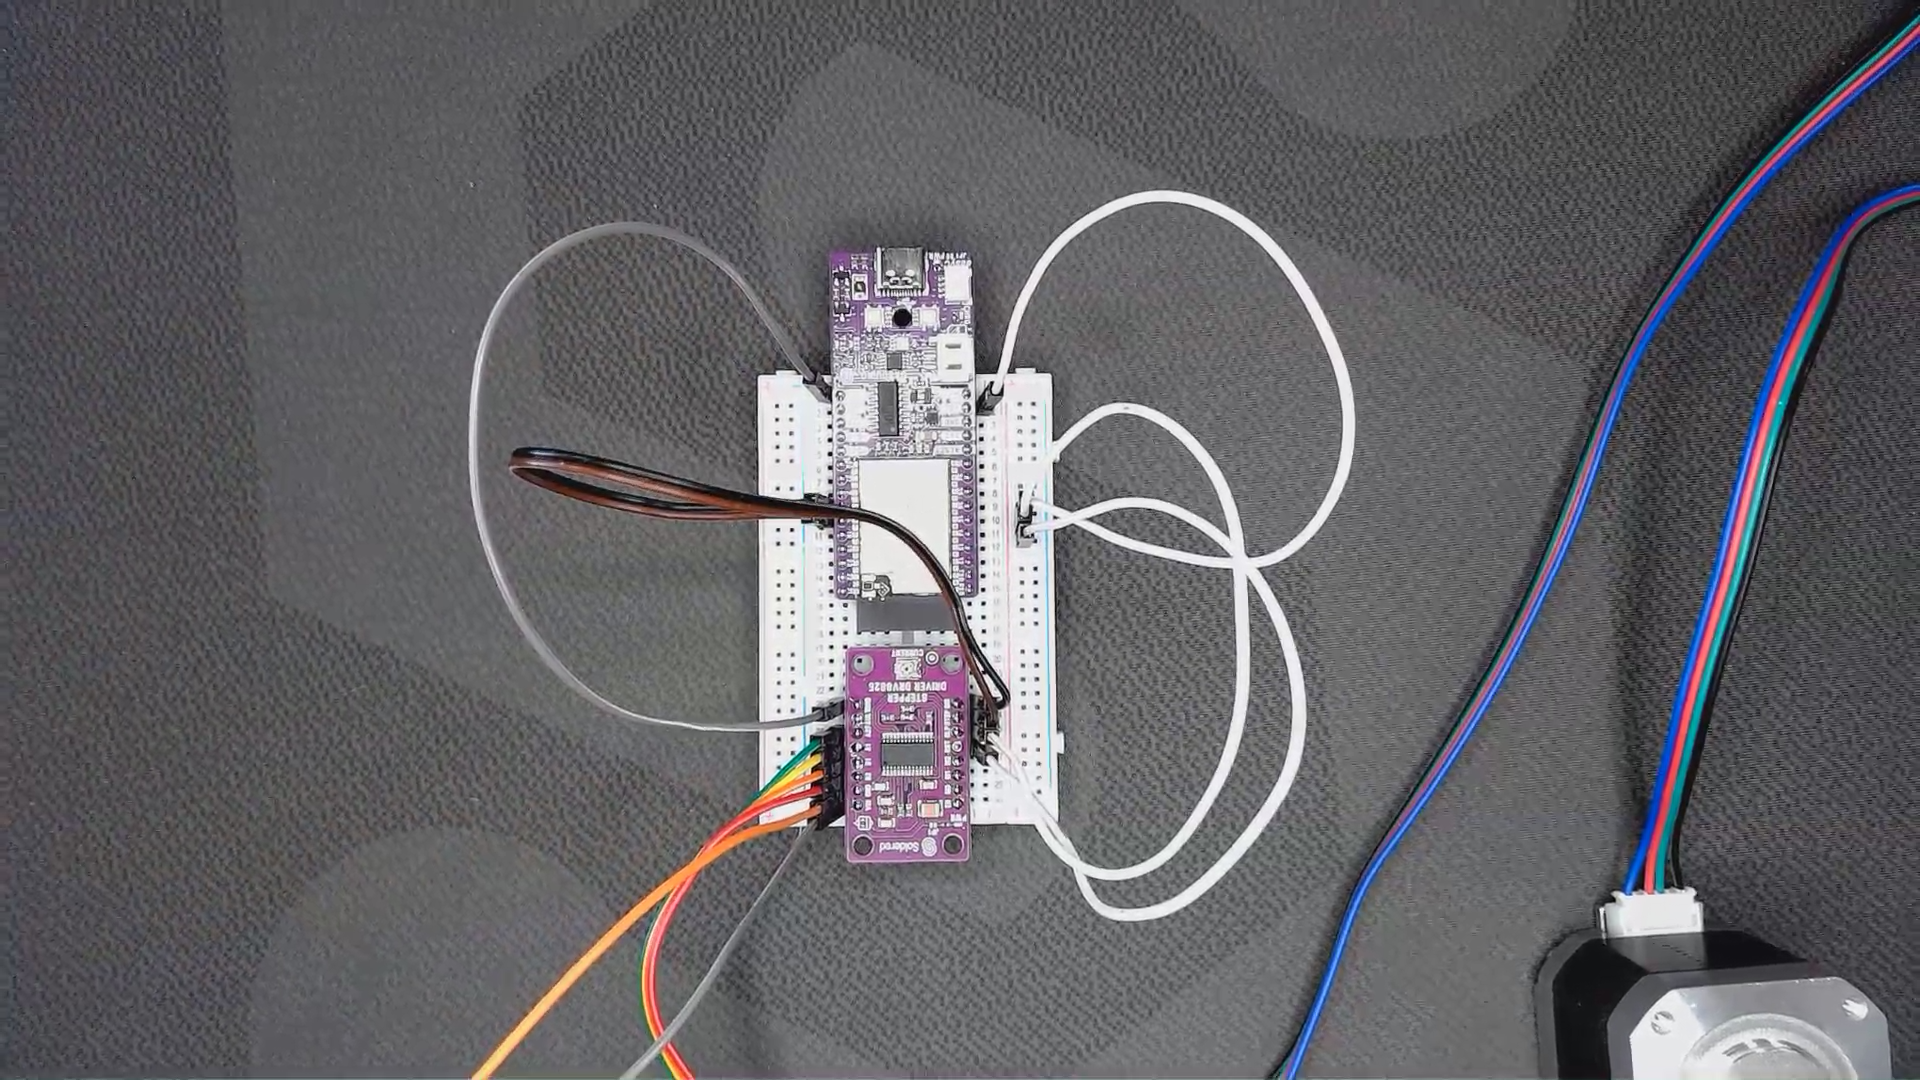
Connections
Below is an example connection diagram for Dasduino CONNECTPLUS and NEMA17 Stepper motor. These pins will be used in the examples throughout this documentation.
| Dasduino CONNECTPLUS | Breakout board |
|---|---|
| GND | GND |
| VCC | RST |
| VCC | SLP |
| IO5 | STEP |
| IO4 | DIR |
You also need to connect VIN and GND on the stepper power supply terminals:
| Power Supply | Breakout Board |
|---|---|
| VCC | VCC |
| GND | GND |
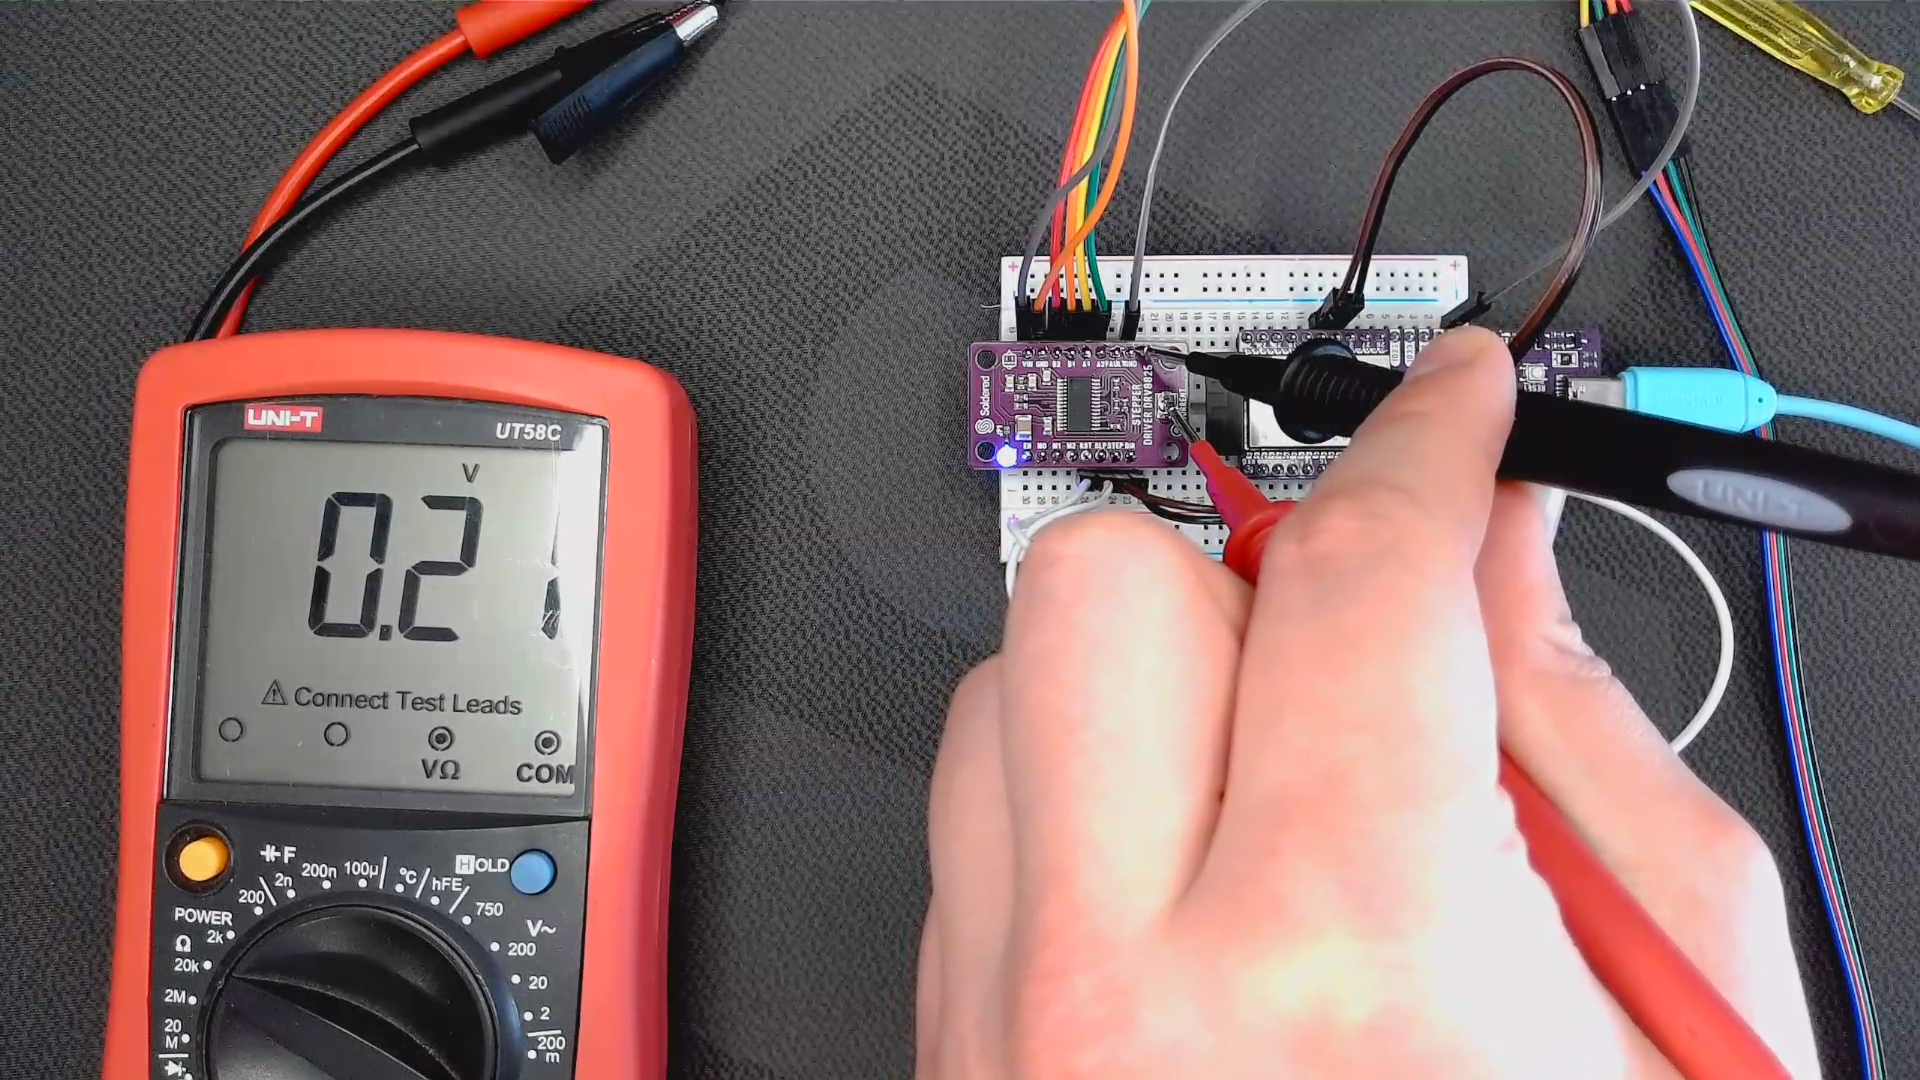
Limiting the current
Before running the motor, maximum current flowing through the stepper coils must be limited so that it doesn't exceed the motor's rated current. The DRV8825 driver includes a small onboard potentiometer for setting the current limit. The easiest way to limit the current is to use the Vref formula: Vref=Current Limit/2. Rated current for NEMA17 is 350mA, so the Vref should be 0.175V.