INA219 - Taking measurements
This page contains a simple example of taking measurements with the INA219 sensor.
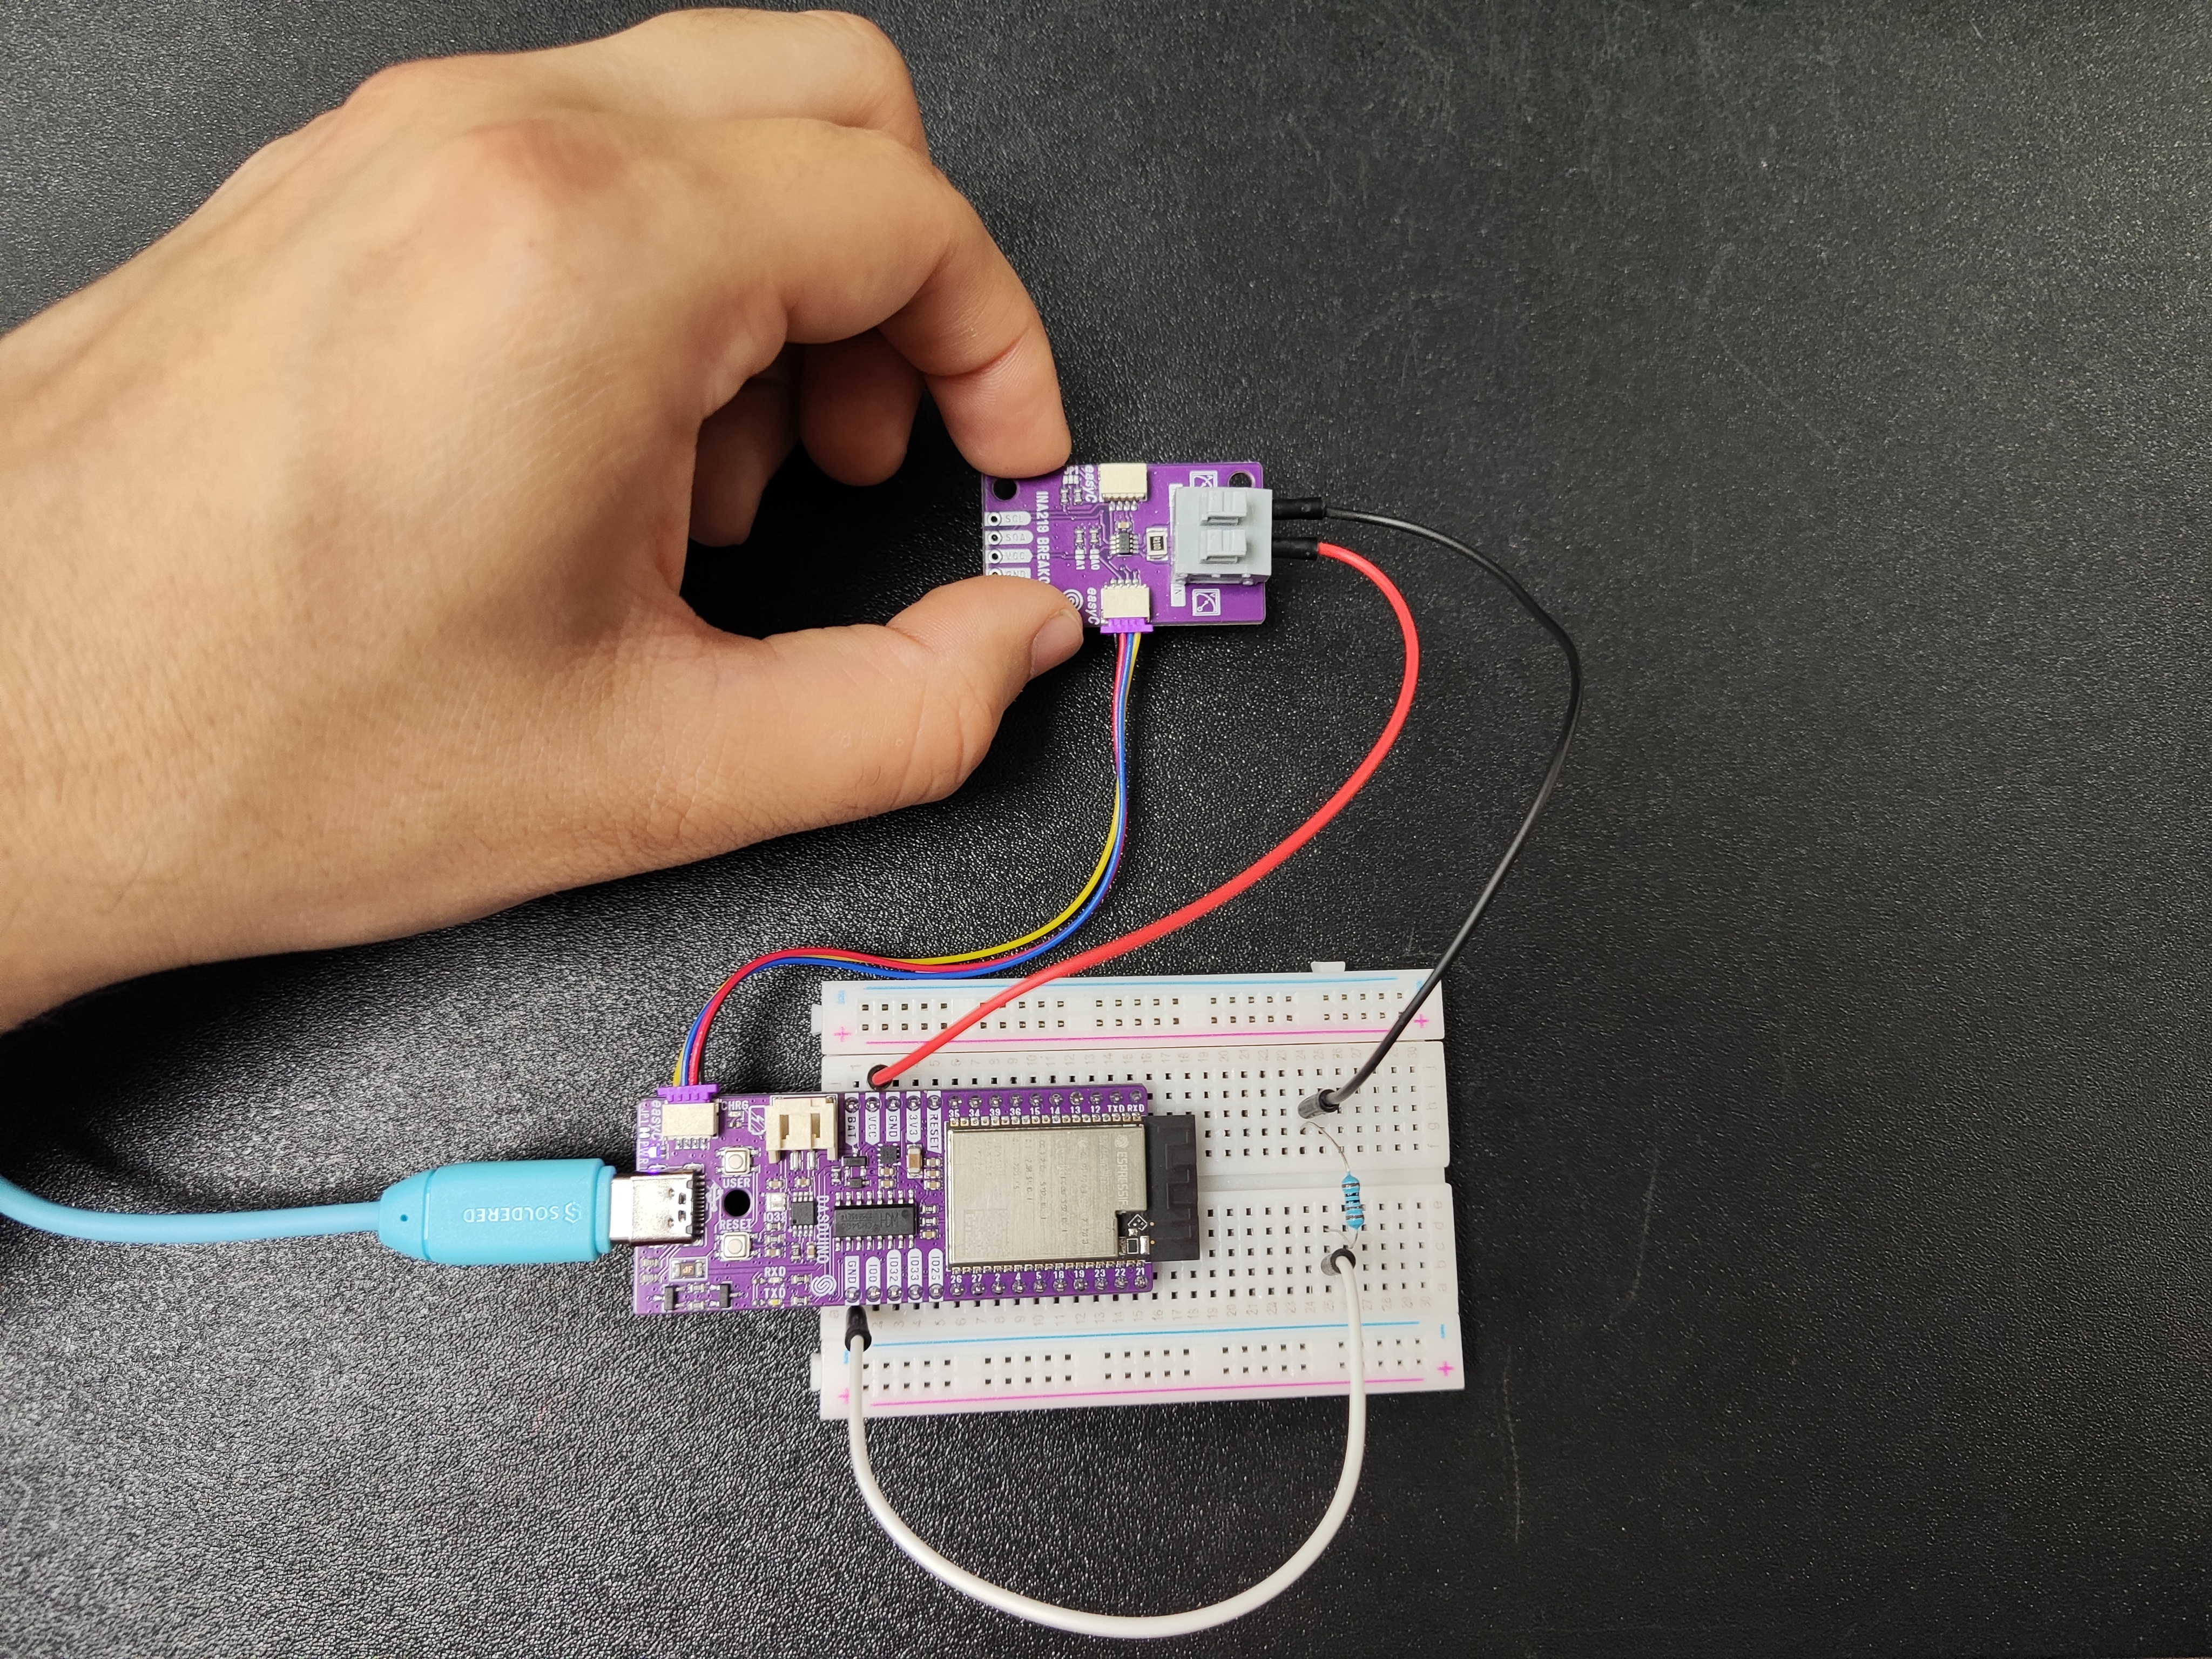
Connections for this example
Initialization
To measure with the INA219 sensor, first include the required library and create the sensor object:
//Include the library
#include "INA219-SOLDERED.h"

//Create an instance of the INA219 object
INA219 ina;
Next, in the setup() function, we have to initialize and configure the sensor:
void setup()
{
    Serial.begin(115200);

    Serial.println("Initialize INA219");
    Serial.println("-----------------------------------------------");

    // Default INA219 address is 0x40
    ina.begin();

    // Configure INA219
    ina.configure(INA219_RANGE_32V, INA219_GAIN_320MV, INA219_BUS_RES_12BIT, INA219_SHUNT_RES_12BIT_1S);

    // Calibrate INA219. Rshunt = 0.1 ohm, Max expected current = 2A
    ina.calibrate(0.1, 2);

    Serial.println("-----------------------------------------------");
}
ina.begin(uint8_t address)
Initializes the INA219 sensor, setting up communication over I2C
Returns value: Boolean value, true for successful I2C communication, false for error
Function parameters:
| Type | Name | Description |
|---|---|---|
uint8_t | address | Optional, sets the I2C address of the INA219 sensor, if none is given then 0x40 is assigned |
ina.configure(ina219_range_t range, ina219_gain_t gain, ina219_busRes_t busRes, ina219_shuntRes_t shuntRes, ina219_mode_t mode)
Initializes the INA219 sensor, setting up communication over I2C
Returns value: Boolean value, true if successful, false for error
Function parameters:
| Type | Name | Description |
|---|---|---|
ina219_range_t | range | Optional, sets the expected maximum voltage range, if none is given then 32V is assigned |
ina219_gain_t | gain | Optional, sets the gain of the sensor, if none is given then 320mV is assigned |
ina219_busRes_t | busRes | Optional, sets the bus resolution of the sensor, if none is given then 12-bit is assigned |
ina219_shuntRes_t | shuntRes | Optional, sets the shunt resolution of the sensor, if none is given then 12-bit is assigned |
ina219_mode_t | mode | Optional, sets the work mode of the sensor, if none is given then INA219_MODE_SHUNT_BUS_CONT is assigned |
ina.calibrate(float rShuntValue, float iMaxExpected)
Configures the shunt resistor value in ohms and the max expected current
Returns value: Boolean value, true if successful, false if not
Function parameters:
| Type | Name | Description |
|---|---|---|
float | rShuntValue | Optional, sets the value of the shunt resistor in ohms, if none is given then 0.1 is assigned |
float | iMaxExpected | Optional, sets the value of the max expected current in Amps, if none is given then 2 is assigned |
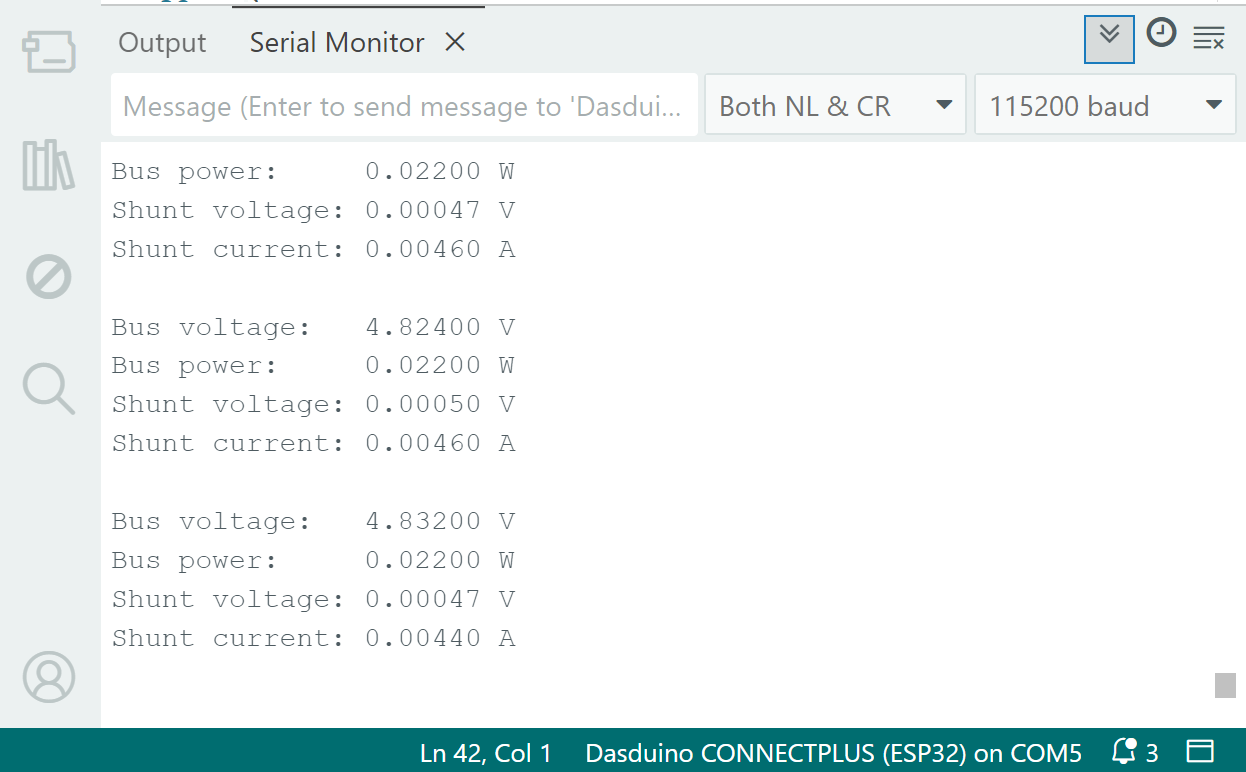
Taking measurements
In the loop() function, we take measurements of the bus voltage, power, shunt voltage, and shunt current:
void loop()
{
    Serial.print("Bus voltage:   ");
    Serial.print(ina.readBusVoltage(), 5);  //Read bus voltage
    Serial.println(" V");

    Serial.print("Bus power:     ");
    Serial.print(ina.readBusPower(), 5);  //Read bus power
    Serial.println(" W");


    Serial.print("Shunt voltage: ");
    Serial.print(ina.readShuntVoltage(), 5);  //Read shunt voltage
    Serial.println(" V");

    Serial.print("Shunt current: ");
    Serial.print(ina.readShuntCurrent(), 5);  //Read shunt current
    Serial.println(" A");

    Serial.println("");
    delay(1000);
}
ina.readBusVoltage()
Reads the current voltage on the bus
Returns value: Float value, voltage in Volts
ina.readBusPower()
Reads the current power on the bus
Returns value: Float value, power in Watts
ina.readShuntVoltage()
Reads the current shunt voltage
Returns value: Float value, voltage in Volts
ina.readShuntCurrent()
Reads the shunt current
Returns value: Float value, current in amperes
Full example
You can find the full sketch below:
INA219-Simple.ino
An example of taking simple measurements with the INA219 sensor