MicroPython - Getting started with VSCode
Why Use VS Code for MicroPython?
Writing MicroPython code in Visual Studio Code (VS Code) provides a much more powerful development experience than most built-in editors that come with boards or simple serial terminals. With the help of the Soldered MicroPython Helper extension, you can:
- Write code with syntax highlighting, IntelliSense, and auto-complete.
- Organize code into modules (
.pyfiles) for better maintainability. - Easily upload, run, and manage files on your MicroPython device.
- View live serial output directly inside VS Code.
- Install MicroPython firmware and Soldered libraries with one click.
- Use an integrated, modern development workflow without ever leaving VS Code.
Requirements and Initial Setup
Before using the extension, make sure the following tools are installed and working correctly. These tools are essential for communication with your MicroPython board.
Required Tools
- Visual Studio Code – main development environment
- Python 3.7+ – used to run
esptoolandmpremote - Node.js + npm – used by the extension to access serial ports (via the
serialportlibrary)
python, node, and npm in your terminal. If these commands fail, your environment is not set up correctly.Verify installation:
python --version   # Expected: Python 3.7 or higher
node -v            # Expected: Node.js 14+ or higher
npm -v             # Confirms npm is available
Quick Setup: Install Required Tools
esptool– used to flash MicroPython firmware to ESP32/ESP8266 boardsmpremote– used to run code, upload files, and interact with your board over USBserialport– a Node.js library the extension uses to read/write serial data
Run the following commands in your terminal to install everything:
# Install Python tools for firmware flashing and file communication
pip install esptool mpremote

# Install Node.js package for serial communication
npm install serialport
If these commands succeed without errors, you're ready to use the extension.
Test the Setup
Run the following commands to ensure the tools are globally available:
esptool --help
mpremote --help
If you see help text with usage instructions, you're good to go.
Fixing PATH Issues
esptool and mpremote when called from the terminal. This is done via the PATH environment variable.On Windows
- Open Start, search for "environment variables", and select "Edit the system environment variables".
- Click Environment Variables....
- Under User variables, select
Pathand click Edit. - Click New, then add the folder where Python installs scripts (usually:
C:\Users\YOURNAME\AppData\Roaming\Python\Python3x\Scripts). - Click OK to save and restart your terminal.
On Linux/macOS
Add the following to your shell configuration file (~/.bashrc, ~/.zshrc, or ~/.profile):
export PATH="$HOME/.local/bin:$PATH"
Then apply the changes:
source ~/.bashrc # or the relevant file
Once set, re-test with:
esptool --help
If help text appears, you're ready to flash and upload!
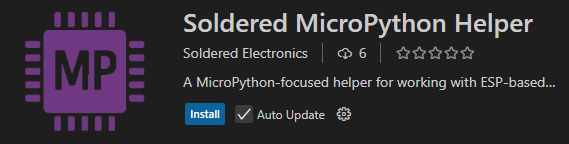
Installing the Extension
- Open VS Code.
- Go to the Extensions tab (or press
Ctrl+Shift+X). - Search for Soldered MicroPython Helper.
- Click Install.
After installation, you’ll see a MicroPython panel in the sidebar. This is your main interface for interacting with your device.
Connecting Your MicroPython Device
- Plug in your MicroPython-compatible board via USB.
- Open the extension in the tab.
- Click the "Select Port" dropdown in the sidebar.
- Choose the correct serial port for your device (e.g.,
COM3).
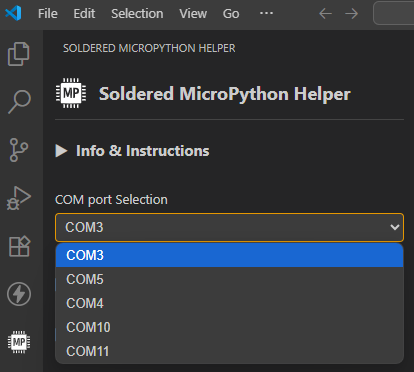
Once connected, the extension will automatically detect your board type and display basic information.
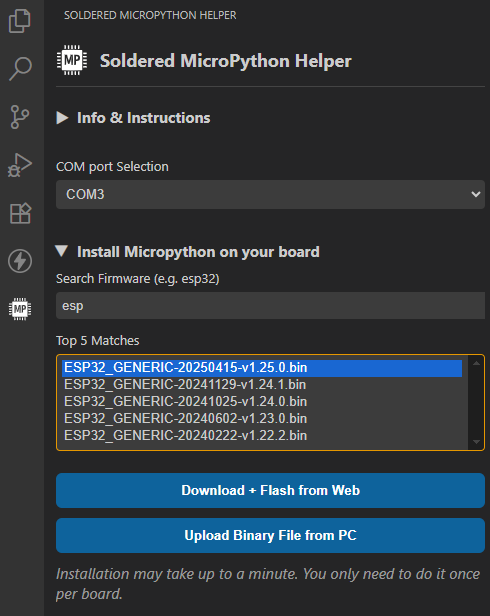
Installing MicroPython Firmware
Don't have MicroPython installed on your development board yet?
- In the sidebar, click "Install MicroPython on your board".
- Select your board model and desired firmware version.
- The extension will automatically download the correct binary and flash it to your device.
- Once complete, your board is ready to use with MicroPython.
Creating or Opening a Project
You can start from scratch or open an existing folder with .py files:
- Go to File → Open Folder... and select your MicroPython project directory.
- Create new files like
main.py,boot.py, or any custom modules. - All the files in this folder can now be uploaded, edited, and run directly from VS Code.
Uploading and Running Code
Once your board is connected and a project folder is open in VS Code, you can easily write, upload, and execute code using the MicroPython Helper extension.
Follow these steps:
1. Create a new Python file
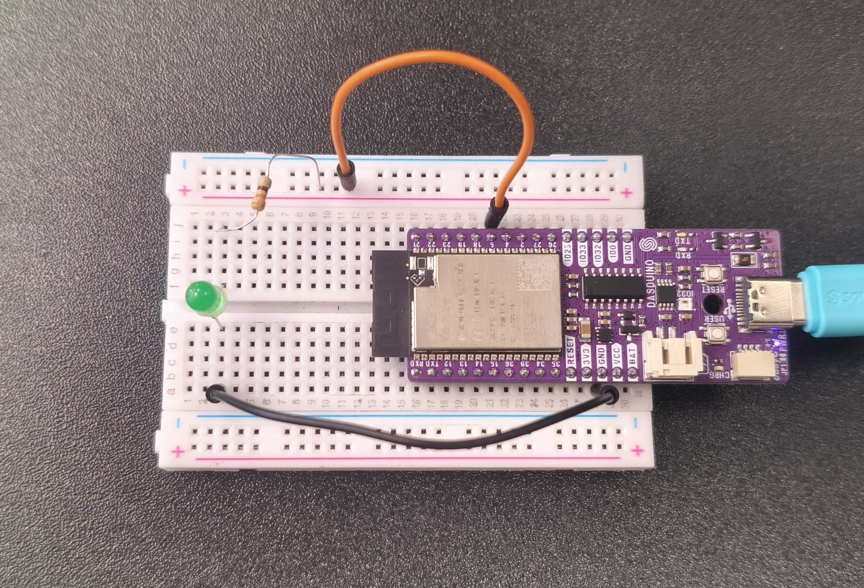
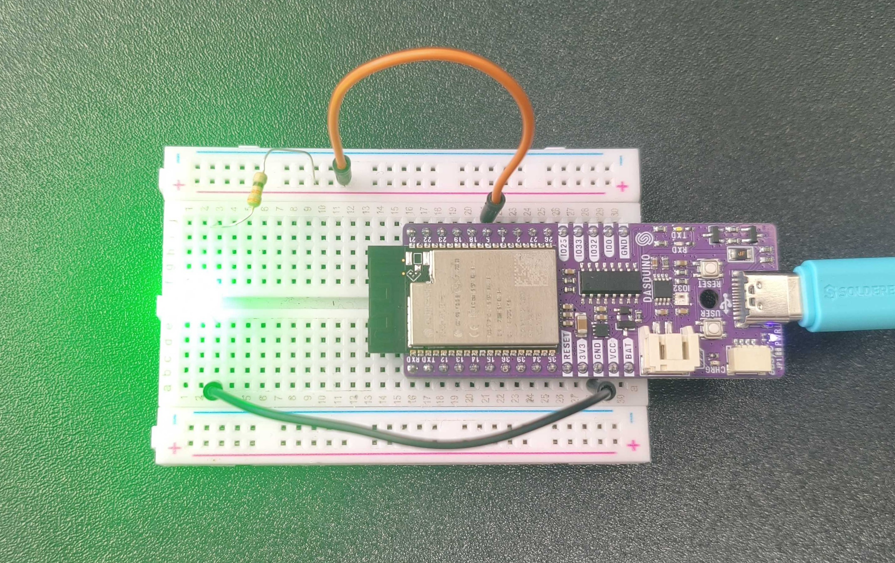
In your project folder, create a file called main.py.
Paste or write some basic MicroPython code. For example:
from machine import Pin
import time

led = Pin(5, Pin.OUT)

while True:
    led.toggle()
    time.sleep(0.5)
This simple script blinks an LED.
2. Save the file
Make sure the file is saved before trying to upload or run it.
3. Open the MicroPython sidebar
On the left sidebar of VS Code, click the MicroPython icon to open the extension panel.
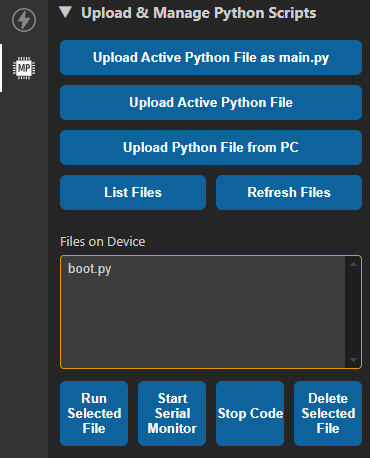
Use the sidebar controls to:
- Upload files – Use the various upload buttons to transfer Python files to your board.
- List and refresh files – The Files on Device window shows what is currently on your board.
- Run Selected File – Runs the currently open file on the board and streams its output live in the Output tab.
- Stop Code – Stops running code, which is usually used for infinite loops. This action is performed automatically if you run another file while one is currently running.
- Delete Selected File – Removes the selected file from the board.
4. Upload the script to your board
To permanently copy the script to your board:
- Click "Upload Active File" — this sends the open file to the board.
- The file is saved to internal storage and will remain after a reset or power-off.
You can also click "Upload Project" to upload all .py files from your open folder.
5. Run the script
Click "Run Selected File" to execute the currently open script.
The live output (from print(), exceptions, etc.) will appear in the Output panel.
6. Stop the script
If your script contains an infinite loop (like blinking an LED), you can click "Stop Code" to interrupt it.
Running a new file also stops the currently running one automatically.
Viewing Live Serial Output
The extension includes a built-in Serial Monitor:
- Open the Output tab (in the bottom panel).
- Real-time logs,
print()output, and exceptions from your MicroPython code will appear here. - This allows you to debug directly without needing a separate terminal app.
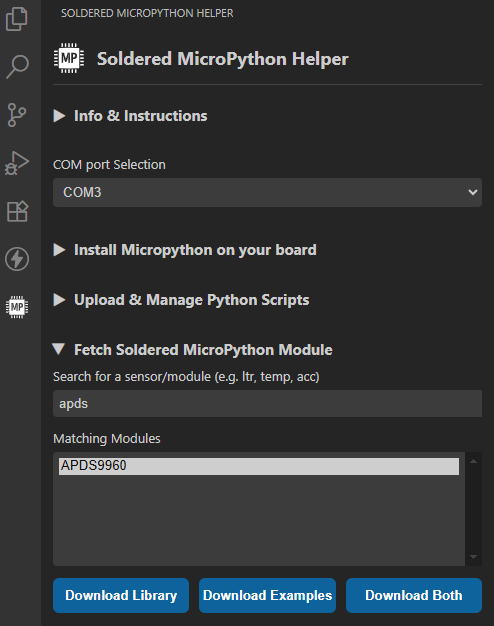
Using the Library Browser to Access Soldered Modules
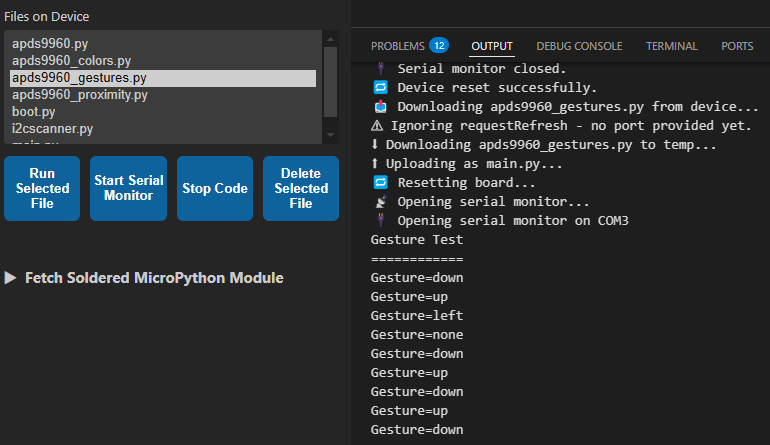
Need drivers for sensors or displays? You can access the Soldered MicroPython Modules library from the extension.
- Click the "Fetch Soldered MicroPython Module" tab.
- Search for keywords like
APDS,LCD, orDRV. - Select which libraries to install (just
.pyfiles, examples, or both). - The extension automatically downloads and adds the files to your project.
Source Code and Development
You can view the full source code for this extension on GitHub.
1. Install dependencies
Make sure you have Node.js, npm, and Python 3.x installed.
npm install
pip install esptool mpremote
2. Build the extension
npm run vscode:prepublish
3. Launch in VS Code
- Open the project folder in VS Code.
- Press
F5to open a new Extension Development Host window. - The extension will load there and can be tested as if it were installed.