MicroPython Overview

MicroPython is a lightweight and efficient implementation of Python 3 designed specifically for microcontrollers and embedded systems.
With MicroPython, your microcontroller can operate similarly to platforms you may already know, such as Arduino, ESP-IDF, or PlatformIO... but using the Python programming language. Development is faster, with quicker code uploads and easier implementation. It’s perfect for rapid prototyping, testing components with MicroPython modules, or building standalone projects effortlessly.
Gone are the days of long compile times, heavy board definitions, and clunky development setups. MicroPython brings a streamlined, user-friendly, and modular development experience that enables fast, flexible prototyping and iteration.
Why Use MicroPython?
- Easy to learn and ideal for beginners
- Interactive REPL (Read-Evaluate-Print Loop) for fast testing and debugging
- Lightweight and fast for many embedded applications
- Runs on a wide range of boards: ESP32, Raspberry Pi Pico, STM32, and more
How MicroPython Works
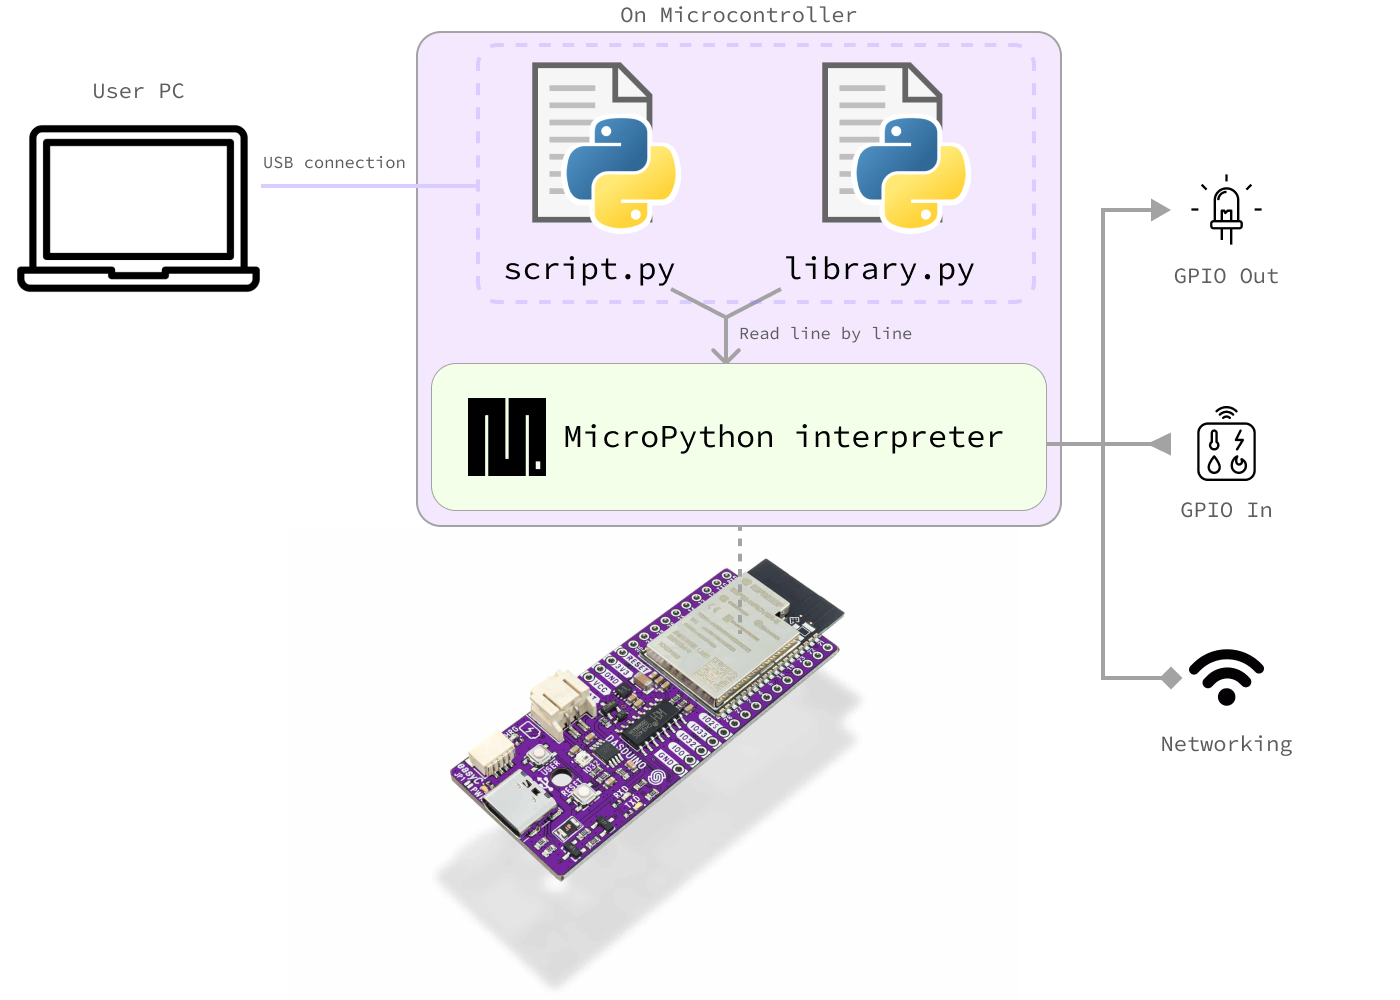
The basic idea is simple: you write Python code, upload it to your device, and the interpreter reads and executes each line as it goes. With this code, you can control sensors, actuators, displays, gather data, and use networking, all while writing in familiar Python syntax.
The MicroPython interpreter is included in the MicroPython firmware, a precompiled binary code that runs on your microcontroller. You only need to install this firmware once during initial setup. After that, your Python scripts and libraries can be uploaded and updated as needed.
See the graph below for a visual explanation:
Workflow
This graphic illustrates a typical development workflow when using MicroPython:
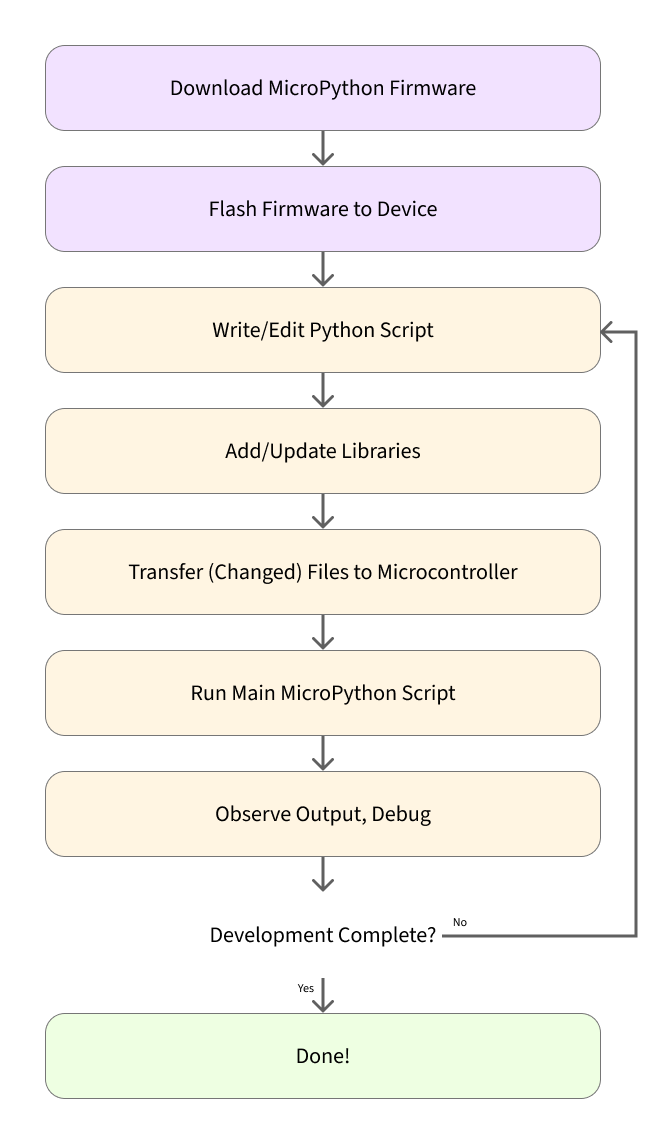
Here is a step-by-step breakdown of the graph above:
- Download MicroPython firmware from the official MicroPython website. Locate your microcontroller model and download the appropriate
.binfile. - Flash the firmware to your device by uploading the
.binfile. This step is similar to uploading an Arduino sketch, but in this case, you're installing the MicroPython runtime, which will interpret your scripts.
You only need to do the first two steps once!
Once MicroPython is installed, updating your project is as simple as copying a new .py file to the board.
- Write or edit your Python script (
main.py), which serves the same purpose as an Arduino.inosketch. You can use any code editor to make changes. - Add modules (libraries) by copying the appropriate
.pyfiles into alib/directory on the board. - Copy your code to the device using
mpremote, your IDE, or a file manager. - Run your script: the interpreter will execute your code automatically if it's named
main.py, or you can run scripts manually via REPL. - Check output through
print()statements, visible via the serial console (just like regular Python debugging).
Find out more
You can explore the official MicroPython project here:
Official MicroPython Website
Find binaries for your microcontroller, resources and more!