Stepper Motor Driver - Getting started
This page provides the essential information for getting started, including board and library installation and wiring the breakout board to your microcontroller.
Acknowledgement
ℹ️
The Soldered Basic Stepper Driver Arduino Library is based on the popular AccelStepper library by airspayce. As such, its source code is licensed under the GNU General Public License v3.0 (GPL v3). For more details, see the GPL v3 license.

Arduino library
To install the Arduino library, you can use the Arduino library manager or download it from the GitHub repository:
Temperature and humidity sensor SHTC3 breakout Arduino library
SHTC3 Arduino library by Soldered
ℹ️
First time Arduino user? For a detailed tutorial on how to get started wtih Arduino, see this section of our docs:
Getting started with Arduino
A full, comprehensive tutorial on how to fully set up and upload code for the first time on an Arduino board, from scratch!
Connections
Below is an example connection diagram for Dasduino CORE. These pins will be used in the examples throughout this documentation.
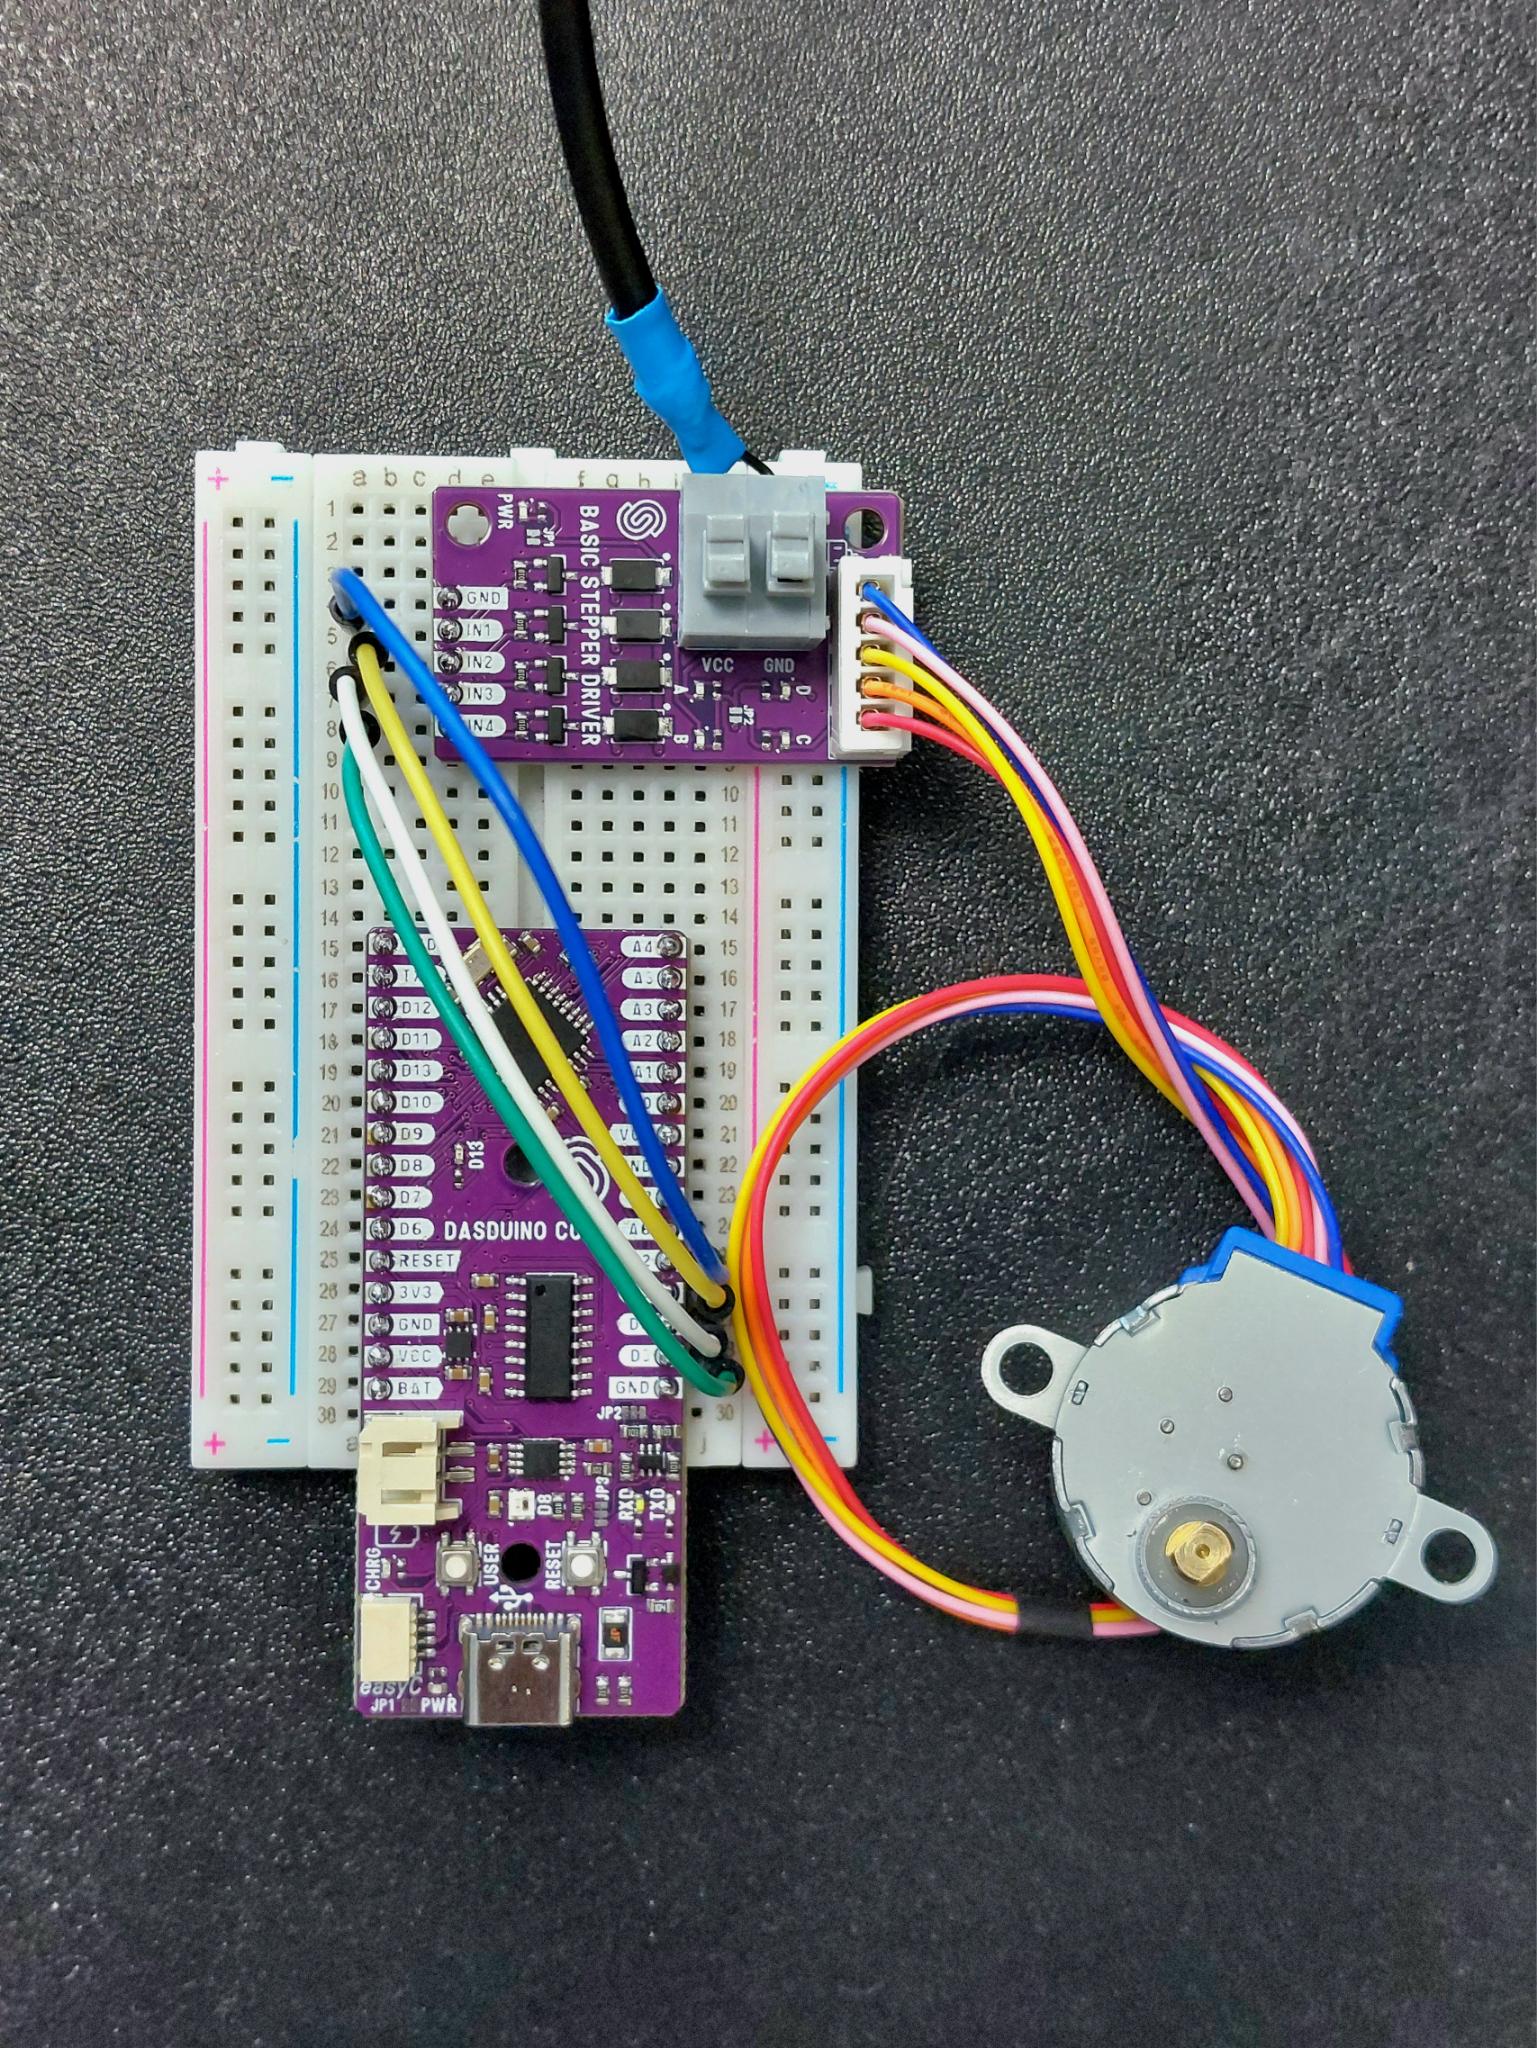
Basic stepper driver connected to Dasduino CORE
| Dasduino CORE | Breakout Board |
|---|---|
| D2 | IN 1 |
| D3 | IN 2 |
| D4 | IN 3 |
| D5 | IN 4 |
| GND | GND (for pulse inputs) |
ℹ️
Pins D2, D3, D4, and D5 can be any digital output pins on your microcontroller.
You also need to connect VCC and GND on the stepper power supply terminals:
| Power Supply | Breakout Board |
|---|---|
| VCC | VCC |
| GND | GND |
⚠️
14V is the maximum supported motor supply voltage!
⚠️
If you have the version of this product with the stepper motor, the motor supply voltage must be exactly 5V!
ℹ️
Powering the stepper motor through the 5V VCC pin on your microcontroller may work but is not recommended due to the high current draw of the motor.