Inkplate Projects - Open-Meteo Weather Station
Overview
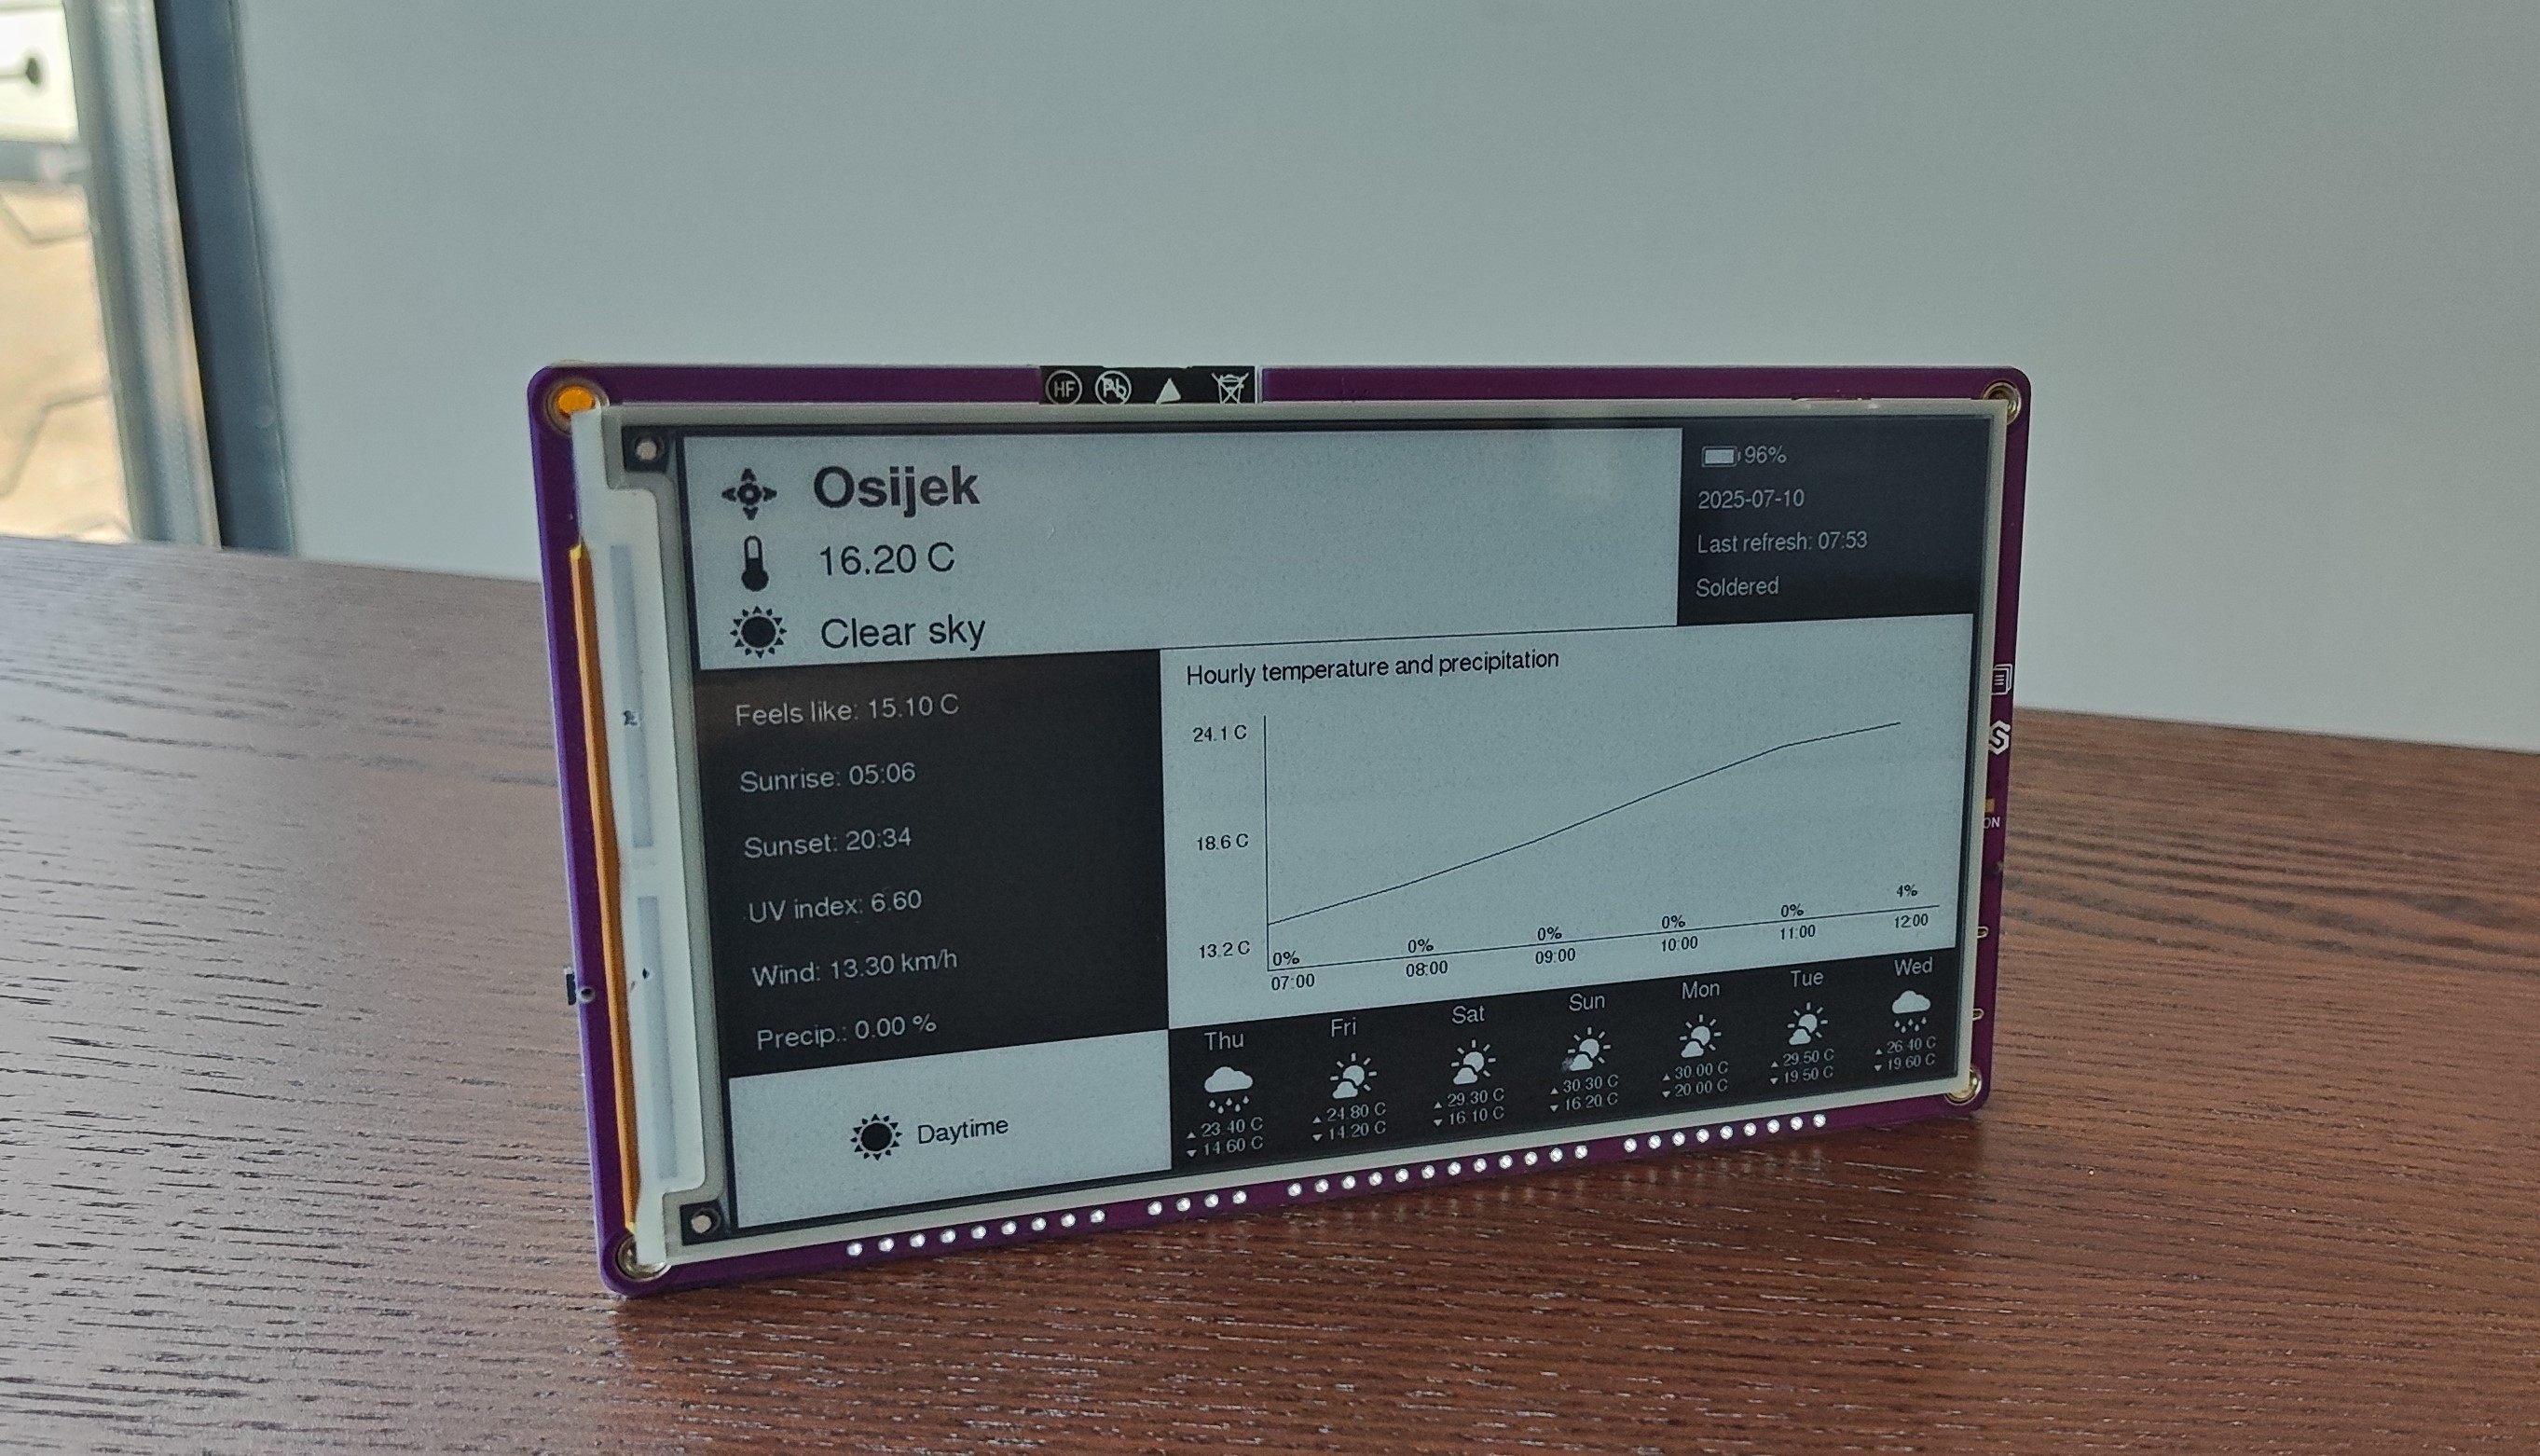
The OpenMeteo Weather Station project turns your Inkplate e-paper display into a fully connected, ultra-low-power personal weather dashboard. It fetches real-time data from the Open-Meteo API—including temperature, conditions, and forecasts—and presents it in a clean, readable format; ideal for desktops, walls, or any spot where ambient weather awareness adds value.
Designed for simplicity and efficiency, this project pulls local weather information based on your provided coordinates and timezone, then renders it in partial grayscale for optimal visual clarity. Users can customize the display with their name and city, and optionally switch between metric and imperial units. A dedicated graphical user interface (GUI) component handles drawing, ensuring the screen is both informative and aesthetically pleasing.
Thanks to the Inkplate’s e-paper technology and built-in deep sleep mode, the display remains visible without consuming power, updating only every 30 minutes before going back to sleep. This makes it perfect for long-term, battery-powered use cases—indoors or out.
Whether you're looking for a minimalist smart weather screen or an example of networked IoT design, this project highlights the Inkplate’s ability to connect, retrieve, and present real-world data with elegant efficiency.
Requirements
For this project, you must:
- Have a stable Wi-Fi connection
Every Inkplate device can run the Open-Meteo Weather Station project. For this example, we will use the Inkplate 5V2.
Setting up
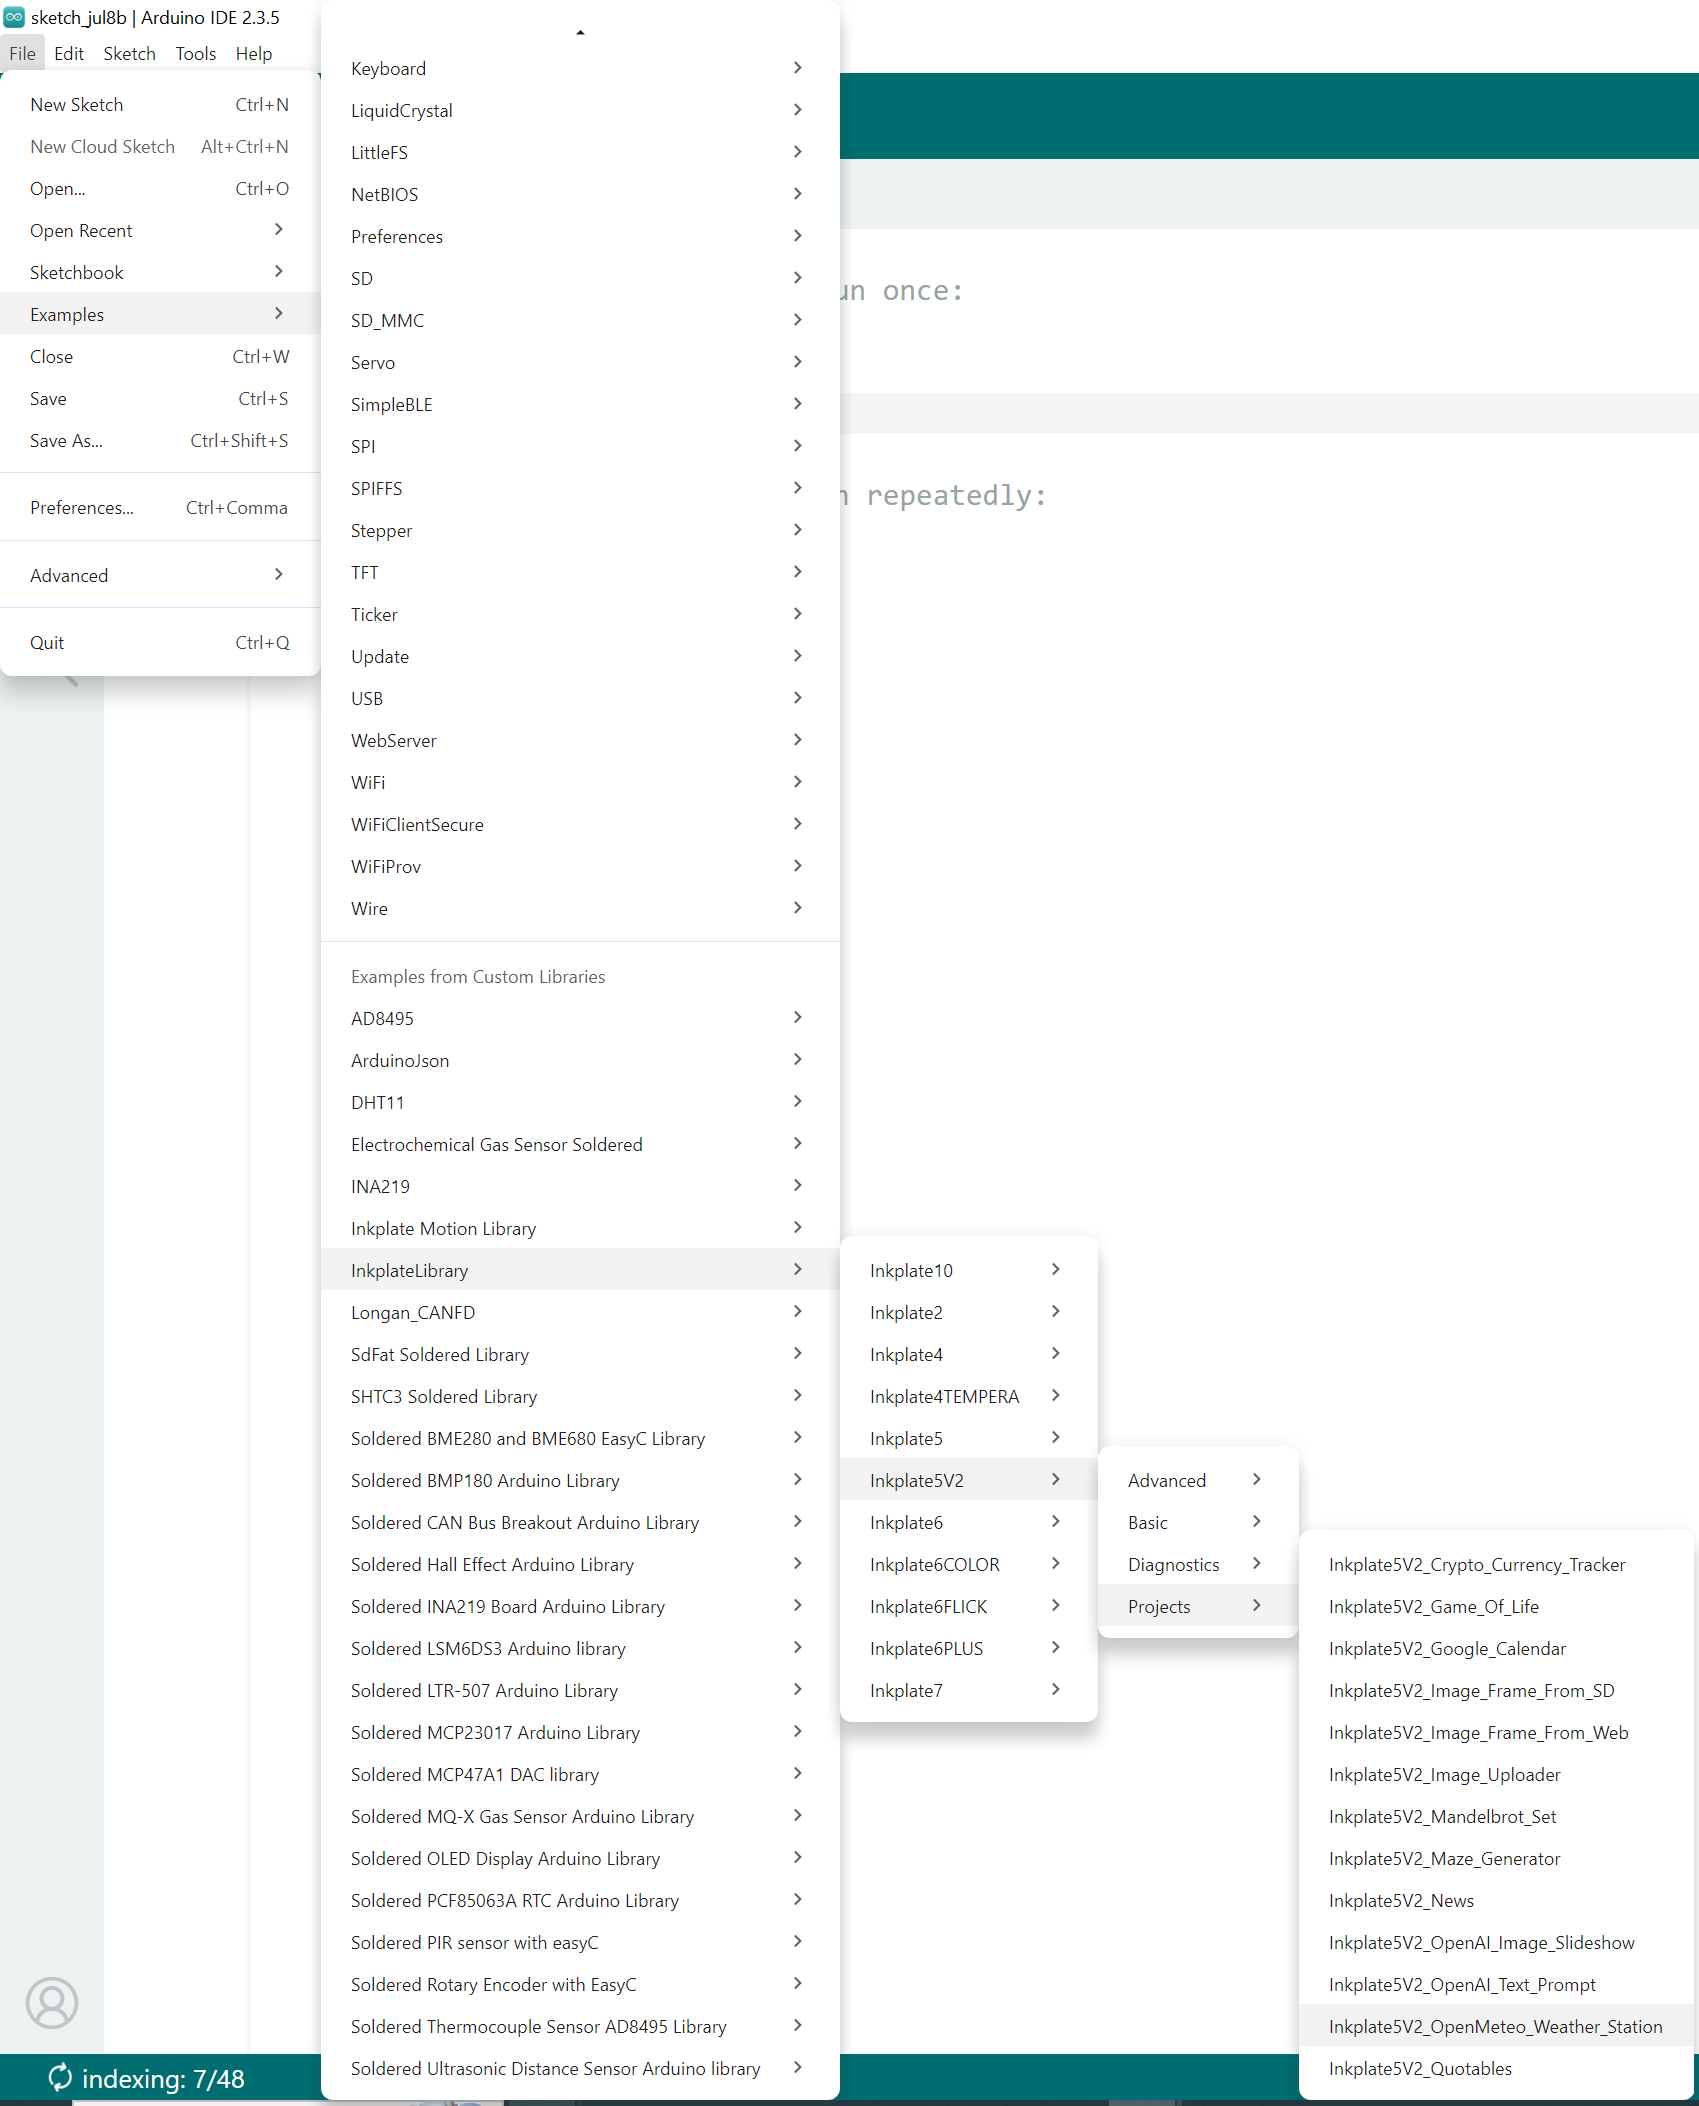
The Arduino sketch must be modified for this project to run. First, open the Arduino IDE and navigate to
File->Examples->InkplateLibrary->Your Inkplate Device->Projects->Inkplate_OpenMeteo_Weather_Station:
Wi-Fi
Next, in the main .ino file of the project, enter the SSID and password for your Wi-Fi connection. This can be done using the following two lines:
const char *ssid = "YOUR_SSID";
const char *password = "YOUR_PASSWORD";
User and location information
To get weather data for your specific location, you must enter your city as well as its coordinates in the main .ino sketch file of the project. The username can also be added and will be displayed on the screen:
// --- User and Location Info ---
String myUsername = "Soldered"; // User's name to be displayed on screen
String myCity = "Osijek";       // City name for weather data
int timeZone =
    2; // timeZone is the number in (UTC + number) in your time zone; UTC +2 for Osijek, UTC -4 for New York City
float latitude = 45.5550;  // Latitude of the city
float longitude = 18.6955; // Longitude of the city
Unit of measurement
You can configure the unit of measurement (Celsius or Fahrenheit) by changing the following variable:
bool metricUnits = true; // set this to false if you wish to use Imperial units
Uploading the code
After completing all the previous steps, uploading the project to the Inkplate is as simple as pressing the upload button in the Arduino IDE:

If you are having trouble uploading the code, check out our in-depth upload tutorial:
Quick start guide
A full, comprehensive tutorial on how to fully set up and upload code to the Inkplate for the first time