Obstacle Sensor - Example usage (Arduino)
This page contains a simple example with function documentation on how to take measurements using the sensor.
Initialization
To use the obstacle sensor board, first, include the required library, create the sensr object and initialize the sensor in the setup() function. You can use the return of begin() to check if everything is connected correctly:
// Include the library
#include "Obstacle-Sensor_SOLDERED.h"

// Create an Ostacle_Sensor object
Obstacle_Sensor obstacle_sensor;

// Setup function, runs once
void setup(){
    Serial.begin(115200);
    // Initialize sensor
    if(!obstacle_sensor.begin())
    {
        Serial.println("Can't init Obstacle_Sensor!");
        Serial.println("Check connection!");
        while(true)
            ;
    }
}
//...
obstacle_sensor.begin()
Initializes the Obstacle_Sensor, setting up communication over I2C and verifying its presence.
Returns value: Returns true if initialization is successful, false otherwise.
Measuring with both digital and analog output
To take a reading, call analogRead()function for analog reading and digitalRead() for digital reading. The output values can be interpreted in two ways. First, black objects absorb the transmitted IR radiation and reflect it poorly, so the output will be smaller for analog and LOW for digital output if a black object is in front of the sensor. However, if a shinier object is placed in front of the sensor, the output becomes larger for analog and HIGH for digital output. Second, if an object is placed further away from the sensor, the output value becomes smaller.
#include "Obstacle-Sensor-SOLDERED.h"

// Declare the sensor object
Obstacle_Sensor obstacle_sensor;

void setup()
{
    // Start serial communication with PC via UART
    Serial.begin(115200);

    // Initialize the sensor
    obstacle_sensor.begin();

    // Set treshold for onboard LED and digital read
    obstacle_sensor.setTreshold(128);
}

void loop()
{
  if(obstacle_sensor.available())
  {
    // Read the digital sensor value
    Serial.print("Obstacle digital: ");
    Serial.println(obstacle_sensor.digitalRead());

    // Read the analog sensor value
    Serial.print("Obstacle analog: ");
    Serial.println(obstacle_sensor.analogRead());
  }
  else
  {
    Serial.println("Communication error!");
  }
    delay(1000);
}
obstacle_sensor.setTreshold()
Set Threshold value for digital output.
Returns value: None.
Function parameters:
| Type | Name | Description |
|---|---|---|
uint16_t | VALUE | Threshold value. |
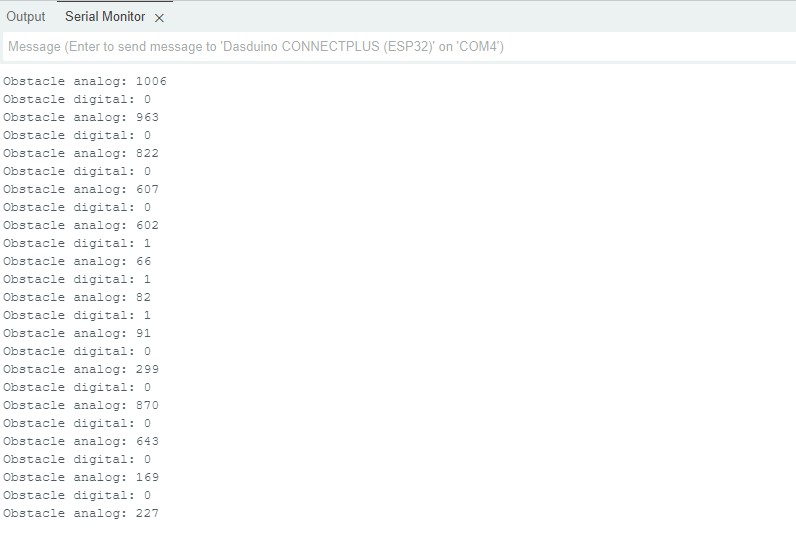
Serial Monitor output
Full example
Try all of the above mentioned functions in this full example which prints out the measured value over Serial at 115200 baud:
Analog.ino
Example file for using SHTC3 sensor with easyC/Qwiic/I2C