Simple Fire Sensor - Detecting and maesuring fire with Qwiic fire sensor (example)
This page contains a simple example with function documentation on how to detect and measure intensity of fire with the sensor.
initialization
To use the sensor, first, include the required library, create the sensor object and SimpleFireSensor object and initalize it in the setup() function. You can use the return of begin() to check if everything is connected correctly.
#include "Simple-fire-sensor-easyC-SOLDERED.h"

SimpleFireSensor sensor;
void setup() {
  sensor.begin();
}
//...
SimpleFireSensor sensor
Creates SimpleFireSensor object
Returns value: none
Function parameters:
| Type | Name | Description |
|---|---|---|
uint16_t | pin | Analog pin number for data communication |
sensor.begin()
Initializes the sensor.
Returns value: Returns true if initialization is successful, false otherwise.
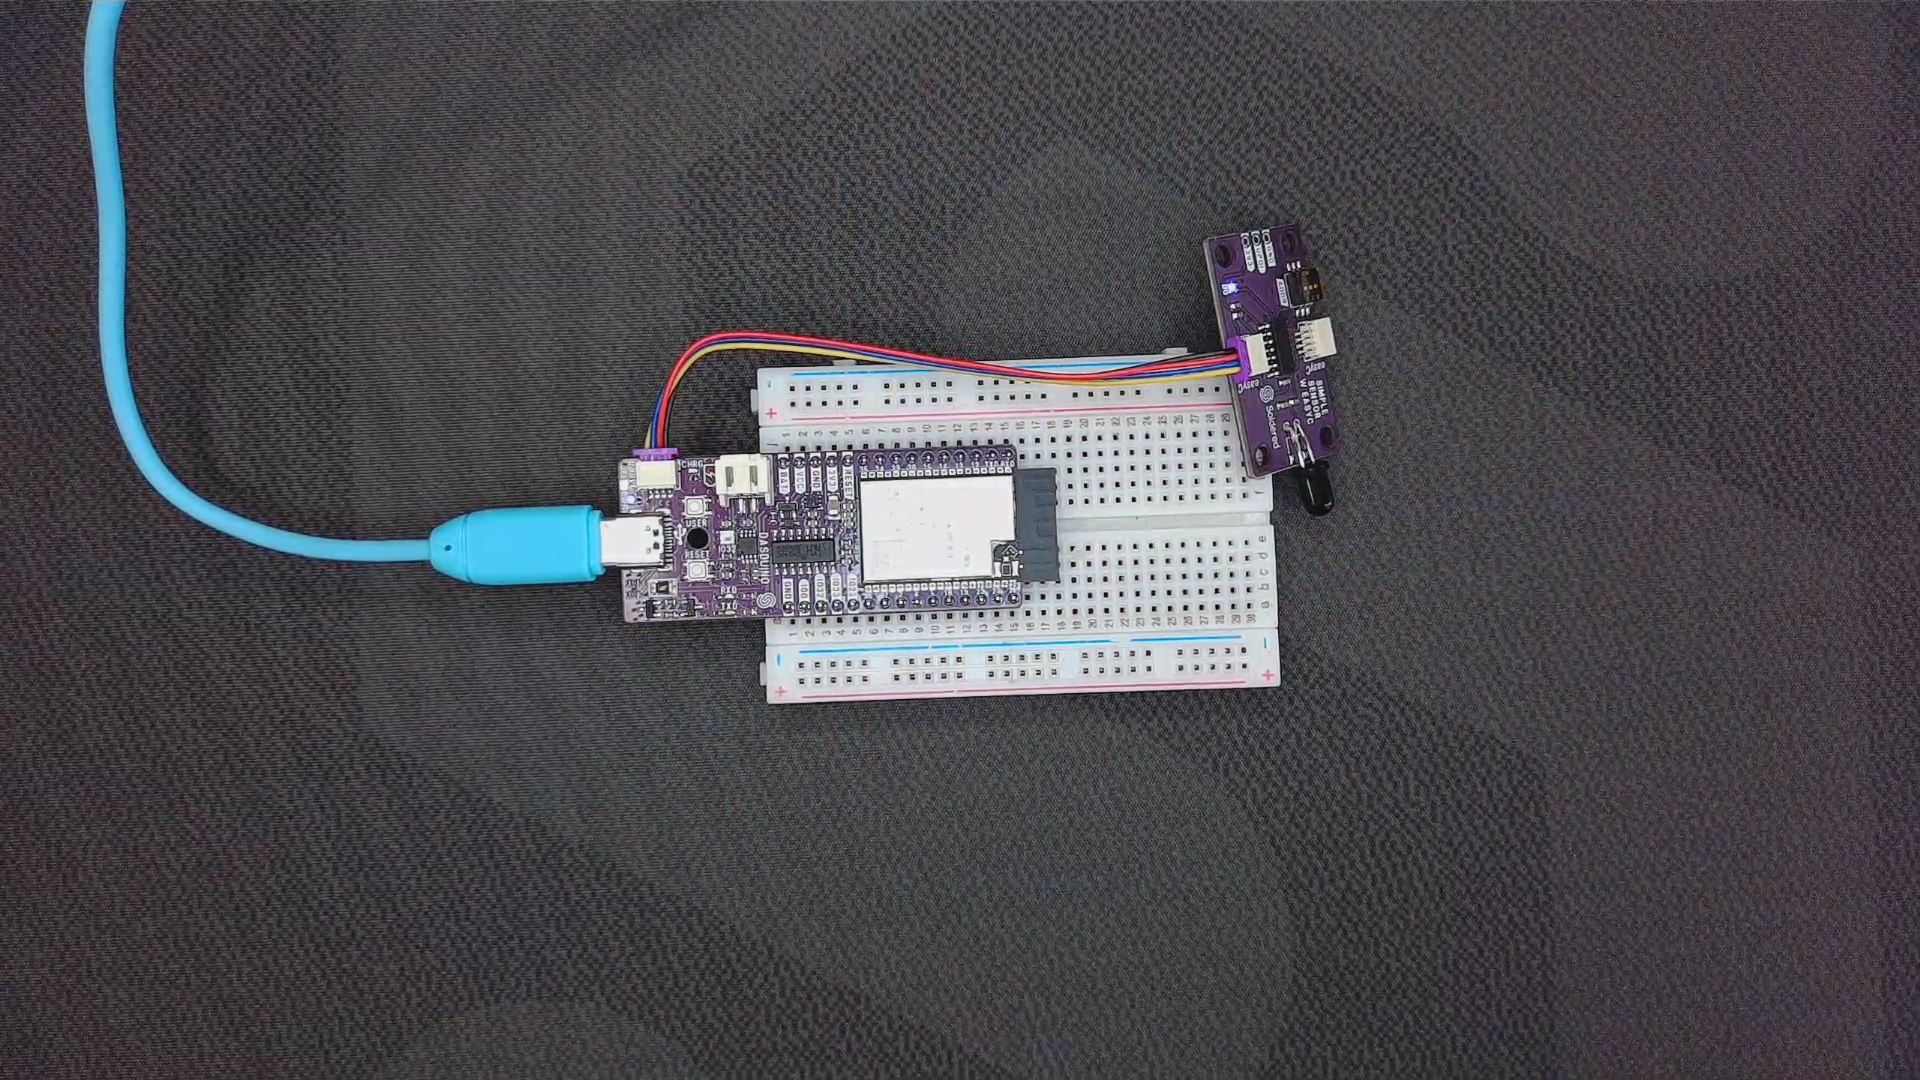
Measuring with both digital and analog output
In this library, there are two options for displaying analog value, for percent value, call getValue() function and for raw value, call getRawValue() function. You should set the setRawLowerTresh() and setRawUpperTresh() values to use the digital output.
#include "Simple-fire-sensor-easyC-SOLDERED.h"
// Declare the sensor object
SimpleFireSensor sensor;
void setup()
{
// Initialize the serial communication via UART
Serial.begin(115200);
// Initialize the sensor
// Start I2C communication on default address (0x30)
sensor.begin();
// If you want another I2C address, enter it in the bracket
// You can set another I2C address (0x31 - 0x37) by changing address switches on the breakout
// NOTE: You have to restart breakout to apply the address change by unplugging and plugging
// the easyC or USB-c from the Dasduino
// sensor.begin(0x31);
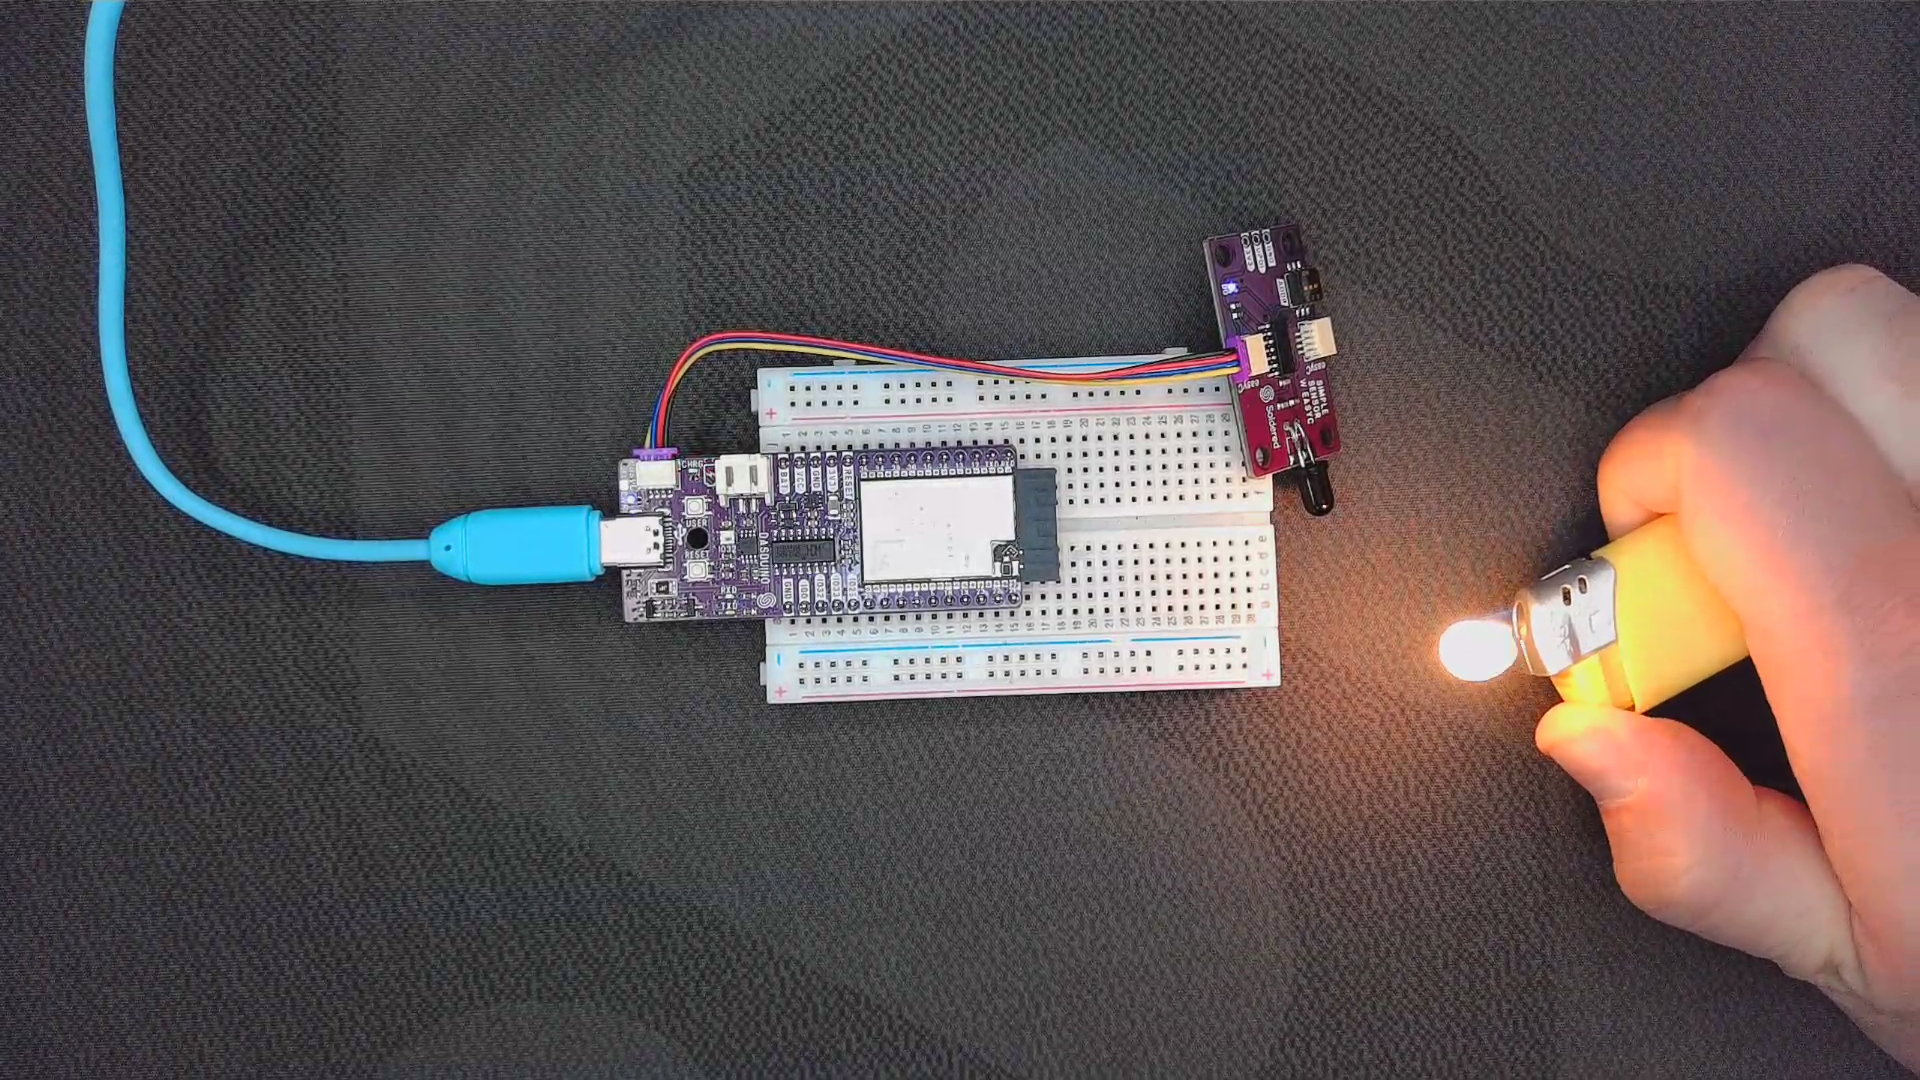
sensor.setRawLowerTresh(850); // You should set these two values, this is value when fire is present (you can use
// lighter at 1m distance)
sensor.setRawUpperTresh(1000); // This is value when no fire is present
// You can use percentage values by calling following functions:
// sensor.setLowerTresh(85); // 85%
// sensor.setUpperTresh(99); // 99%
// Set threshold for LED on the breakout
sensor.setRawThreshold(250); // or
// sensor.setThreshold(25.1); // 25.1%
}
void loop()
{
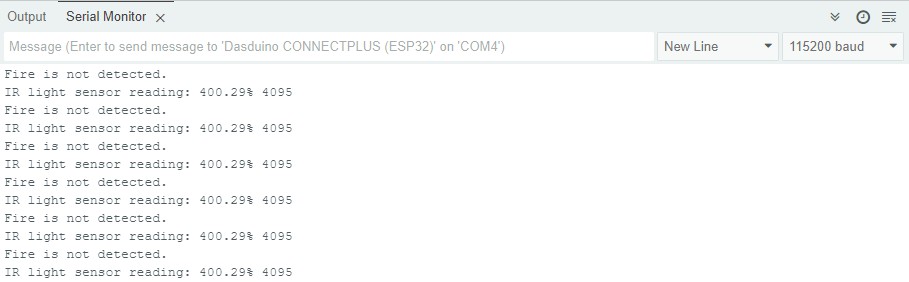
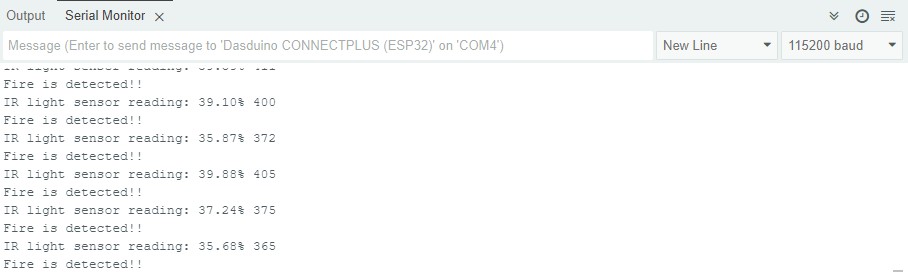
Serial.print("IR light sensor reading: "); // Print information message
Serial.print(sensor.getValue()); // Prints percent value of fire sensor
Serial.print("% ");
Serial.println(sensor.getRawValue()); // Prints raw value of fire sensor
// This function checks to which value is closer value that has been read from sensor
if (abs(sensor.getValue() - sensor.getLowerTresh()) < abs(sensor.getValue() - sensor.getUpperTresh()))
// You can also use raw values if you want:
// if (abs(sensor.getRawValue() - sensor.getRawLowerTresh()) < abs(sensor.getRawValue() - sensor.getRawUpperTresh()))
{
Serial.println("Fire is detected!!");
}
else
{
Serial.println("Fire is not detected.");
}
// Wait a bit before next reading
delay(500);
}
sensor.getValue()
Returns the measurement in percentage.
Returns value: Returns float representation of fire chance percentage
sensor.getRawValue()
Returns the raw ADC value.
Returns value: Returns integer representation of fire value
sensor.setRawLowerTresh()
Sets the value at which fire is present
Returns value: none
Function parameters:
| Type | Name | Description |
|---|---|---|
uint16_t | value | Value at which fire is present |
sensor.setRawUpperTresh()
Sets the value at which fire is not present
Returns value: none
Function parameters:
| Type | Name | Description |
|---|---|---|
uint16_t | value | Value at which fire is not present |
Full example
Try all of the above mentioned functions in full example below:
Read_values_native.ino
Example for using the digital and analog read functions for Simple fire sensor.