FAQ and troubleshooting
Here, we've gathered the most frequently asked questions along with detailed answers to help you get the most out of your device. We know that working with maker hardware and software can sometimes be challenging, so we created this resource to make things easier. Browse through the questions below—you might find the solution you're looking for.
If you're having trouble uploading code, try the following troubleshooting steps.
Restart device
- Disconnect the device and power it off completely.
- Reconnect via USB.
Make sure that the device is turned ON
This is a crucial step that is often forgotten. Make sure that the ON LED is turned on.
Verify Arduino IDE version
Inkplate 6COLOR requires Arduino IDE 2.0+ for proper board and library support.
If you're using an older version, update to Arduino 2.0 or later to avoid compatibility issues.
Still having issues?
If none of these steps resolve the issue, contact our support team here with details of your setup and the troubleshooting steps you've tried.
If your Inkplate 6COLOR display is not refreshing, follow these steps to diagnose and resolve the issue.
1. Verify that the code is uploading correctly
- Enable verbose output in Arduino under File → Preferences, then check the compile and upload logs.
- When uploading, a successful upload should print:
Leaving...
Hard resetting via RTS pin...
2. Test with an official example
Make sure you're testing with an unmodified Arduino example from the Inkplate library. Running custom code might be almost correct but could still prevent the display from refreshing properly.
Try uploading these tested examples:
Inkplate6COLOR_Hello_World.ino
Writing 'Hello world' to the Inkplate 6COLOR.
Inkplate6COLOR_Full_Screen_Colors.ino
Example of showing all of the colors of the Inkplate 6COLOR.
3. Check your power source
- Some laptop or PC USB ports provide insufficient current, which may cause Inkplate to get stuck while refreshing.
- Try a different USB port, power adapter, or USB cable to ensure the board is receiving stable power.
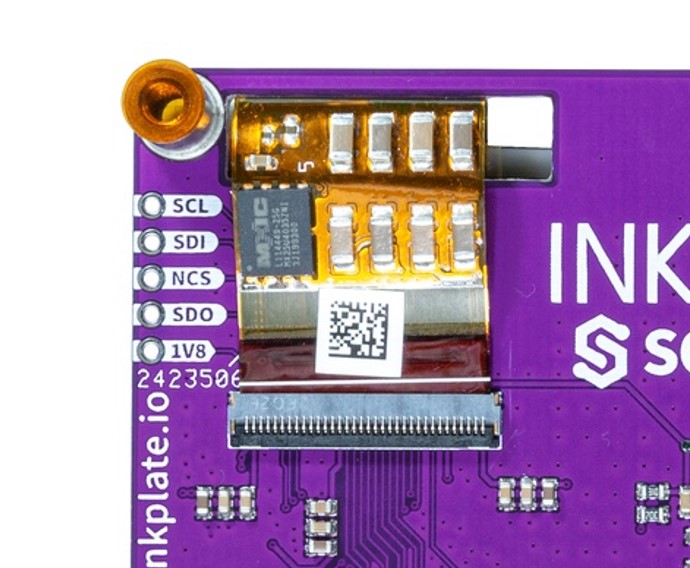
4. Inspect the e-paper flat cable and panel
- Examine the flat-flex cable connector to ensure it's properly seated.
- Check the edges of the e-paper panel for any visible damage or cracks.
5. Still having issues?
If none of these steps resolve the issue, contact our support team here with details of your setup and troubleshooting steps taken.
If you notice artifacts, streaks, or ghosting on your Inkplate 6COLOR display, follow these steps to clean the screen and check for potential connection issues.
1. Run a display cleaning cycle
Try running the following sketch, which performs 30 full refresh cycles to remove any persistent artifacts:
#include <Inkplate.h>
Inkplate inkplate;
int cleanTimes = 30;

void setup()
{
    inkplate.begin();
    for(int i = 0; i < cleanTimes; i++)
    {
        inkplate.clearDisplay();
        inkplate.display();
        delay(500);
        inkplate.fillRect(0, 0, 1024, 758, BLACK);
        inkplate.display();
        delay(500);
    }
}

void loop()
{
    // Do nothing
}
2. Check the e-paper flat cable connector
If artifacts persist after cleaning or appear as long vertical lines or streaks, it may indicate a loose, improperly connected, or possibly damaged flat cable.
Try re-seating the e-paper flat cable by carefully disconnecting and reconnecting it.
3. Still having issues?
If none of these steps resolve the issue, contact our support team here with details of your setup and the troubleshooting steps you've tried.
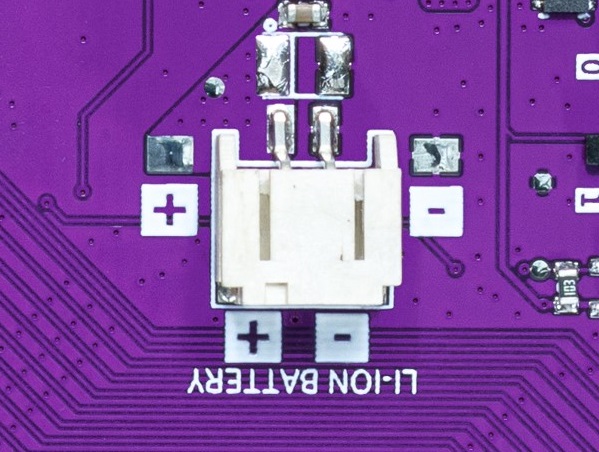
All Inkplate models have a 2-pin 2.0mm JST connector for connecting a 3.7V Li-ion battery. Inkplate 6COLOR features an onboard MCP73831 charging IC, which automatically charges the battery when connected via USB and seamlessly switches to battery power when unplugged.
All hardware design files, including schematics, KiCad project files, gerber files, and more, are available in the Inkplate 6COLOR hardware repository on GitHub.
Additionally, this documentation contains detailed hardware design insights on the hardware design page.
We are currently working on making 3D enclosure files available in the Inkplate 6COLOR hardware repository. Stay tuned for updates!
Short answer: No.
Inkplate 6COLOR is an e-paper development platform and functions similarly to an Arduino with an integrated e-paper display. While it is not designed to be a plug-and-play e-reader or monitor, you could write your own Arduino sketch to display data sent from a PC via USB.
However, if you're looking for a true e-ink monitor experience, Inkplate 6COLOR is not the right choice.
At this time, Inkplate 6COLOR is not officially supported by ESPHome.
There is currently no ESPHome display component for this model, but we are actively working on expanding ESPHome compatibility for all Inkplate devices. Stay tuned for future updates!