Getting started with Arduino
Are you a first-time Arduino user?
For a step-by-step guide on installing Arduino, connecting your board, and uploading your first sketch, see this section of our docs:
Getting started with Arduino
A comprehensive beginner’s guide to setting up Arduino and uploading your first program.
NULA board definitions
To program your NULA Core, you will have to install the board definitions which are like complete packages of software so that Arduino can compile and upload your code correctly. To do that follow the next few steps below:
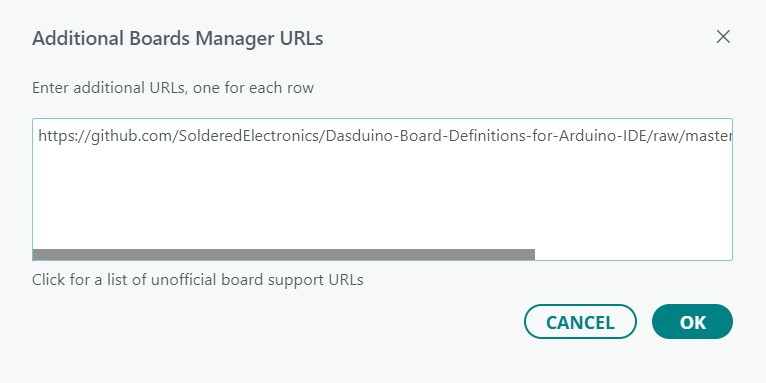
Copy the following URL:
https://github.com/SolderedElectronics/Dasduino-Board-Definitions-for-Arduino-IDE/raw/master/package_Dasduino_Boards_index.json
and add it to Additional Boards Manager under File -> Preferences in your Arduino IDE.
Now, install new boards via Tools -> Board -> Boards Manager. In the search box, type in nula or dasduino and select the NULA AVR Boards by Soldered.
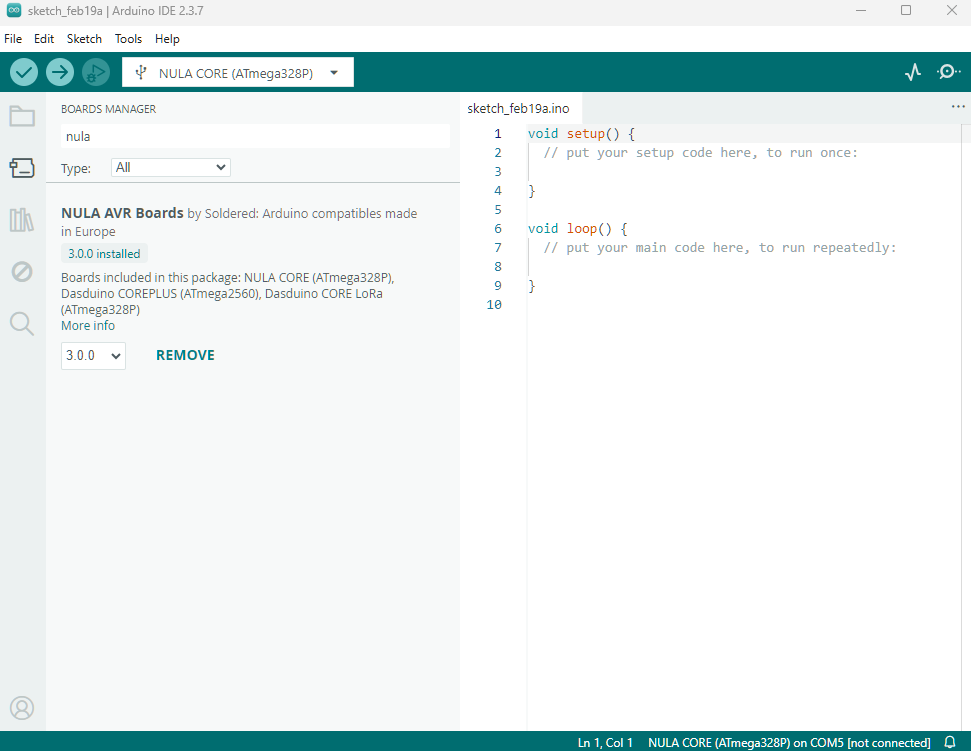
Once installed, select your board from the menu: Tools -> Board -> NULA AVR Boards -> NULA CORE and start writing your sketches!
Example sketch
Once your board is selected and connected via USB-C, try uploading this simple example to verify everything is working:
void setup() {
  Serial.begin(115200);
  Serial.println("Hello from NULA Core!");
}

void loop() {
  delay(1000);
  Serial.println("Running...");
}