AS5600 - Offset
This page contains an example demonstrating how to apply a software offset to the AS5600's angle readings, useful for defining your own zero point instead of relying on the magnet's physical mounting angle.
Why use an offset
The angle the AS5600 reports is relative to however the magnet happens to be oriented when you mount it, there's no guarantee 0 degrees lines up with anything meaningful in your project. Rather than physically rotating the magnet to fix this, setOffset() shifts the reported angle in software, letting you define whatever direction should read as zero.
Initialization is the same as every other example:
#include "Position-sensor-AS5600-breakout-SOLDERED.h"

PositionSensor sensor;

void setup()
{
    Serial.begin(115200);

    Wire.begin();

    if (!sensor.begin())
    {
        Serial.println("AS5600 not found! Check wiring. Freezing.");
        while (true)
        {
            delay(1000);
        }
    }

    Serial.println("AS5600 found!");

    while (!sensor.magnetDetected())
    {
        Serial.println("Magnet not detected!");
        delay(1000);
    }

    Serial.println("Magnet detected!");
}
Applying an offset
void loop()
{
    sensor.setOffset(0);
    Serial.print("Measurement without offset:\t");
    Serial.println(sensor.rawAngle() * AS5600_RAW_TO_DEGREES);

    sensor.setOffset(45);
    Serial.print("Measurement with offset:\t");
    Serial.println(sensor.rawAngle() * AS5600_RAW_TO_DEGREES);

    Serial.println();
    delay(1000);
}
sensor.setOffset()
Sets a software offset that's added to every subsequent angle reading. This doesn't touch the sensor's internal configuration, it's applied by the library on each read.
Returns value: Returns false if the offset magnitude is unreasonably large (over 36000 degrees), true otherwise.
Function parameters:
| Type | Name | Description |
|---|---|---|
float | degrees | Offset in degrees, -359.99 to 359.99 recommended |
sensor.getOffset()
Returns the offset currently applied to angle readings.
Returns value: The current offset in degrees, as a float.
This example resets the offset to 0 and sets it to 45 on every single pass through loop(), just to print both values side by side for comparison. In a real project you'd normally set the offset once during setup, right after you've physically mounted the magnet, and leave it alone.
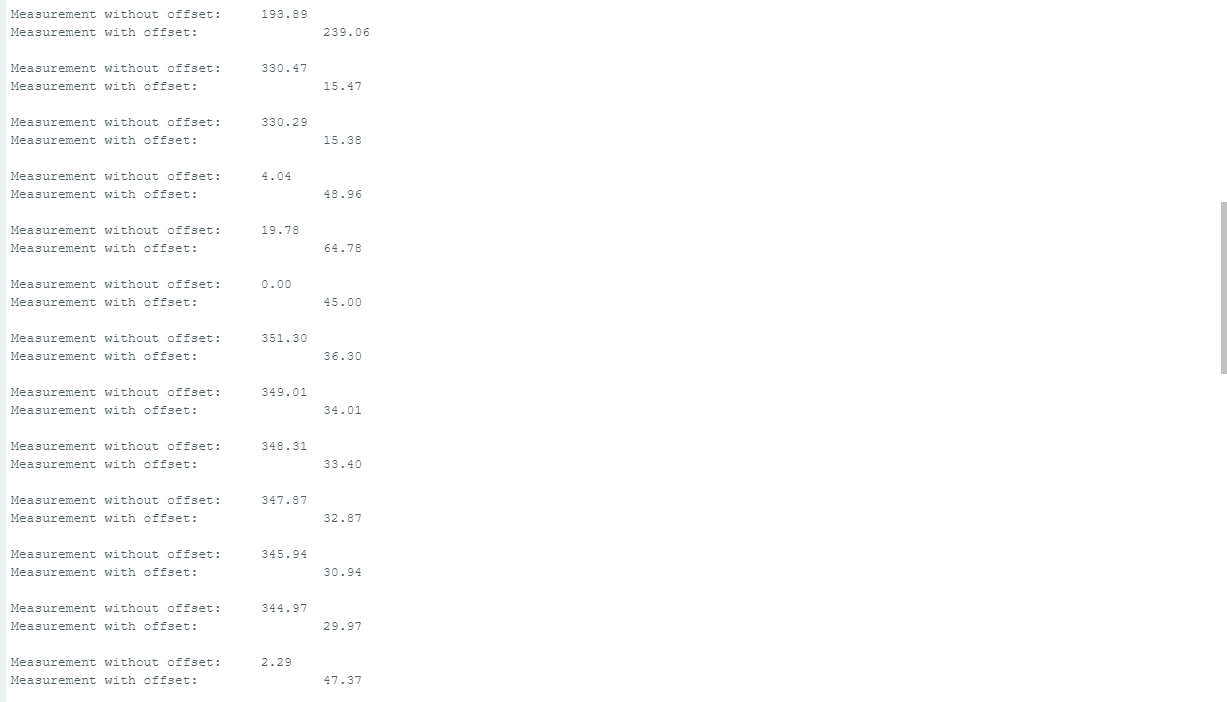
Running the sketch above produces output like this, with the offset consistently adding 45 degrees (wrapping around past 360 when needed):
Adding to an existing offset
If you want to nudge the current offset rather than replace it outright, increaseOffset() adds to whatever offset is already set instead of overwriting it:
sensor.increaseOffset(10); // shifts the current offset by another 10 degrees
sensor.increaseOffset()
Adds the given number of degrees to the existing offset, instead of replacing it like setOffset() does.
Returns value: Returns false if the resulting offset magnitude is unreasonably large, true otherwise.
Function parameters:
| Type | Name | Description |
|---|---|---|
float | degrees | Degrees to add to the current offset |
Full example
#include <Wire.h>
#include "Position-sensor-AS5600-breakout-SOLDERED.h"

PositionSensor sensor;

void setup()
{
    Serial.begin(115200);

    Wire.begin();

    if (!sensor.begin())
    {
        Serial.println("AS5600 not found! Check wiring. Freezing.");
        while (true)
        {
            delay(1000);
        }
    }

    Serial.println("AS5600 found!");

    while (!sensor.magnetDetected())
    {
        Serial.println("Magnet not detected!");
        delay(1000);
    }

    Serial.println("Magnet detected!");
}

void loop()
{
    sensor.setOffset(0);
    Serial.print("Measurement without offset:\t");
    Serial.println(sensor.rawAngle() * AS5600_RAW_TO_DEGREES);

    sensor.setOffset(45);
    Serial.print("Measurement with offset:\t");
    Serial.println(sensor.rawAngle() * AS5600_RAW_TO_DEGREES);

    Serial.println();
    delay(1000);
}
Offset.ino
Full example for applying a software angle offset using the AS5600 sensor