ADS1219 24-bit ADC - Single-Shot Reading
This page covers the simplest way to read the ADS1219: one conversion at a time, triggered on demand. It also covers how to wire up a voltage reference, which every other example on the following pages relies on too.
Voltage reference
Before reading any channel, the ADS1219 needs a reference voltage to measure against - every conversion result is scaled relative to it.
- Internal reference: the ADS1219 has a built-in 2.048V reference. No extra wiring needed - leave REFP/REFN unconnected and select
ADS1219_VREF_INTERNAL. - External reference: for a different or more precise reference voltage, feed it into REFP and REFN directly. The simplest option is tying REFP to VCC and REFN to GND, giving you a reference equal to your supply voltage (3.3V or 5V). For higher accuracy, connect a dedicated voltage reference IC or a lab power supply/voltage generator instead.
Connections
Connect the ADS1219 board via Qwiic, and wire REFP/REFN to your chosen reference (VCC/GND for the simplest option, or an external precision reference/voltage generator).
Connect a signal source to AIN0 and AIN1 - this example reads the voltage difference between them.
Single-shot reading
In single-shot mode, each call to startSync() triggers exactly one conversion, after which the ADC goes idle until asked again - useful for infrequent measurements or battery-powered projects.
#include <Wire.h>
#include "ADS1219-SOLDERED.h"

ADS1219_Soldered adc;

void setup()
{
    Serial.begin(115200);
    Wire.begin();

    while (!adc.begin())
    {
        Serial.println("ADS1219 not found. Check wiring! Retrying...");
        delay(1000);
    }

    // Use REFP/REFN as the reference (tie them to VCC/GND, or a precision source)
    adc.setVoltageReference(ADS1219_VREF_EXTERNAL);
}

void loop()
{
    if (!adc.startSync())
    {
        Serial.println("Failed to start conversion. Check wiring! Retrying...");
        delay(1000);
        return;
    }

    while (!adc.dataReady())
        delay(10);

    adc.readConversion();

    // 3300.0f is the reference voltage in millivolts (3.3V here) - change this
    // to match whatever you actually wired to REFP/REFN
    float mV = adc.getConversionMillivolts(3300.0f);

    Serial.print("Voltage (mV): ");
    Serial.println(mV, 3);
}
adc.begin()
Initializes the ADS1219 and establishes I2C communication. Performs a soft reset and verifies the configuration register reads back as expected.
Returns value: Boolean value, true if the device is detected and communication succeeds, false otherwise.
adc.setVoltageReference()
Selects the voltage reference source used for conversion.
Returns value: Boolean value, true on success.
Function parameters:
| Type | Name | Description |
|---|---|---|
ads1219_vref_t | vref | ADS1219_VREF_INTERNAL for the built-in 2.048V reference, ADS1219_VREF_EXTERNAL to use the REFP/REFN pins. |
adc.startSync()
Starts or restarts a conversion. In single-shot mode, this triggers exactly one conversion.
Returns value: Boolean value, true on success.
adc.dataReady()
Checks whether a new conversion result is available, by reading the DRDY status bit over I2C.
Returns value: Boolean value, true if a new result is ready to be read.
adc.readConversion()
Reads the latest conversion result from the ADC and stores it internally. Call after dataReady() returns true.
Returns value: Boolean value, true on success.
adc.getConversionMillivolts()
Converts the internally stored conversion result to millivolts, adjusted for the configured gain.
Returns value: Float value, the measured voltage in millivolts.
Function parameters:
| Type | Name | Description |
|---|---|---|
float | refMillivolts | The reference voltage in millivolts. Use 2048.0 for the internal reference, or the actual voltage applied to REFP/REFN when using an external reference. |
adc.getConversionRaw() instead. It returns the signed 24-bit result exactly as the ADC produced it, with no gain or reference scaling applied.adc.getConversionRaw()
Returns the last stored conversion result as a raw signed value, without any gain or reference scaling applied.
Returns value: Signed 32-bit value (the ADC's 24-bit two's complement result, sign-extended).
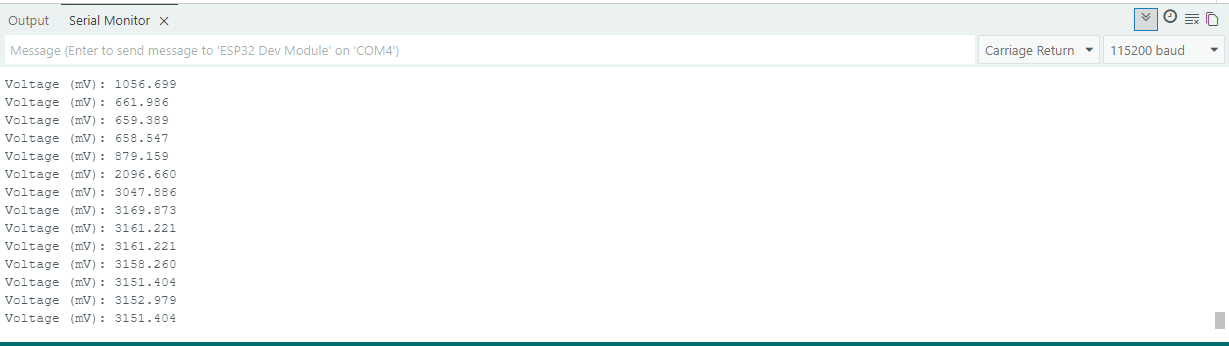
Open the Serial Monitor at 115200 baud to see the voltage reading, printed once per conversion.
Single_Shot.ino
Full single-shot reading example for the ADS1219 24-bit ADC
Powering down between readings
Single-shot mode is described above as ideal for battery-powered projects, but that's only true if you actually power the ADC down between readings instead of leaving it idle. Call powerDown() after reading a result, and startSync() again to wake it up for the next one:
void loop()
{
    adc.startSync(); // Also wakes the ADC up if it was powered down

    while (!adc.dataReady())
        delay(10);

    adc.readConversion();
    float mV = adc.getConversionMillivolts(3300.0f);

    Serial.print("Voltage (mV): ");
    Serial.println(mV, 3);

    adc.powerDown(); // Shut down the analog front-end until the next reading

    delay(5000); // Wait between readings, e.g. once every 5 seconds
}
adc.powerDown()
Puts the ADC into power-down mode, stopping conversions and powering down the analog front-end. The device still responds to I2C commands, and a subsequent startSync() call wakes it back up.
Returns value: Boolean value, true on success.