FAQ and troubleshooting
Here, we've gathered the most frequently asked questions along with detailed answers. Maker hardware and software can be tricky sometimes, so browse through the questions below. You might find the solution you're looking for.
If your computer isn't showing Inkplate 13SPECTRA as a serial port, try the following troubleshooting steps.
1. Install the CH340 driver
Inkplate 13SPECTRA uses an onboard CH340 chip for USB-to-serial communication. If the driver isn't installed, your operating system won't recognize the board as a COM port.
- Windows: download and install the driver from this link.
- macOS: the driver must be installed manually from the official WCH website, then enabled under System Settings → Login Items & Extensions → CH34xVPCDriver.
- Linux: no driver installation is needed, the CH340 is supported out of the box.
See the full walkthrough on the Quick start guide.
2. Check the cable and USB port
Some USB-C cables are power-only and don't carry data. Try a different, known-good USB-C cable, and connect directly to a USB port on your computer rather than through a hub.
3. Make sure the board is powered on
Press the POWER ON button and confirm the blue power LED lights up before checking for the COM port again.
4. Verify the correct COM port is selected
In Arduino IDE, check Tools → Port and confirm the correct port is selected. If multiple ports are listed, disconnect the board and reconnect it to see which port appears/disappears.
5. Still having issues?
If none of these steps resolve the issue, contact our support team here with details of your setup and the troubleshooting steps you've tried.
Inkplate 13SPECTRA's onboard CH340 handles the reset and bootloader sequence automatically, so in most cases you don't need to do anything special before uploading, just click Upload in Arduino IDE.
1. Verify the correct board is selected
In Arduino IDE, go to Tools → Board and make sure Soldered Inkplate 13SPECTRA is selected. Uploading with the wrong board selected will fail or produce unexpected errors.
2. Check the upload log
A successful upload should end with:
Leaving...
Hard resetting via RTS pin...
If the log instead shows something like Failed to connect... No serial data received, the automatic reset didn't trigger correctly.
3. Press the manual reset button
Inkplate 13SPECTRA has a dedicated reset button on the board, wired into the same reset circuit as the automatic USB reset. Press it once, then start the upload again right after.
4. Restart the board manually
- Disconnect the USB-C cable and power the board off completely.
- Reconnect the cable and press POWER ON again.
- Try uploading again immediately after the board powers up.
5. Try a different USB cable or port
As with detection issues, a bad cable or an unpowered USB hub can interrupt the reset sequence mid-upload.
6. Still having issues?
If none of these steps resolve the issue, contact our support team here with details of your setup and the troubleshooting steps you've tried.
Inkplate 13SPECTRA's Spectra panel behaves differently from Inkplate's grayscale models, so a few things are worth checking before assuming there's a hardware fault.
1. Remember: no partial updates or grayscale
Unlike some other Inkplate models, Inkplate 13SPECTRA doesn't support partial updates or grayscale. Every display.display() call performs a full-screen refresh. If your code was adapted from a partial-update example for another Inkplate model, that's likely why nothing updates as expected.
2. Test with an official example
Make sure you're testing with an unmodified example from the Inkplate Arduino library, such as the Full Screen Colors example, before troubleshooting custom code.
3. Check your power source
Some laptop or PC USB ports don't provide enough current for a full-screen refresh on a panel this large. Try a different USB port or a dedicated USB power adapter.
4. Colors look wrong or swapped
If colors appear shifted or incorrect, double check that you're using the correct color constants for this board. Refer to the color spectrum section of the drawing graphics page, note that INKPLATE_BLUE and INKPLATE_GREEN currently need to be decremented by 1 (INKPLATE_BLUE - 1, INKPLATE_GREEN - 1) to render correctly on this board.
5. Ghosting after many refreshes
Some visible ghosting after repeated full-screen refreshes is normal for e-paper panels. If ghosting is severe or doesn't clear after a couple of full refreshes, it may indicate a loose or damaged flat-flex cable connecting the panel.
6. Still having issues?
If none of these steps resolve the issue, contact our support team here with details of your setup and the troubleshooting steps you've tried.
Inkplate 13SPECTRA charges connected batteries automatically through its onboard MCP73831 charging IC whenever it's plugged into USB-C.
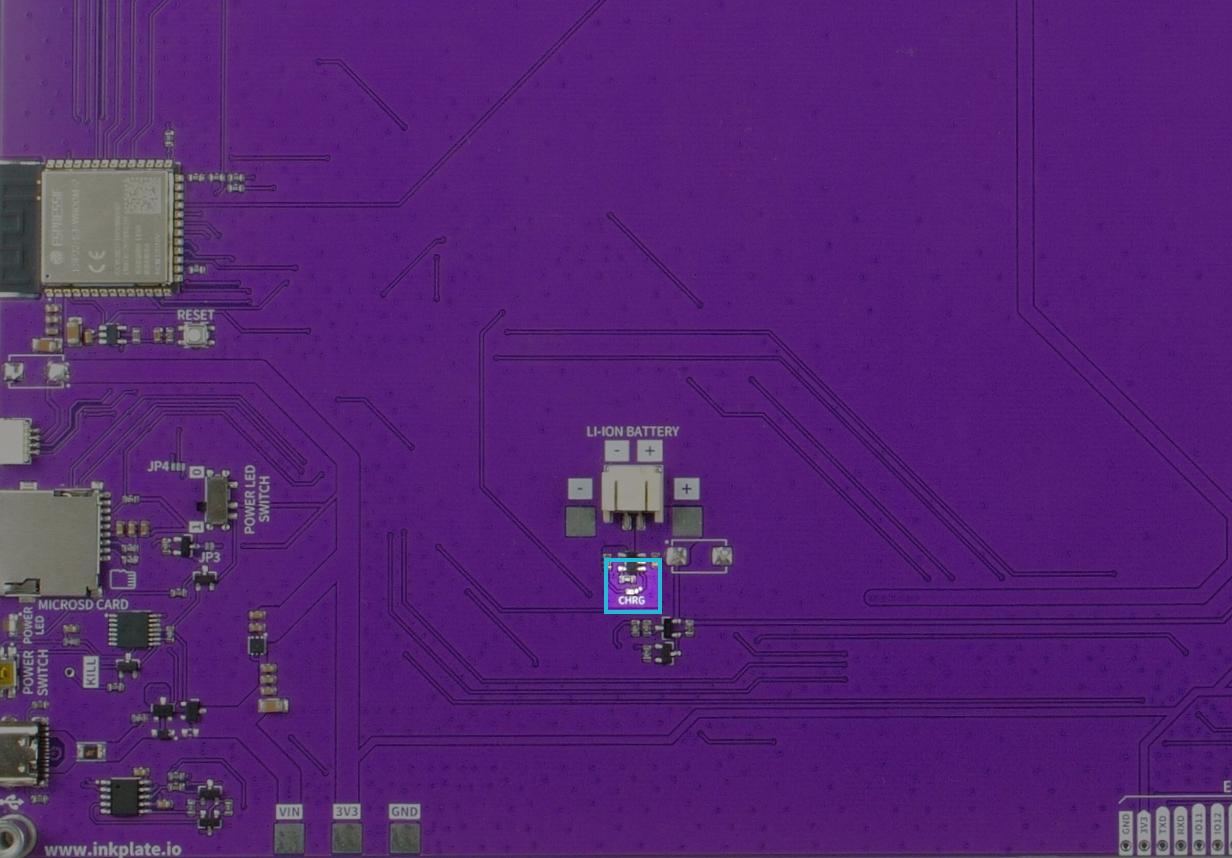
1. Check the charging LED
A dedicated charging indicator LED shows real-time charging status. If it's off, the battery may already be fully charged, or it isn't connected correctly.
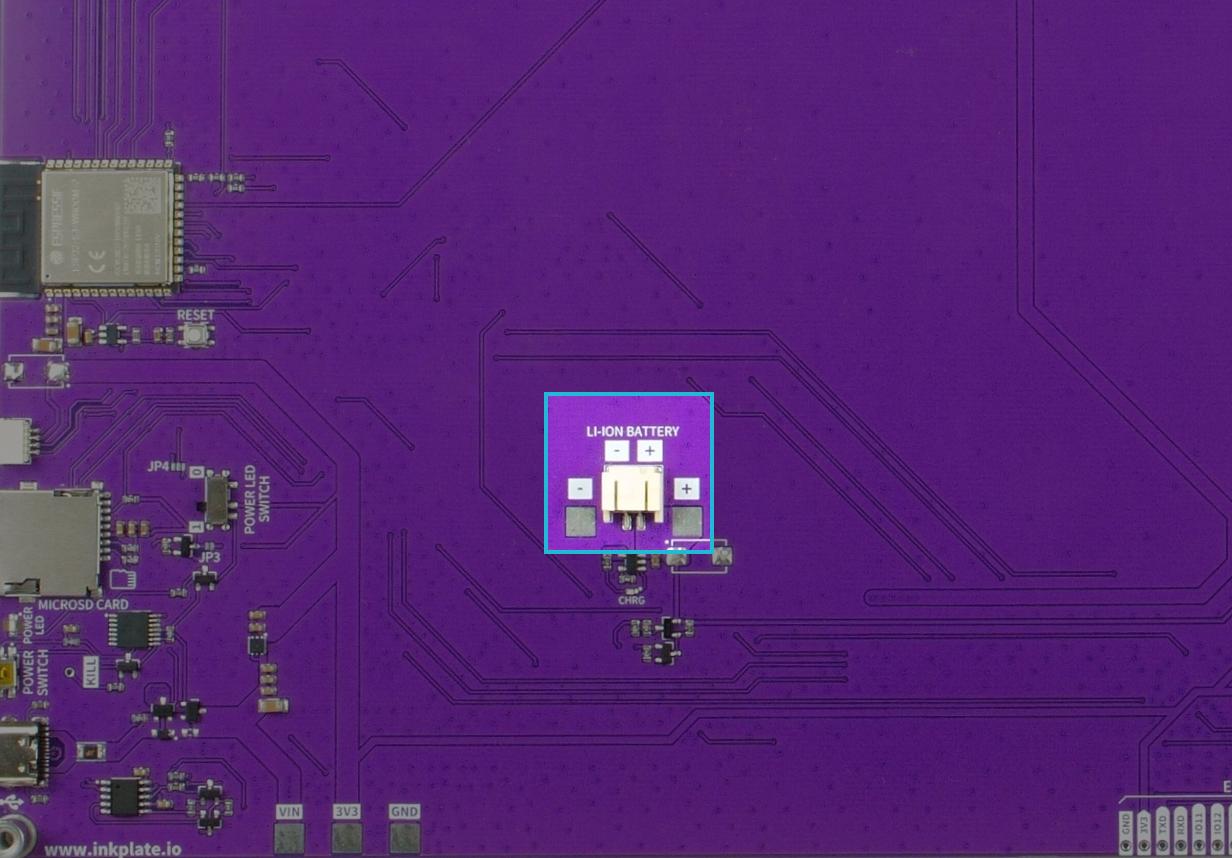
2. Double-check battery polarity
3. Use a compatible battery
Inkplate 13SPECTRA is compatible with 3.7V Li-ion batteries with protection. See the battery page for details and supplier recommendations.
4. Still having issues?
If none of these steps resolve the issue, contact our support team here with details of your setup and the troubleshooting steps you've tried.
Inkplate 13SPECTRA uses the SdFat library to communicate with the onboard microSD card slot.
1. Supported card types and formats
For best results, use the official SD card formatter to format your card to FAT32 before use.
2. Check sdCardInit() in your code
Your sketch should check the return value of display.sdCardInit() and print the result over Serial, if it returns false, the card isn't being detected at the hardware level. See the MicroSD basics page for a full working example.
3. Re-seat the card
Remove the microSD card and reinsert it firmly, making sure it clicks into place in the slot.
4. Try a different card
Some microSD cards, especially very high-capacity or off-brand ones, can be unreliable. Testing with a different, known-good card can help isolate whether the card itself is the problem.
5. Still having issues?
If none of these steps resolve the issue, contact our support team here with details of your setup and the troubleshooting steps you've tried.