FAQ and troubleshooting
These are the questions we get asked most often about Inkplate 6, with answers. Have a look through before writing in. There is a good chance yours is already here.
If you're having trouble uploading code, try the following troubleshooting steps:
Restart device
- Disconnect the device and power it off completely.
- Reconnect via USB.
Make sure that the device is turned ON
Easy one to miss. Check that the blue ON LED is lit.
Verify Arduino IDE version
Inkplate 6 requires Arduino IDE 2.0+ for proper board and library support.
If you're using an older version, update to Arduino IDE 2.0 or later to avoid compatibility issues.
Still having issues?
If none of these steps resolve the issue, contact our support team here with details of your setup and the troubleshooting steps you've tried.
To preserve display quality and extend the lifespan of the panel, it's recommended to perform a full update (display.display()) after a certain number of partial updates.
If your Inkplate 6 display is not refreshing, follow these steps to diagnose and resolve the issue:
1. Verify that the code is uploading correctly
- Enable verbose output in Arduino under File → Preferences, then check the compile and upload logs.
- When uploading, a successful upload should print:
Leaving...
Hard resetting via RTS pin...
2. Test with an official example
Make sure you're testing with an unmodified Arduino example from the Inkplate library. Running custom code might be almost correct, but it could still prevent the display from refreshing properly.
Try uploading these tested examples:
Inkplate6_Hello_World.ino
Writing 'Hello world' to the Inkplate 6.
Inkplate6_Black_And_White.ino
Example of drawing in black and white mode on the Inkplate 6.
3. Check your power source
- Some laptop or PC USB ports provide insufficient current, which may cause Inkplate to get stuck while refreshing.
- Try a different USB port, power adapter, or USB cable to ensure the board is receiving stable power.
4. Inspect the e-paper flat cable and panel
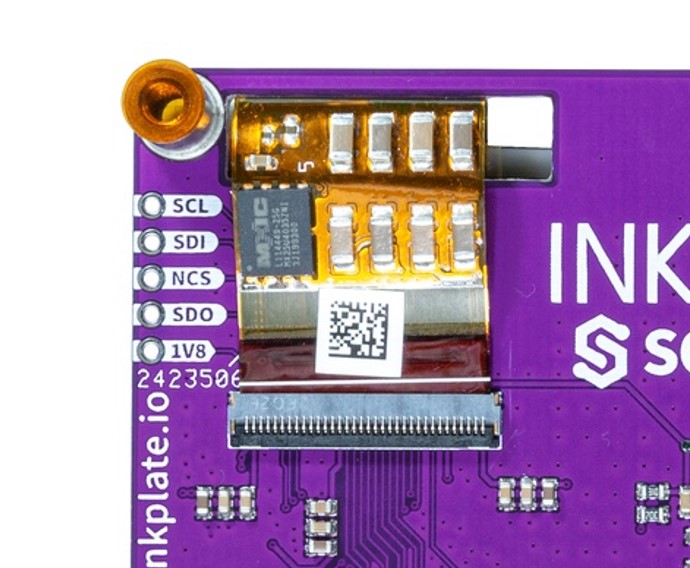
- Examine the flat-flex cable connector to ensure it's properly seated.
- Check the edges of the e-paper panel for any visible damage or cracks.
5. Still having issues?
If none of these steps resolve the issue, contact our support team here with details of your setup and the troubleshooting steps taken.
If you notice artifacts, streaks, or ghosting on your Inkplate 6 display, follow these steps to clean the screen and check for potential connection issues:
1. Run a display cleaning cycle
The library has a dedicated burnInClean() routine for this. It drives the panel's cleaning waveform directly, which shifts stuck particles better than alternating black and white full refreshes:
#include "Inkplate.h"             // Include Inkplate library to the sketch
Inkplate display(INKPLATE_1BIT); // Create object on Inkplate library and set library to work in monochrome mode

// Number of clear cycles.
#define CLEAR_CYCLES 20

// Delay between clear cycles (in milliseconds)
// NOTE: cycles delay should not be smaller than 5 seconds
#define CYCLES_DELAY 5000

void setup()
{
  display.begin();        // Init library (you should call this function ONLY ONCE)
  display.clearDisplay(); // Clear any data that may have been in (software) frame buffer.

  int cycles = CLEAR_CYCLES;

  // Clean the screen by running the burn in function which starts the cleaning sequence
  display.burnInClean(cycles, CYCLES_DELAY);

  // Print text when clearing is done.
  display.setTextSize(4);
  display.setCursor(100, 100);
  display.print("Clearing done.");
  display.display();
}

void loop()
{
  // Empty...
}
CYCLES_DELAY at 5000 ms or more. Running the cycles back to back does not give the panel time to settle between them.Inkplate6_Burn_In_Clean.ino
The full cleaning example from the Inkplate library.
2. Check the e-paper flat cable connector
If artifacts persist after cleaning or appear as long vertical lines or streaks, it may indicate a loose, improperly connected, or possibly damaged flat cable.
Try re-seating the e-paper flat cable by carefully disconnecting and reconnecting it.
3. Still having issues?
If none of these steps resolve the issue, contact our support team here with details of your setup and the troubleshooting steps you've tried.
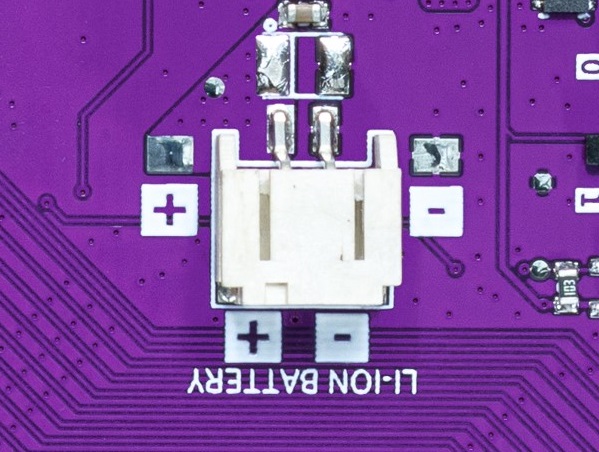
All Inkplate models have a 2-pin 2.0mm JST connector for a 3.7V Li-ion battery. Inkplate 6 has an onboard MCP73831 charger, so the battery charges whenever USB is connected, and the board switches over to battery power on its own when you unplug it.
All hardware design files, including schematics, KiCad project files, gerber files, and more, are available in the Inkplate 6 hardware repository on GitHub.
Additionally, this documentation contains detailed hardware design insights on the hardware design page.
The printable enclosure files are in the Inkplate 6 hardware repository, under OUTPUTS/V1.2.1/3D printable files. You will find .stl models for the top, the bottom and the case, along with a description file listing the recommended print settings.
A .step model of the PCB itself is in the same OUTPUTS/V1.2.1 folder if you would rather design your own enclosure around the board.
Short answer: No.
Inkplate 6 is an e-paper development platform and functions similarly to an Arduino with an integrated e-paper display. While it is not designed to be a plug-and-play e-reader or monitor, you could write your own Arduino sketch to display data sent from a PC via USB.
However, if you're looking for a true e-ink monitor experience, Inkplate 6 is not the right choice.
Yes. ESPHome ships an Inkplate display platform that covers Inkplate 6. Set the model key to inkplate_6_v2 for current boards, or inkplate_6 for the original revision:
display:
  - platform: inkplate6
    model: inkplate_6_v2
    greyscale: false
    partial_updating: false
    update_interval: 60s
See the ESPHome Inkplate documentation for the full list of configuration options and the GPIO pin assignments the platform expects.