2.4 Buzzer Beep
The goal of this example is to make some noise. A passive buzzer is a tiny speaker: feed it a square wave and it vibrates at whatever frequency you send it, so a single buzzer can play any note you like.
In this example the NULA MINI plays a short eight-note scale the moment it powers up.
In this documentation you will learn:
- How to connect a passive buzzer to the board.
- How
tone()turns a frequency into a sound. - How
noTone()silences the buzzer again. - How to keep a melody in an array and step through it with a loop.
Hardware required:
- 1x Soldered NULA MINI board
- 1x Breadboard
- 1x Passive buzzer
- 3x Jumper wires
- 1x USB-C cable
IO5 and ground. There is nothing to protect it from, because the pin only ever swings between 0 V and 3.3 V.Putting the components together
Follow the five steps below. Each photo is taken from the same position, so you can compare it with the previous one and see exactly what changed.
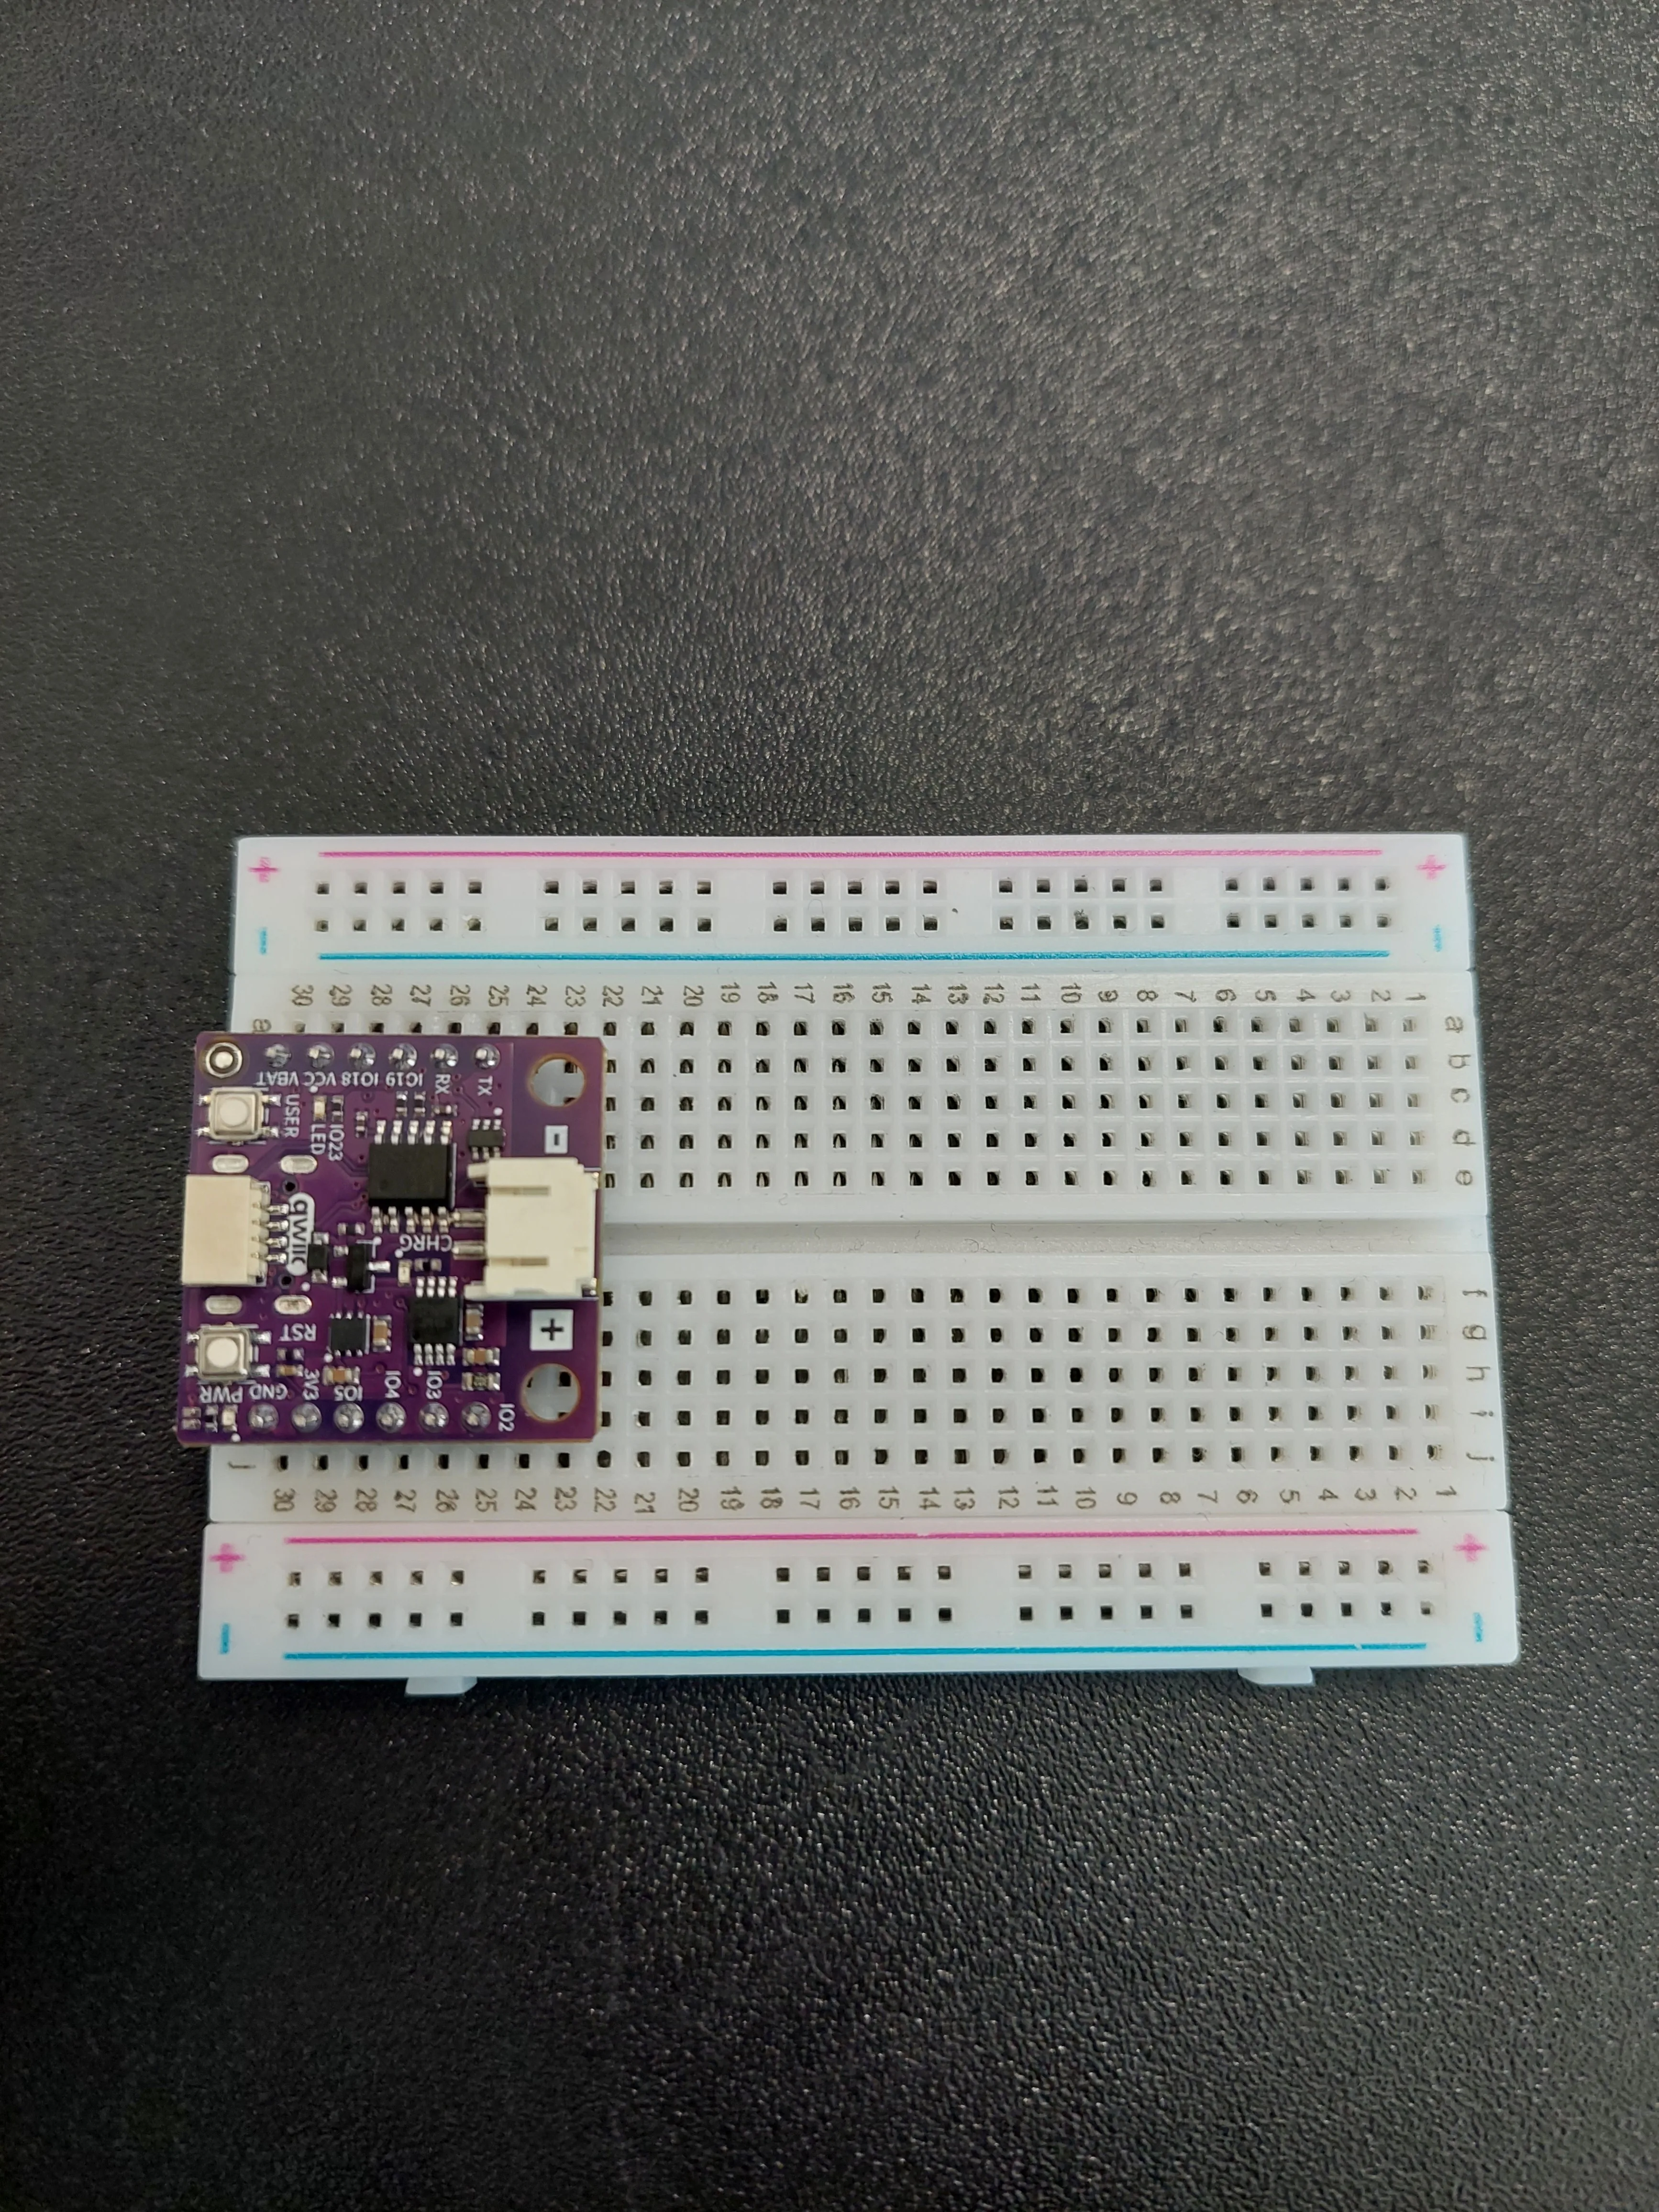
1. Insert the NULA MINI board on the breadboard
Push the board into one end of the breadboard so that its two rows of pins sit on either side of the centre channel, with the chip facing down.
2. Place the buzzer and bring ground out to the rail
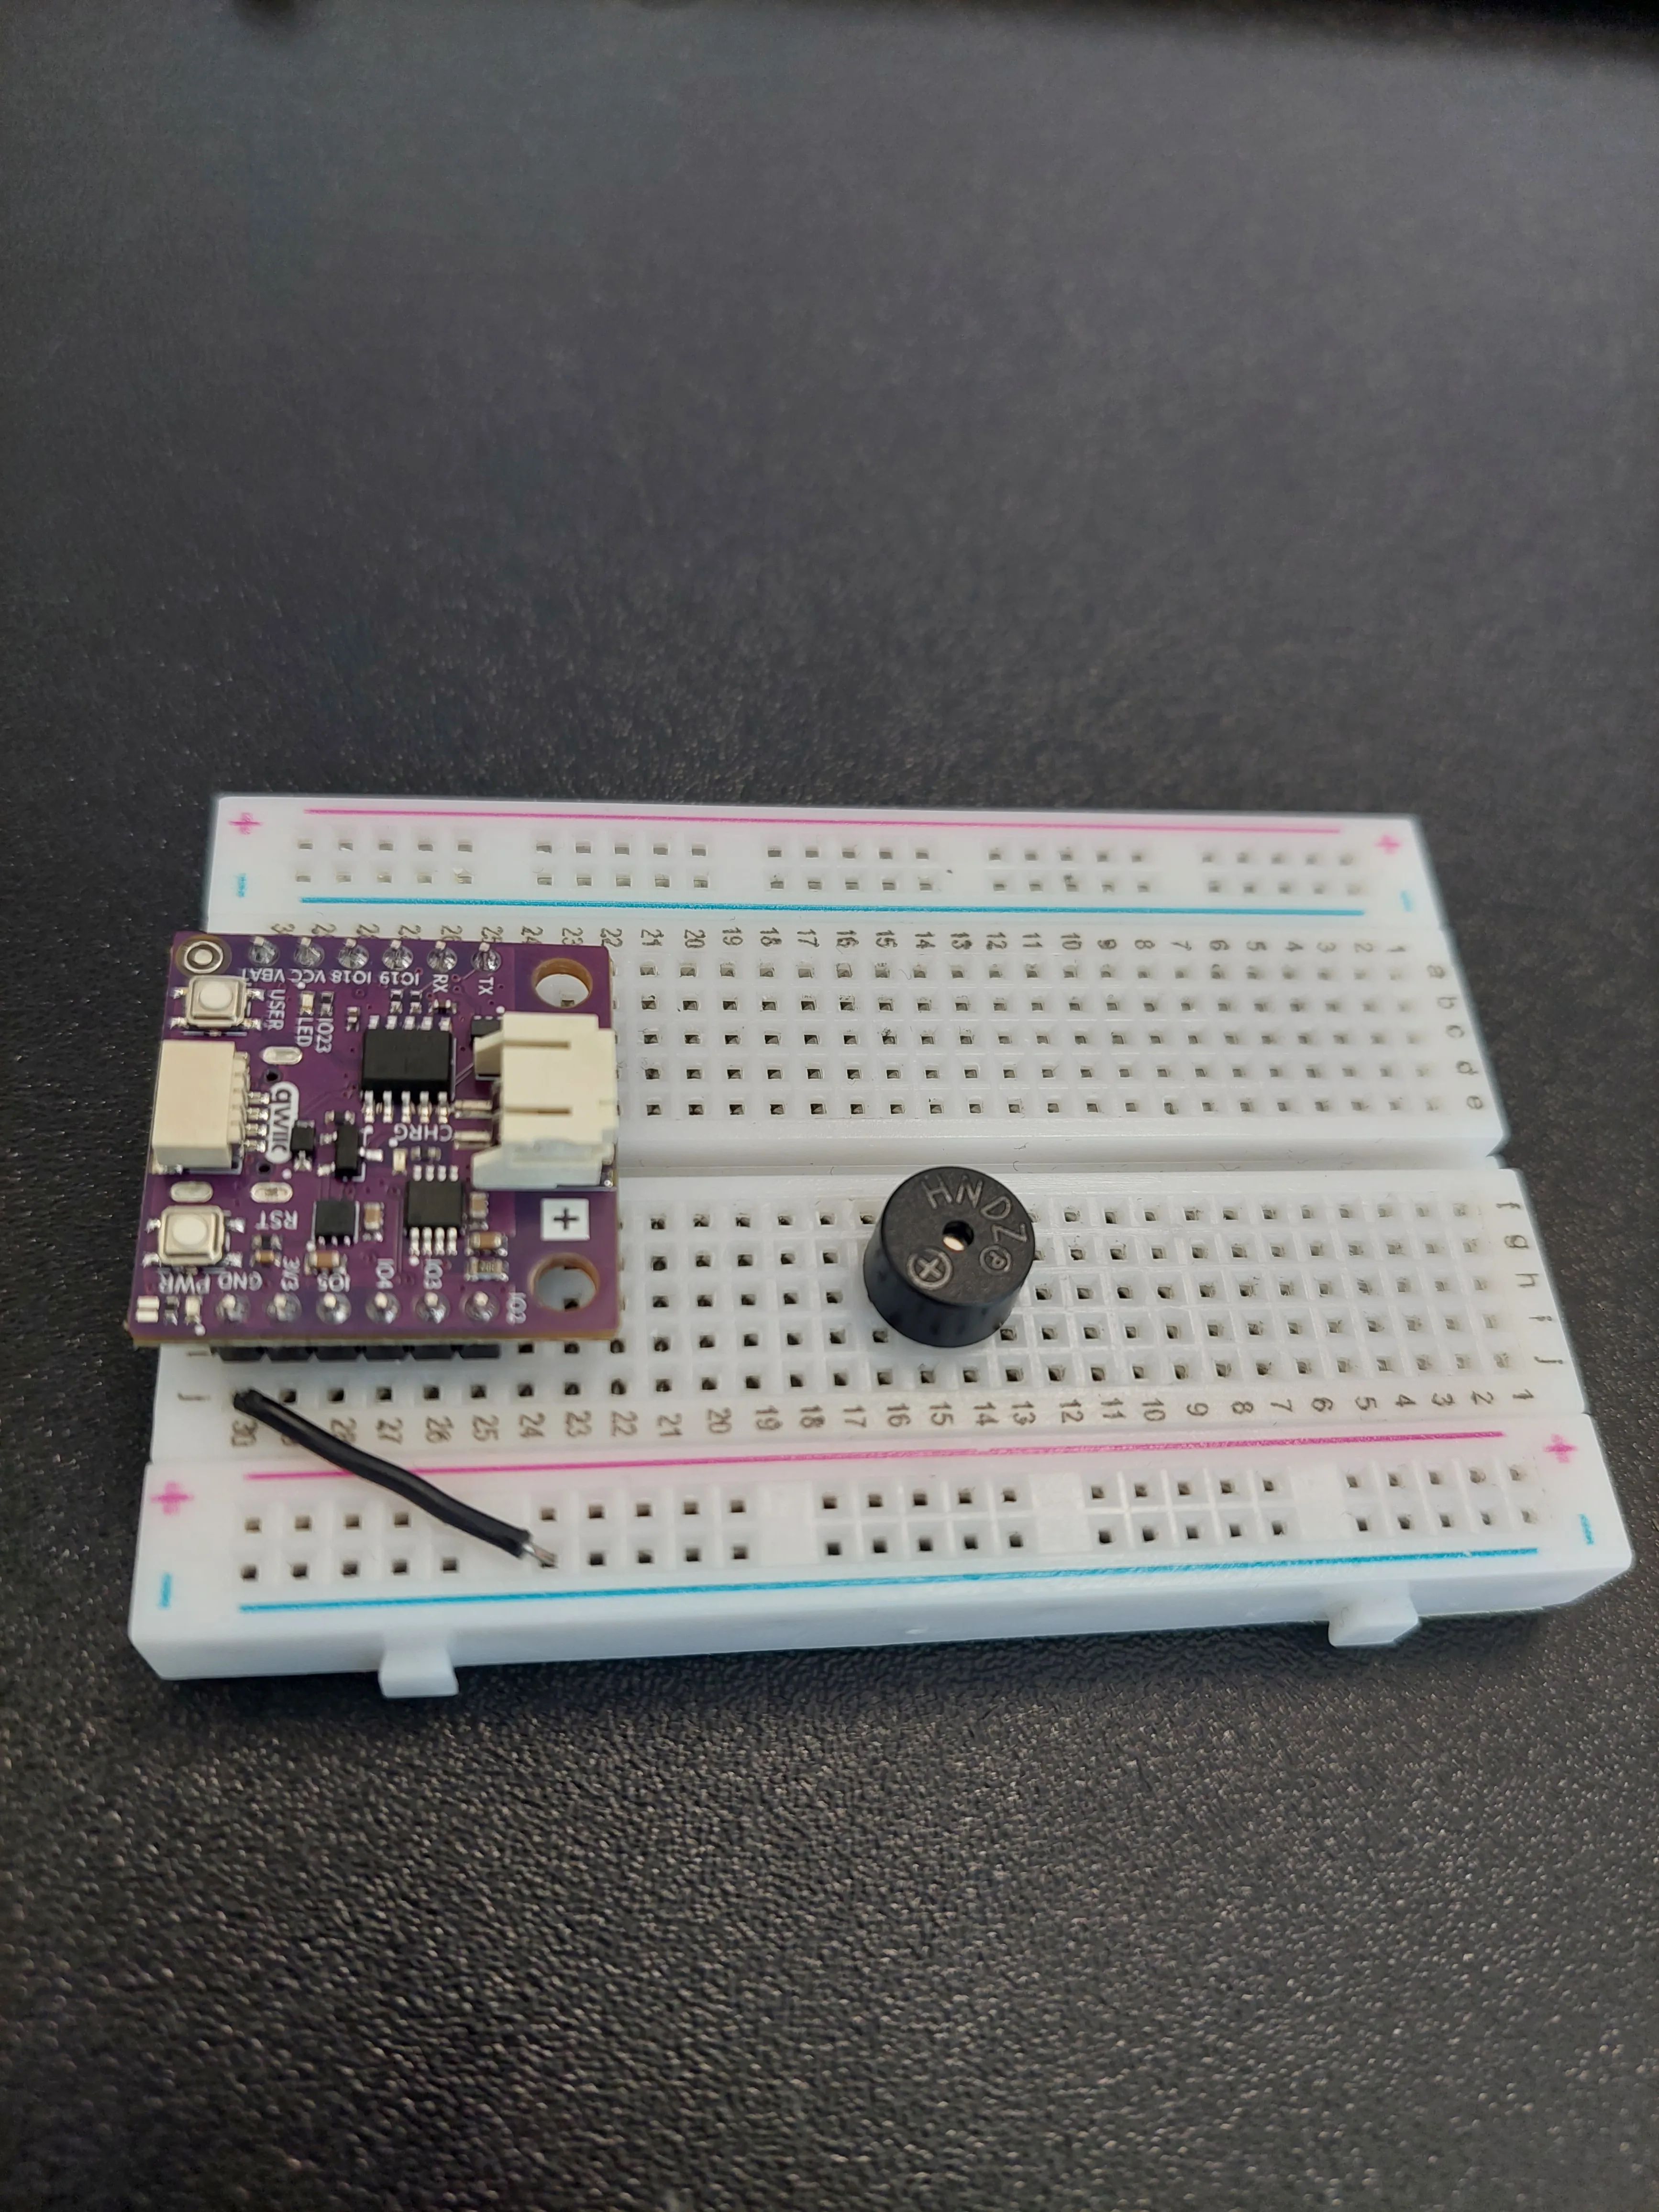
The buzzer goes on the f–j side, well clear of the board, with its two legs in row 14 and row 15.
Look at the top of the buzzer's case before you push it in. Next to the HWDZ moulding there is a small + inside a circle, and the leg on that side of the case is the positive one. That leg goes into row 15.
Then run a jumper from j30 (GND) across to the blue − rail. That rail is the ground line for the rest of the example.
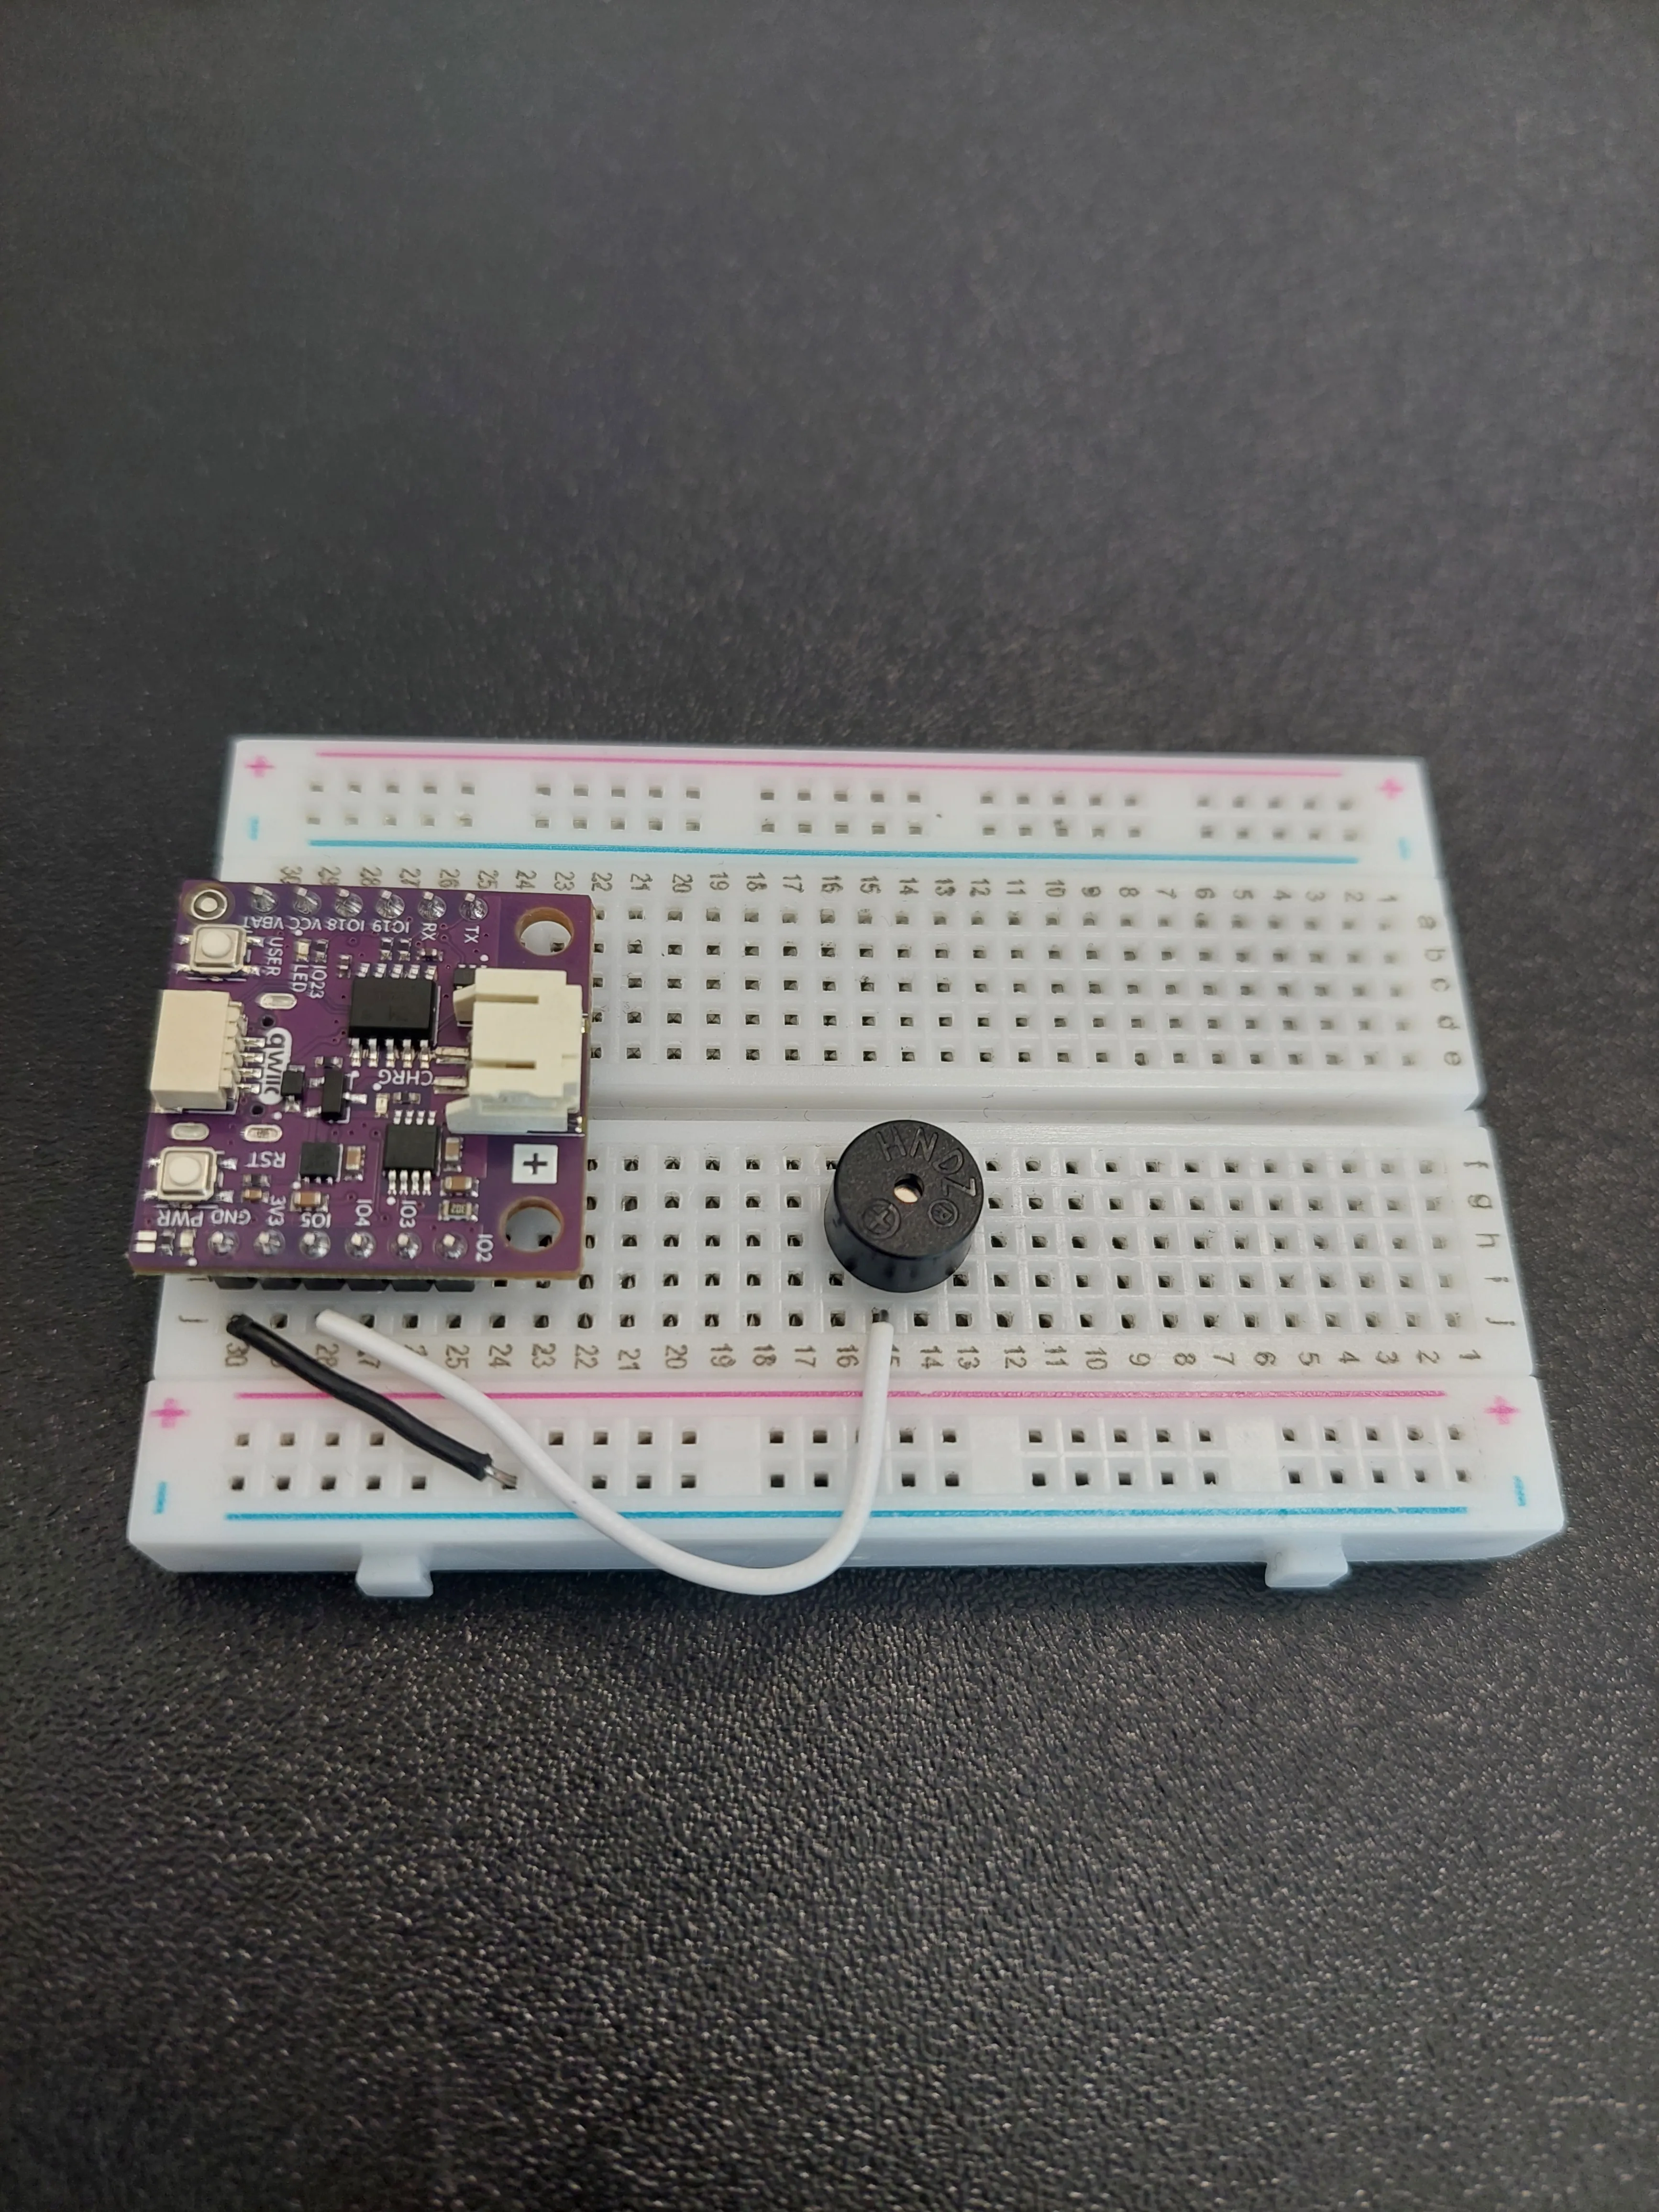
3. Connect the positive leg to IO5
One jumper from j15 (the row holding the buzzer's + leg) down to j28 (IO5). This is the wire that will carry the square wave.
4. Connect the other leg to ground
One more jumper, from j14 (the buzzer's other leg) across to the blue − rail, which is already tied to GND.
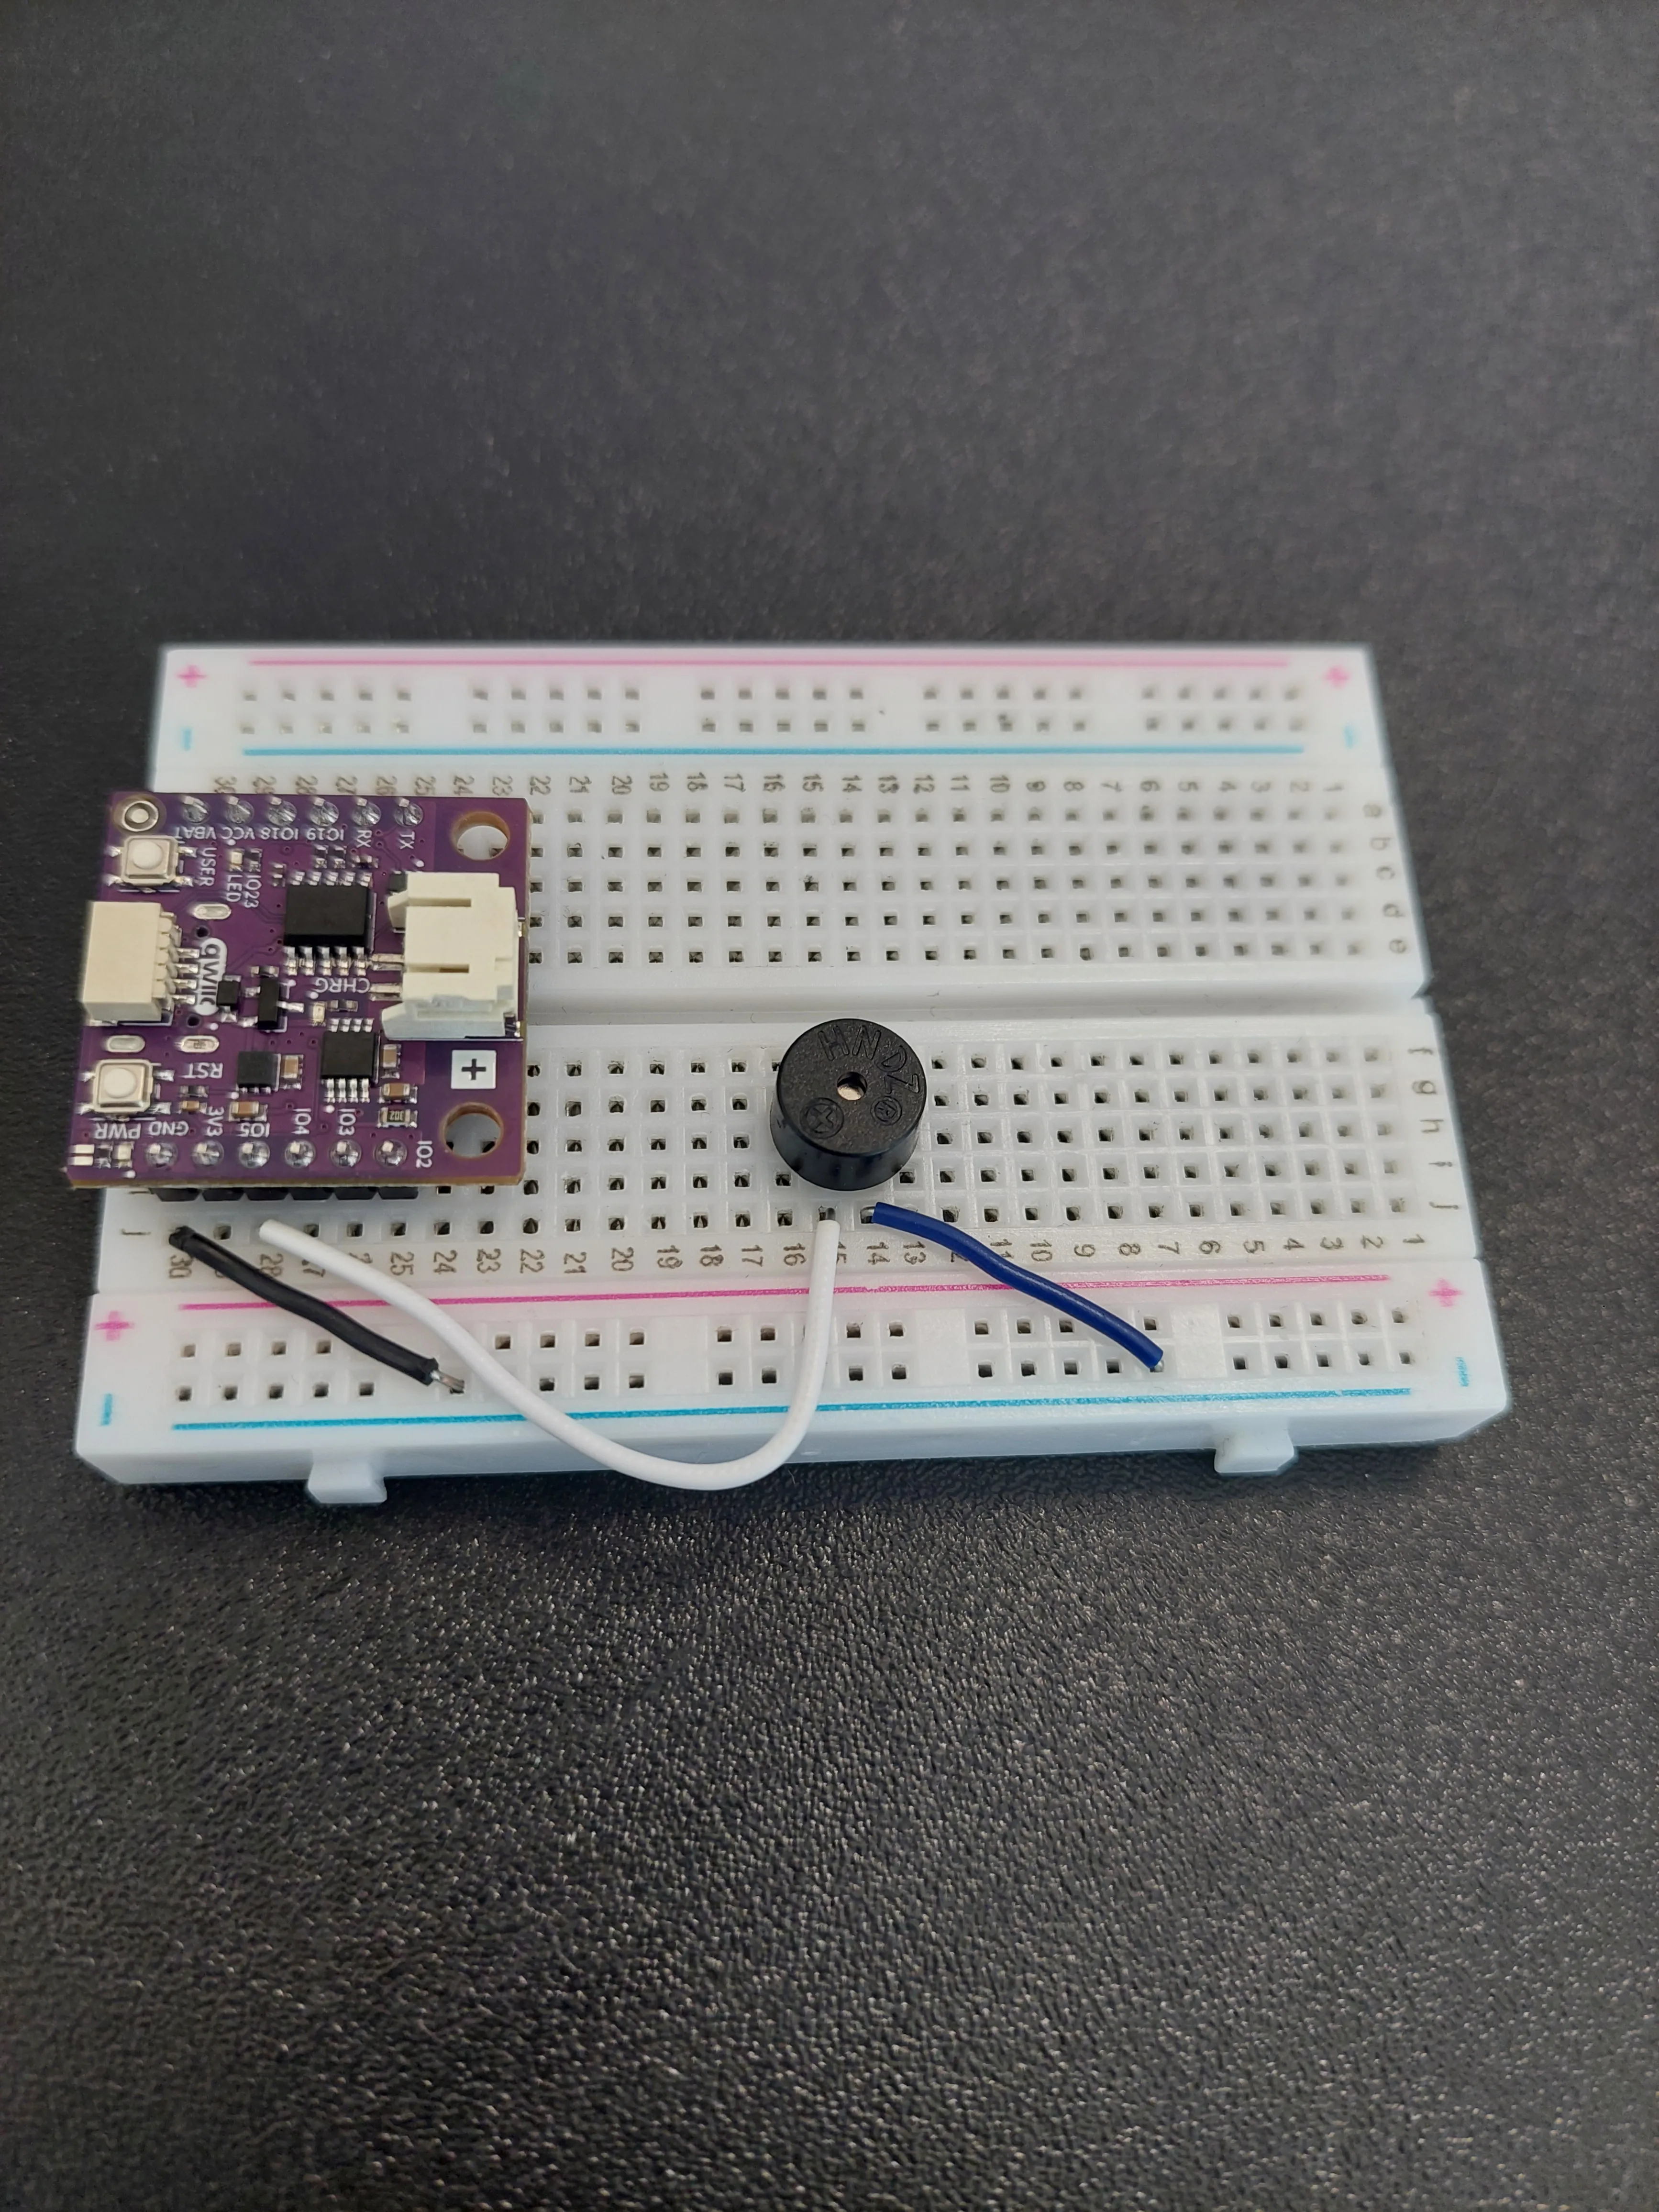
The loop is now closed: IO5 → buzzer → GND. Whatever IO5 does, the buzzer feels.
5. Connect the board to your computer
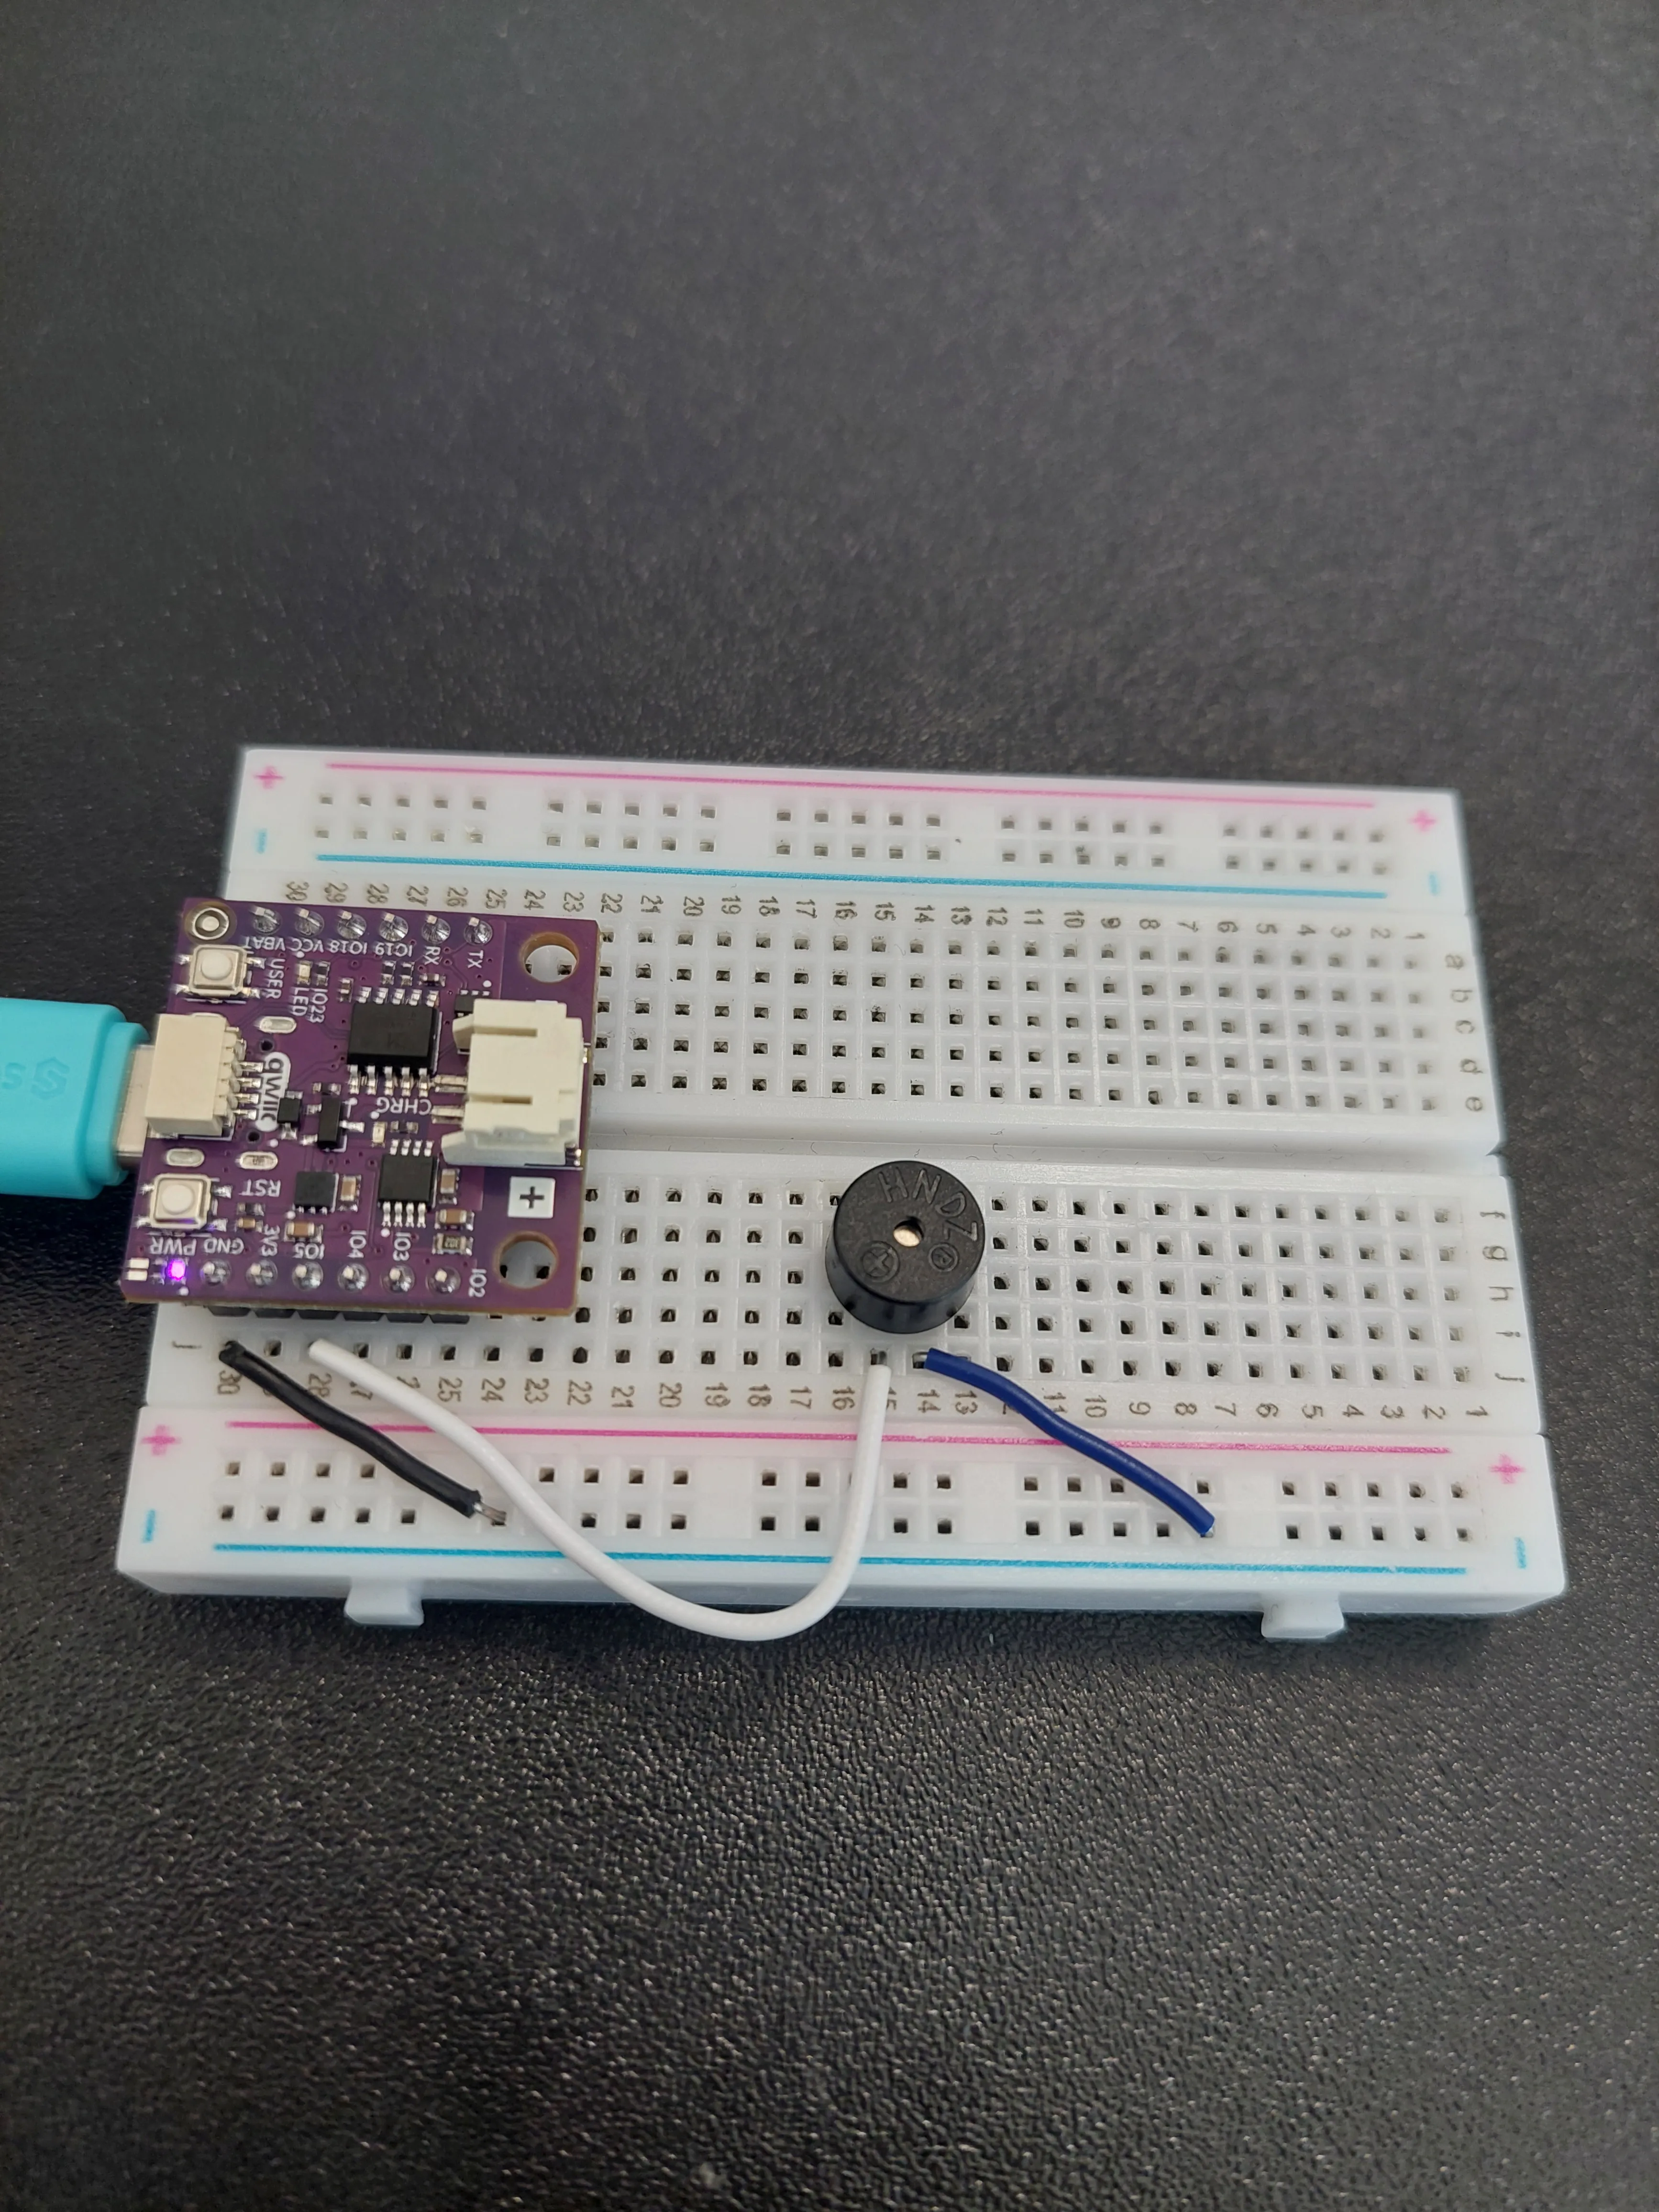
IO5 reaches the + row, and the other row reaches ground.How a passive buzzer makes a note
Sound is nothing more than air being pushed back and forth. Inside the buzzer is a thin disc that moves whenever the voltage across it changes, and moving it quickly enough makes a note you can hear.
That is all tone() does. It switches IO5 between 3.3 V and 0 V over and over, making a square wave, and the number of switches per second is the frequency, measured in hertz. Your ear reads that frequency as pitch:
| Note | Frequency (Hz) |
|---|---|
| C4 | 262 |
| D4 | 294 |
| E4 | 330 |
| F4 | 349 |
| G4 | 392 |
| A4 | 440 |
| B4 | 494 |
| C5 | 523 |
The useful thing about tone() is that it keeps running in the background. Once a note has started, the board is free to carry on with the rest of the code, which is why the sketch uses delay() to decide how long to wait before starting the next one.
How the melody is stored
A melody is really two lists that travel together: which note, and how long it lasts. The sketch keeps them in two arrays of the same length:
melody[]holds the frequency of each note in hertz.noteDuration[]holds the length of each note, written the way sheet music writes it:4for a quarter note,2for a half note.
A for loop then walks through both arrays one index at a time, plays the note with tone() and waits out its duration. When the loop finishes, noTone() makes sure the buzzer is left silent.
Code
/*
This is a variable to which we assign the number of the pin that we connected the buzzer to.
The NULA board has a pin naming logic as follows: IO5, where 5 is the number that we give to the variable.
*/
const int BUZZER_PIN = 5;

/*
We will use two arrays - one for note frequencies (in Hertz) and one for note durations.
These define a short melody that the buzzer will play.
*/
int melody[] = { 262, 294, 330, 349, 392, 440, 494, 523 }; // C4 to C5
int noteDuration[] = { 4, 4, 4, 4, 4, 4, 4, 2 };           // Quarter notes (last one is half note)

/*
Here we work out how many notes the melody has, instead of counting them by hand. sizeof() tells us how much memory
something takes up, so the size of the whole array divided by the size of one entry gives us the number of entries.
Written this way the number stays correct even after you add a note of your own.
*/
const int NOTE_COUNT = sizeof(melody) / sizeof(melody[0]);

void setup() {

  /*
  pinMode() is a function that configures the specified pin to behave either as an input or in this case as an output.
  As our pin needs to drive the buzzer, we will put the pin in OUTPUT mode.
  */
  pinMode(BUZZER_PIN, OUTPUT);

  /*
  Serial.begin() establishes serial communication between your board and your computer via a USB cable. We use it here
  to let you know when the melody starts and when it is done.
  */
  Serial.begin(115200);
  Serial.println("Playing melody...");

  /*
  A for loop repeats a block of code a set number of times, counting with a variable of its own. Here "i" starts at 0
  and grows by one each pass until it reaches NOTE_COUNT, so the block below runs once for every note in the melody.
  */
  for (int i = 0; i < NOTE_COUNT; i++) {

    /*
    Musical note lengths are written as fractions: a quarter note is a quarter of a whole note. Here we turn that
    fraction into milliseconds by dividing one second by the number in the array, so a 4 becomes 250 ms and a 2
    becomes 500 ms.
    */
    int duration = 1000 / noteDuration[i];

    /*
    tone() is a function that makes the buzzer produce a sound. It generates a square wave of the given frequency,
    which our ears hear as the pitch of the note, and the third value tells it how long to keep playing.
    */
    tone(BUZZER_PIN, melody[i], duration);

    /*
    delay() is a function that starts a pause in the code. We wait slightly longer than the note itself, which leaves a
    short silence between notes so they do not run into each other. Feel free to experiment with the 1.3.
    */
    delay(duration * 1.3);
  }

  /*
  noTone() stops whatever sound the buzzer was making. The last note already ended on its own, but calling this makes
  sure the buzzer is left silent no matter what.
  */
  noTone(BUZZER_PIN);
  Serial.println("Melody finished!");
}

void loop() {
  // Nothing happens here - melody plays once in setup()
}
What you should see
Upload the sketch and the buzzer plays a rising scale of eight notes, about two seconds in all. Then it goes quiet.
Everything happens in setup() and loop() is empty, so the melody plays once per power-up. To hear it again, tap the RST button on the board.
Open Tools → Serial Monitor and set the baud rate to 115200, and you can watch the same thing in text:

IO5 lands in the same row as one of them.Try it yourself: change one of the numbers in melody[] and upload again. Because NOTE_COUNT is worked out from the array itself, you can also add notes to both arrays and the loop will pick them up with no other change.
Full example
Check out the full example code on the link below:
2.4_Buzzer_Beep.ino
Example that shows how to use the tone() function to play a simple melody on a passive buzzer connected to IO5.