3.1 Measuring Distance
The goal of this example is to measure distance with the kit's ultrasonic sensor. The sensor sends out a short burst of sound, listens for the echo bouncing back off whatever is in front of it, and works out how far away that object is. The result is printed to the Serial Monitor in centimetres.
This is also the first example that uses a library and a Qwiic module, so the wiring is the easiest of the whole kit: one cable, and you are done.
In this documentation you will learn:
- How an ultrasonic sensor measures distance by timing an echo.
- How to connect a Qwiic module with a single cable and no jumper wires.
- What a library is, and how to install and use one.
- Why this sensor needs two function calls to give you one reading.
- How to spot a reading that is not a real measurement.
Hardware required:
- 1x Soldered NULA MINI board
- 1x Breadboard
- 1x Ultrasonic distance sensor (HC-SR04)
- 1x Qwiic cable
- 1x USB-C cable
Putting the components together
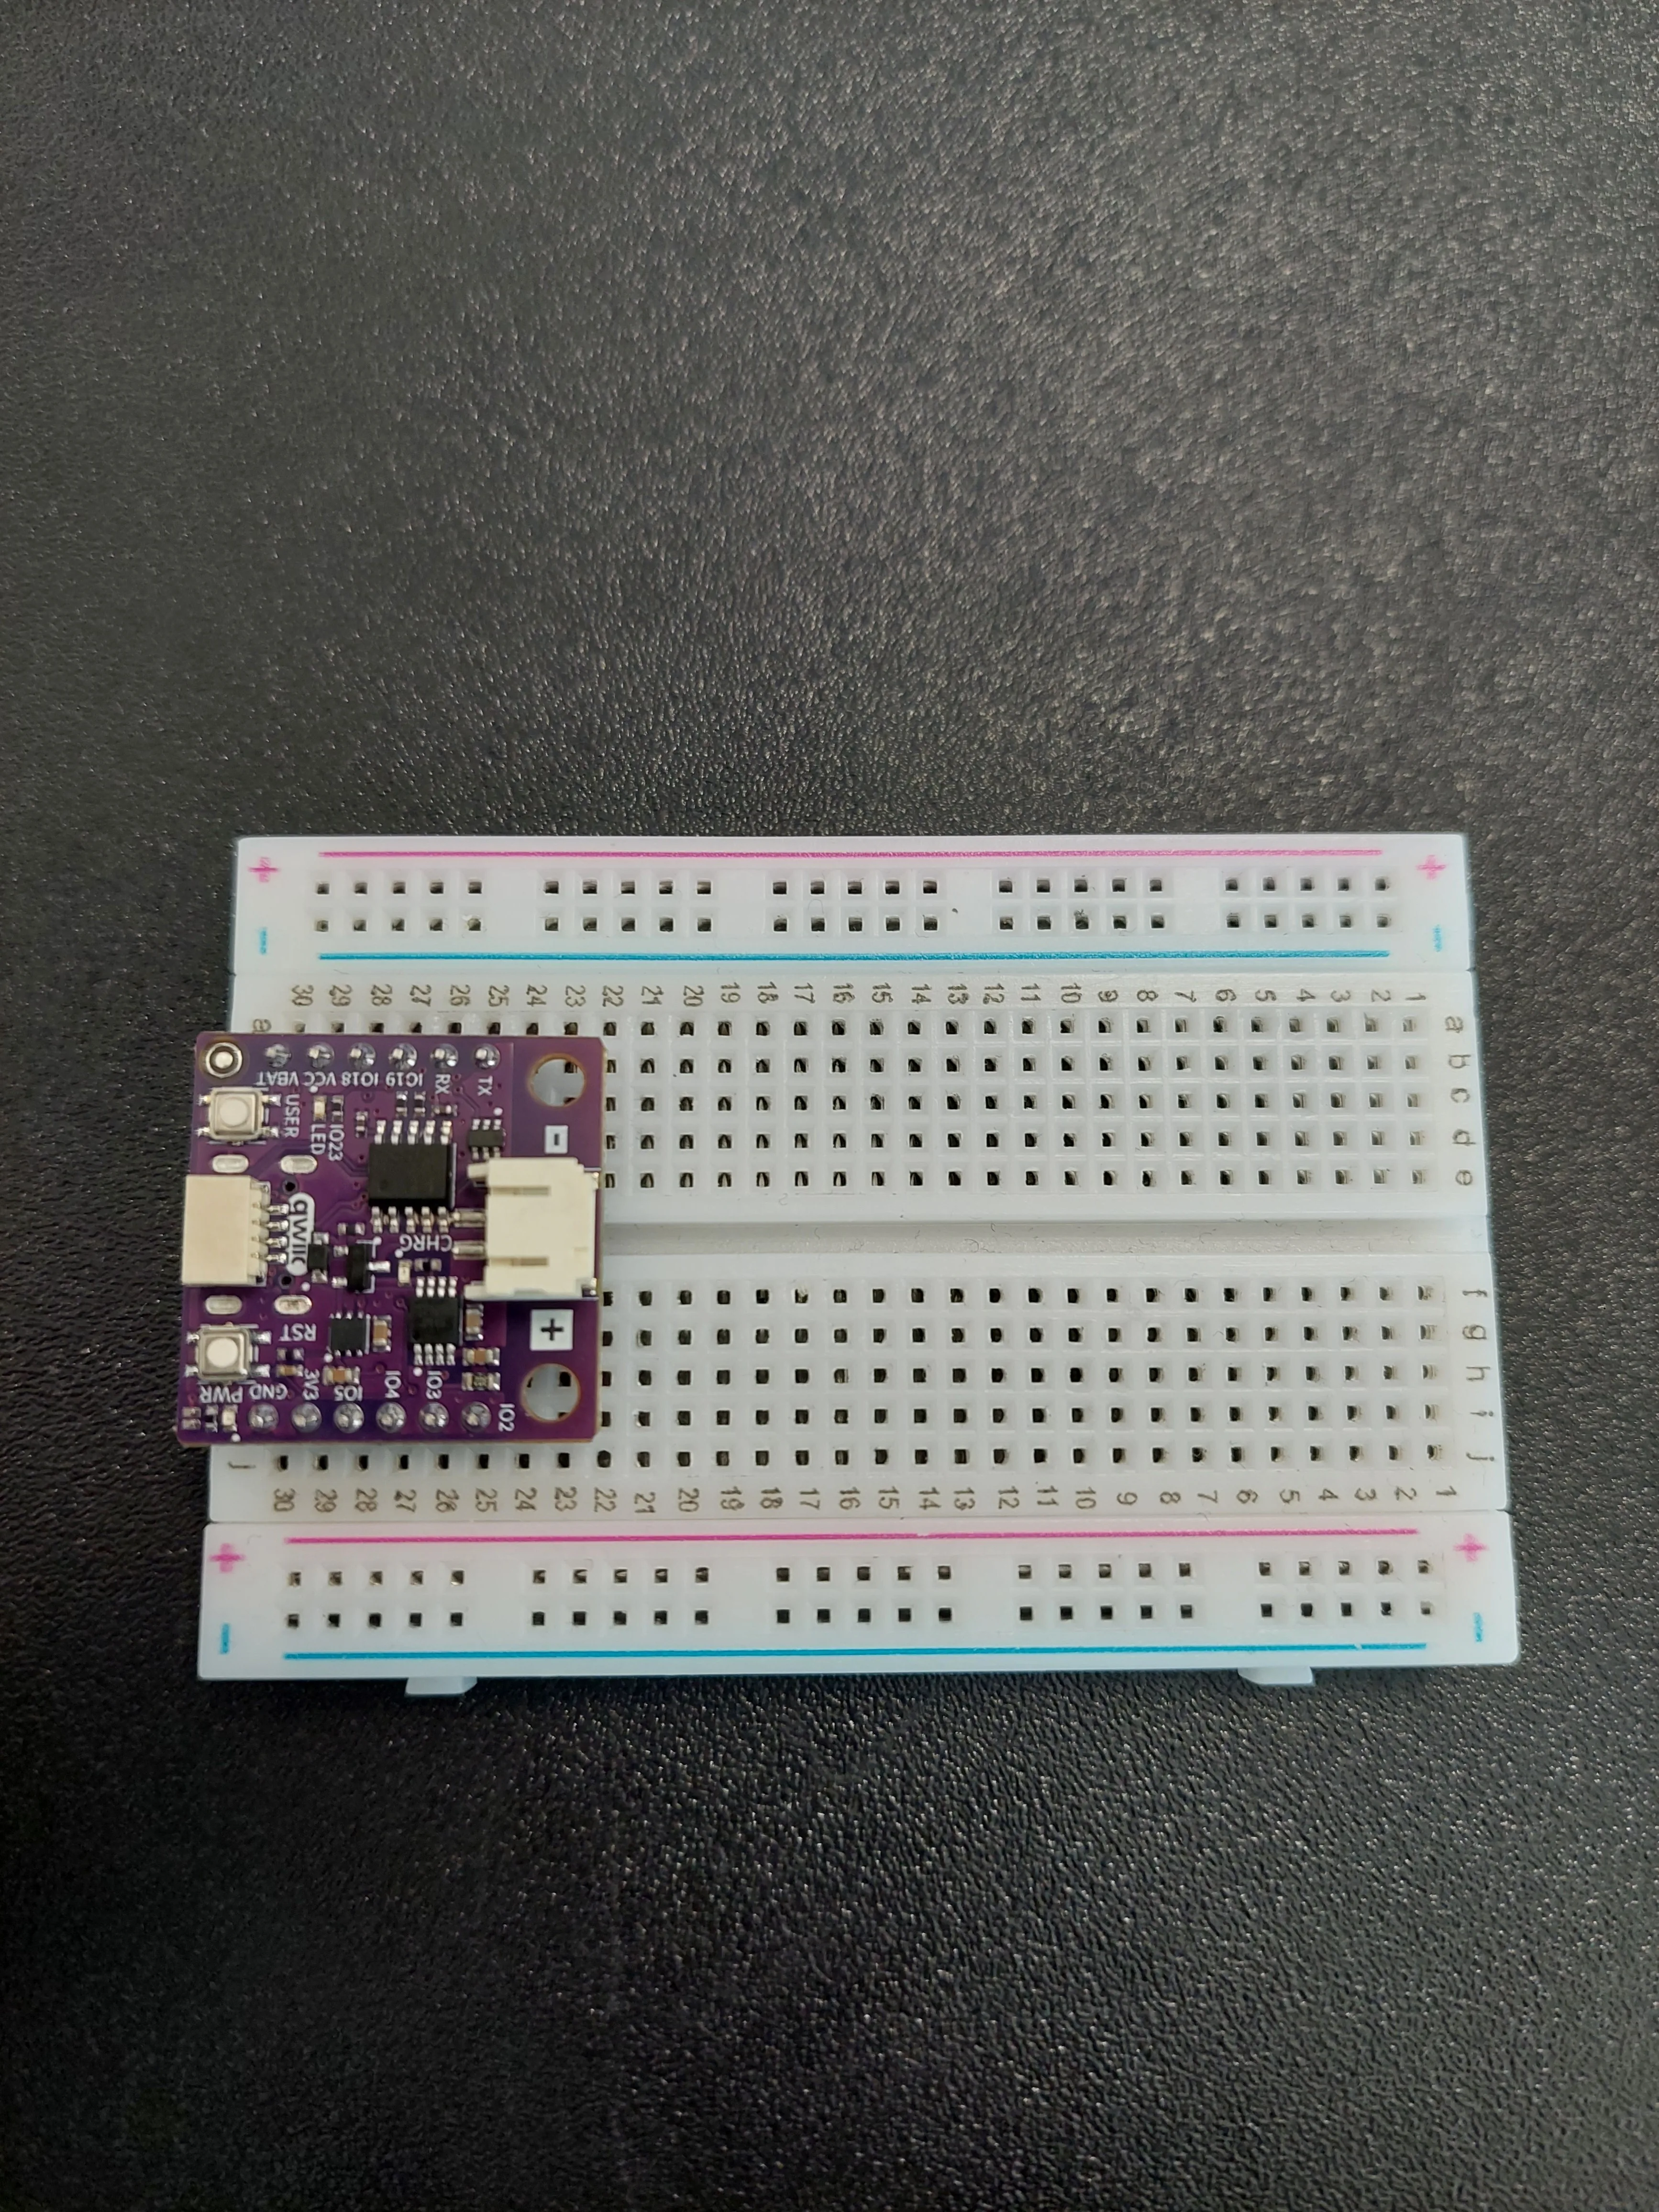
1. Insert the NULA MINI board on the breadboard
Push the board into one end of the breadboard so that its two rows of pins sit on either side of the centre channel, with the chip facing down.
2. Plug the Qwiic cable into the board
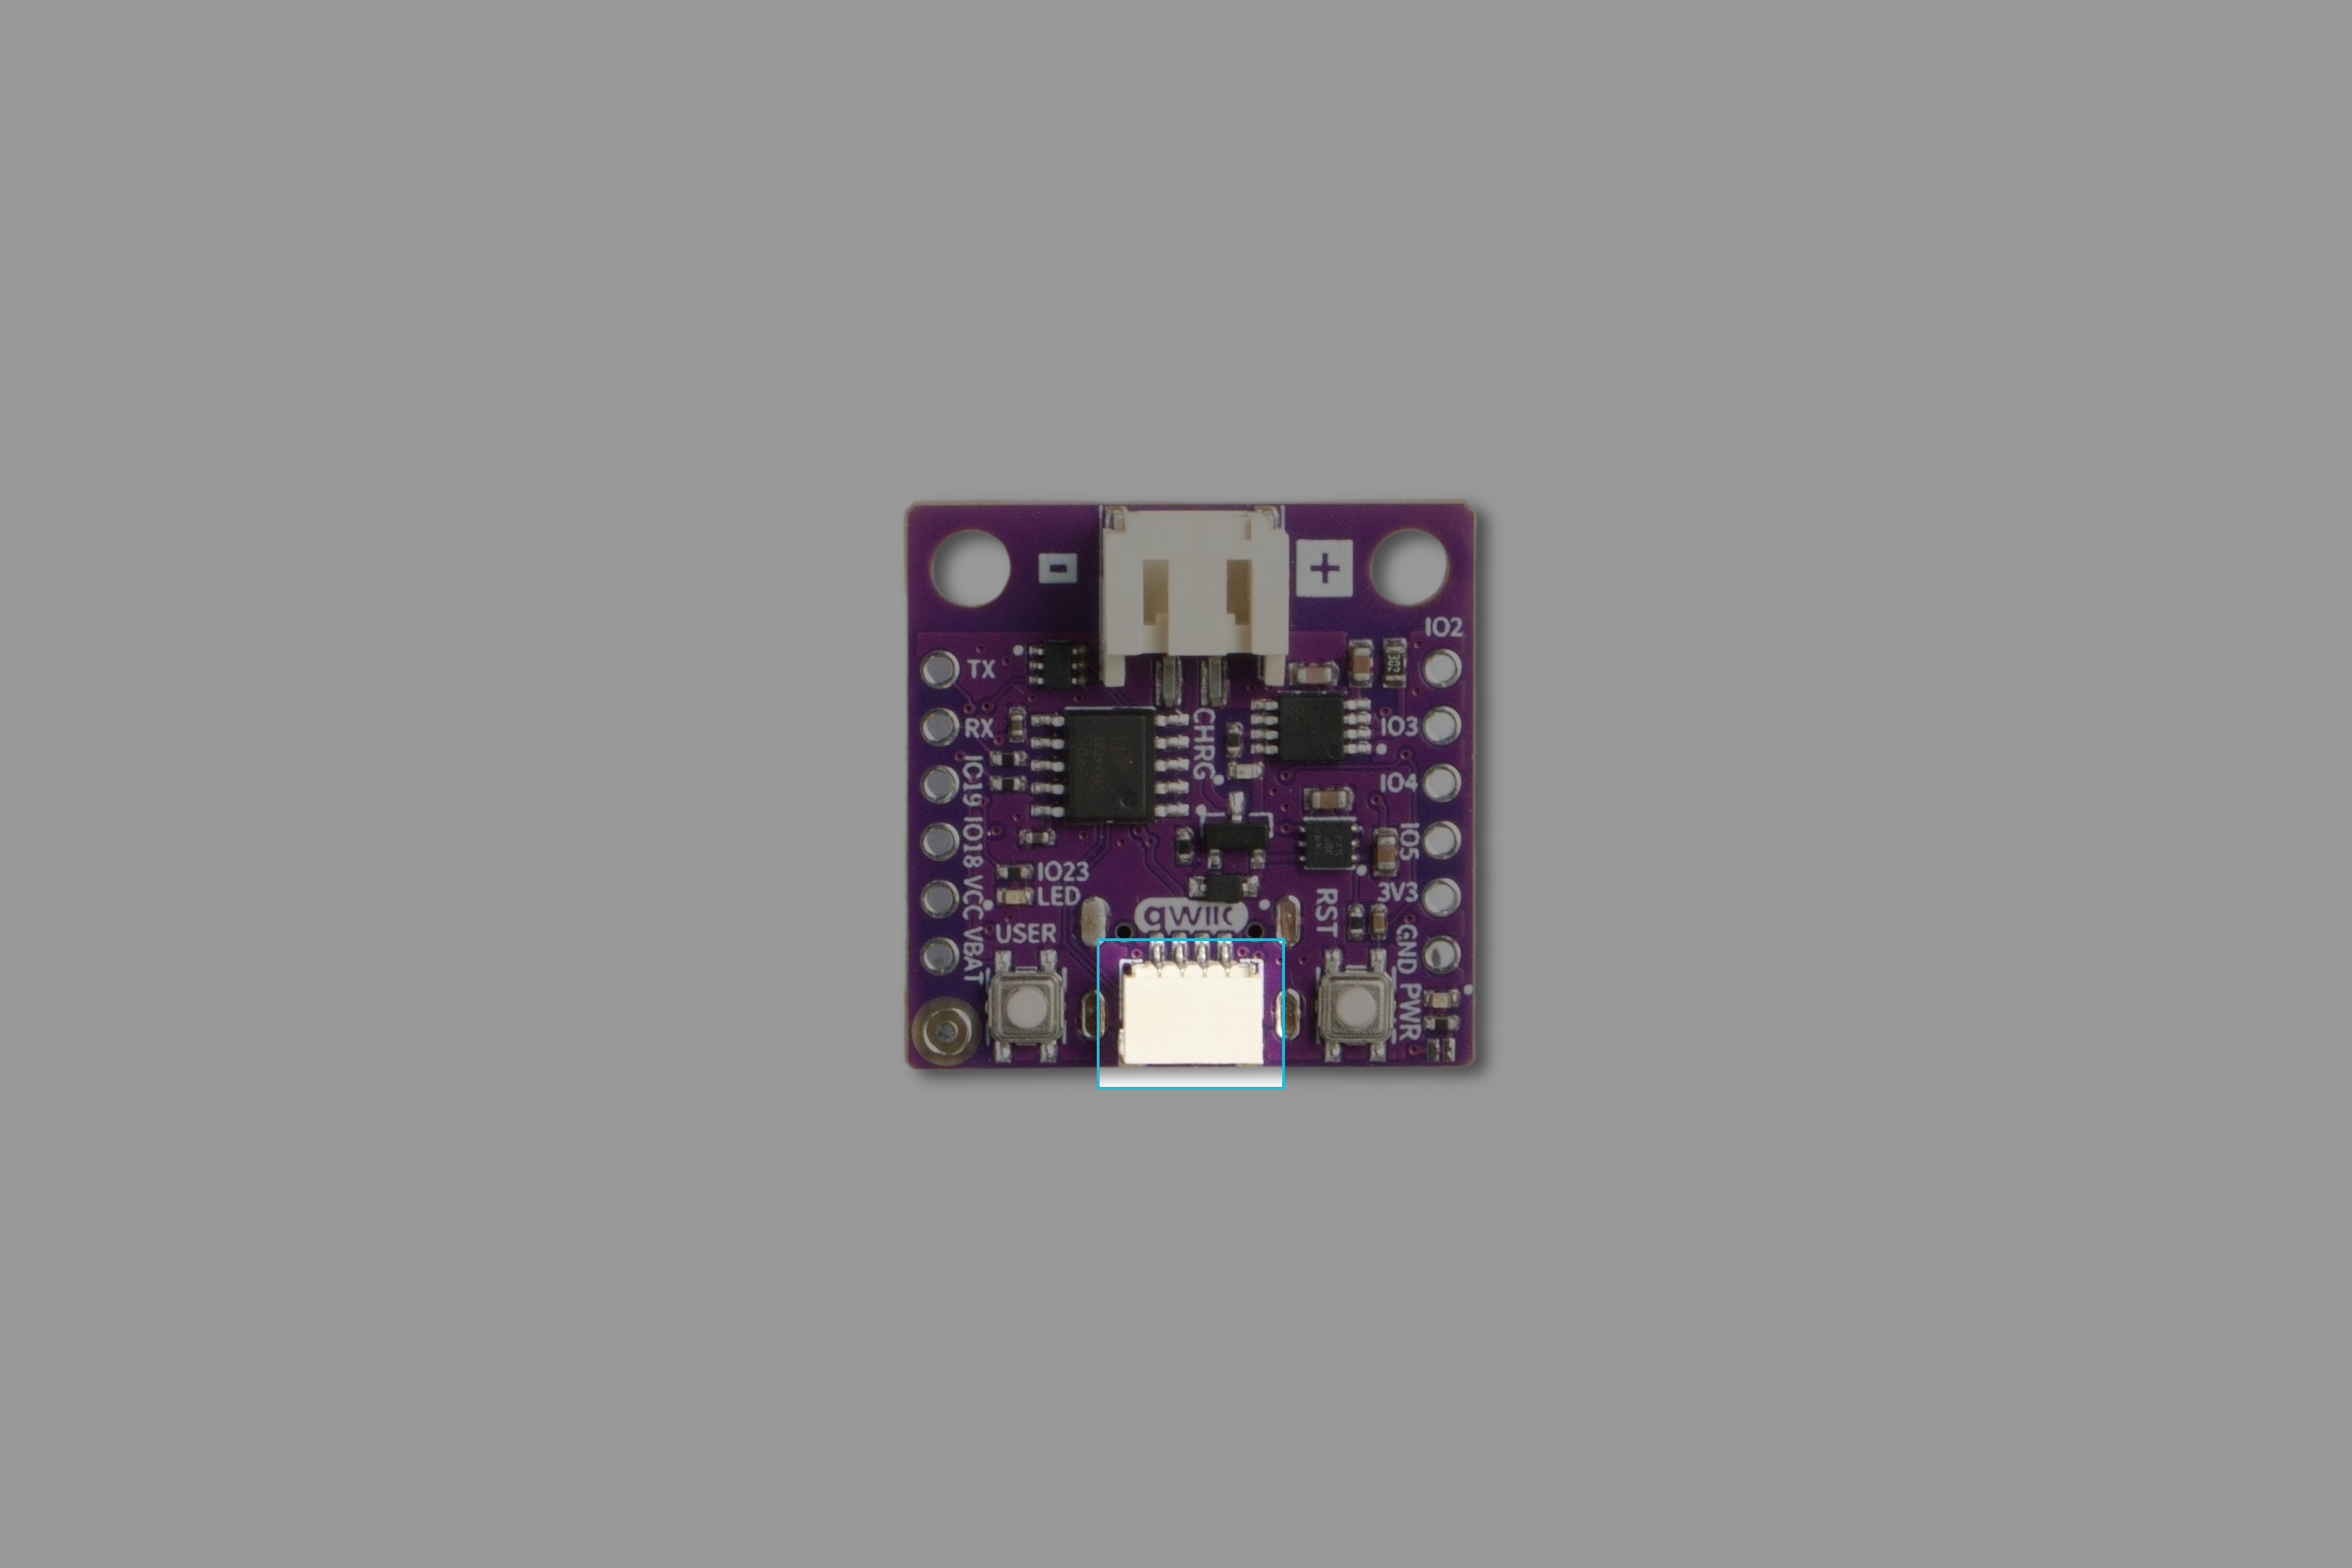
The NULA MINI has one Qwiic connector, on the edge of the board between the USER and RST buttons. It is the white connector marked qwiic on the silkscreen. Push the cable in until it clicks.
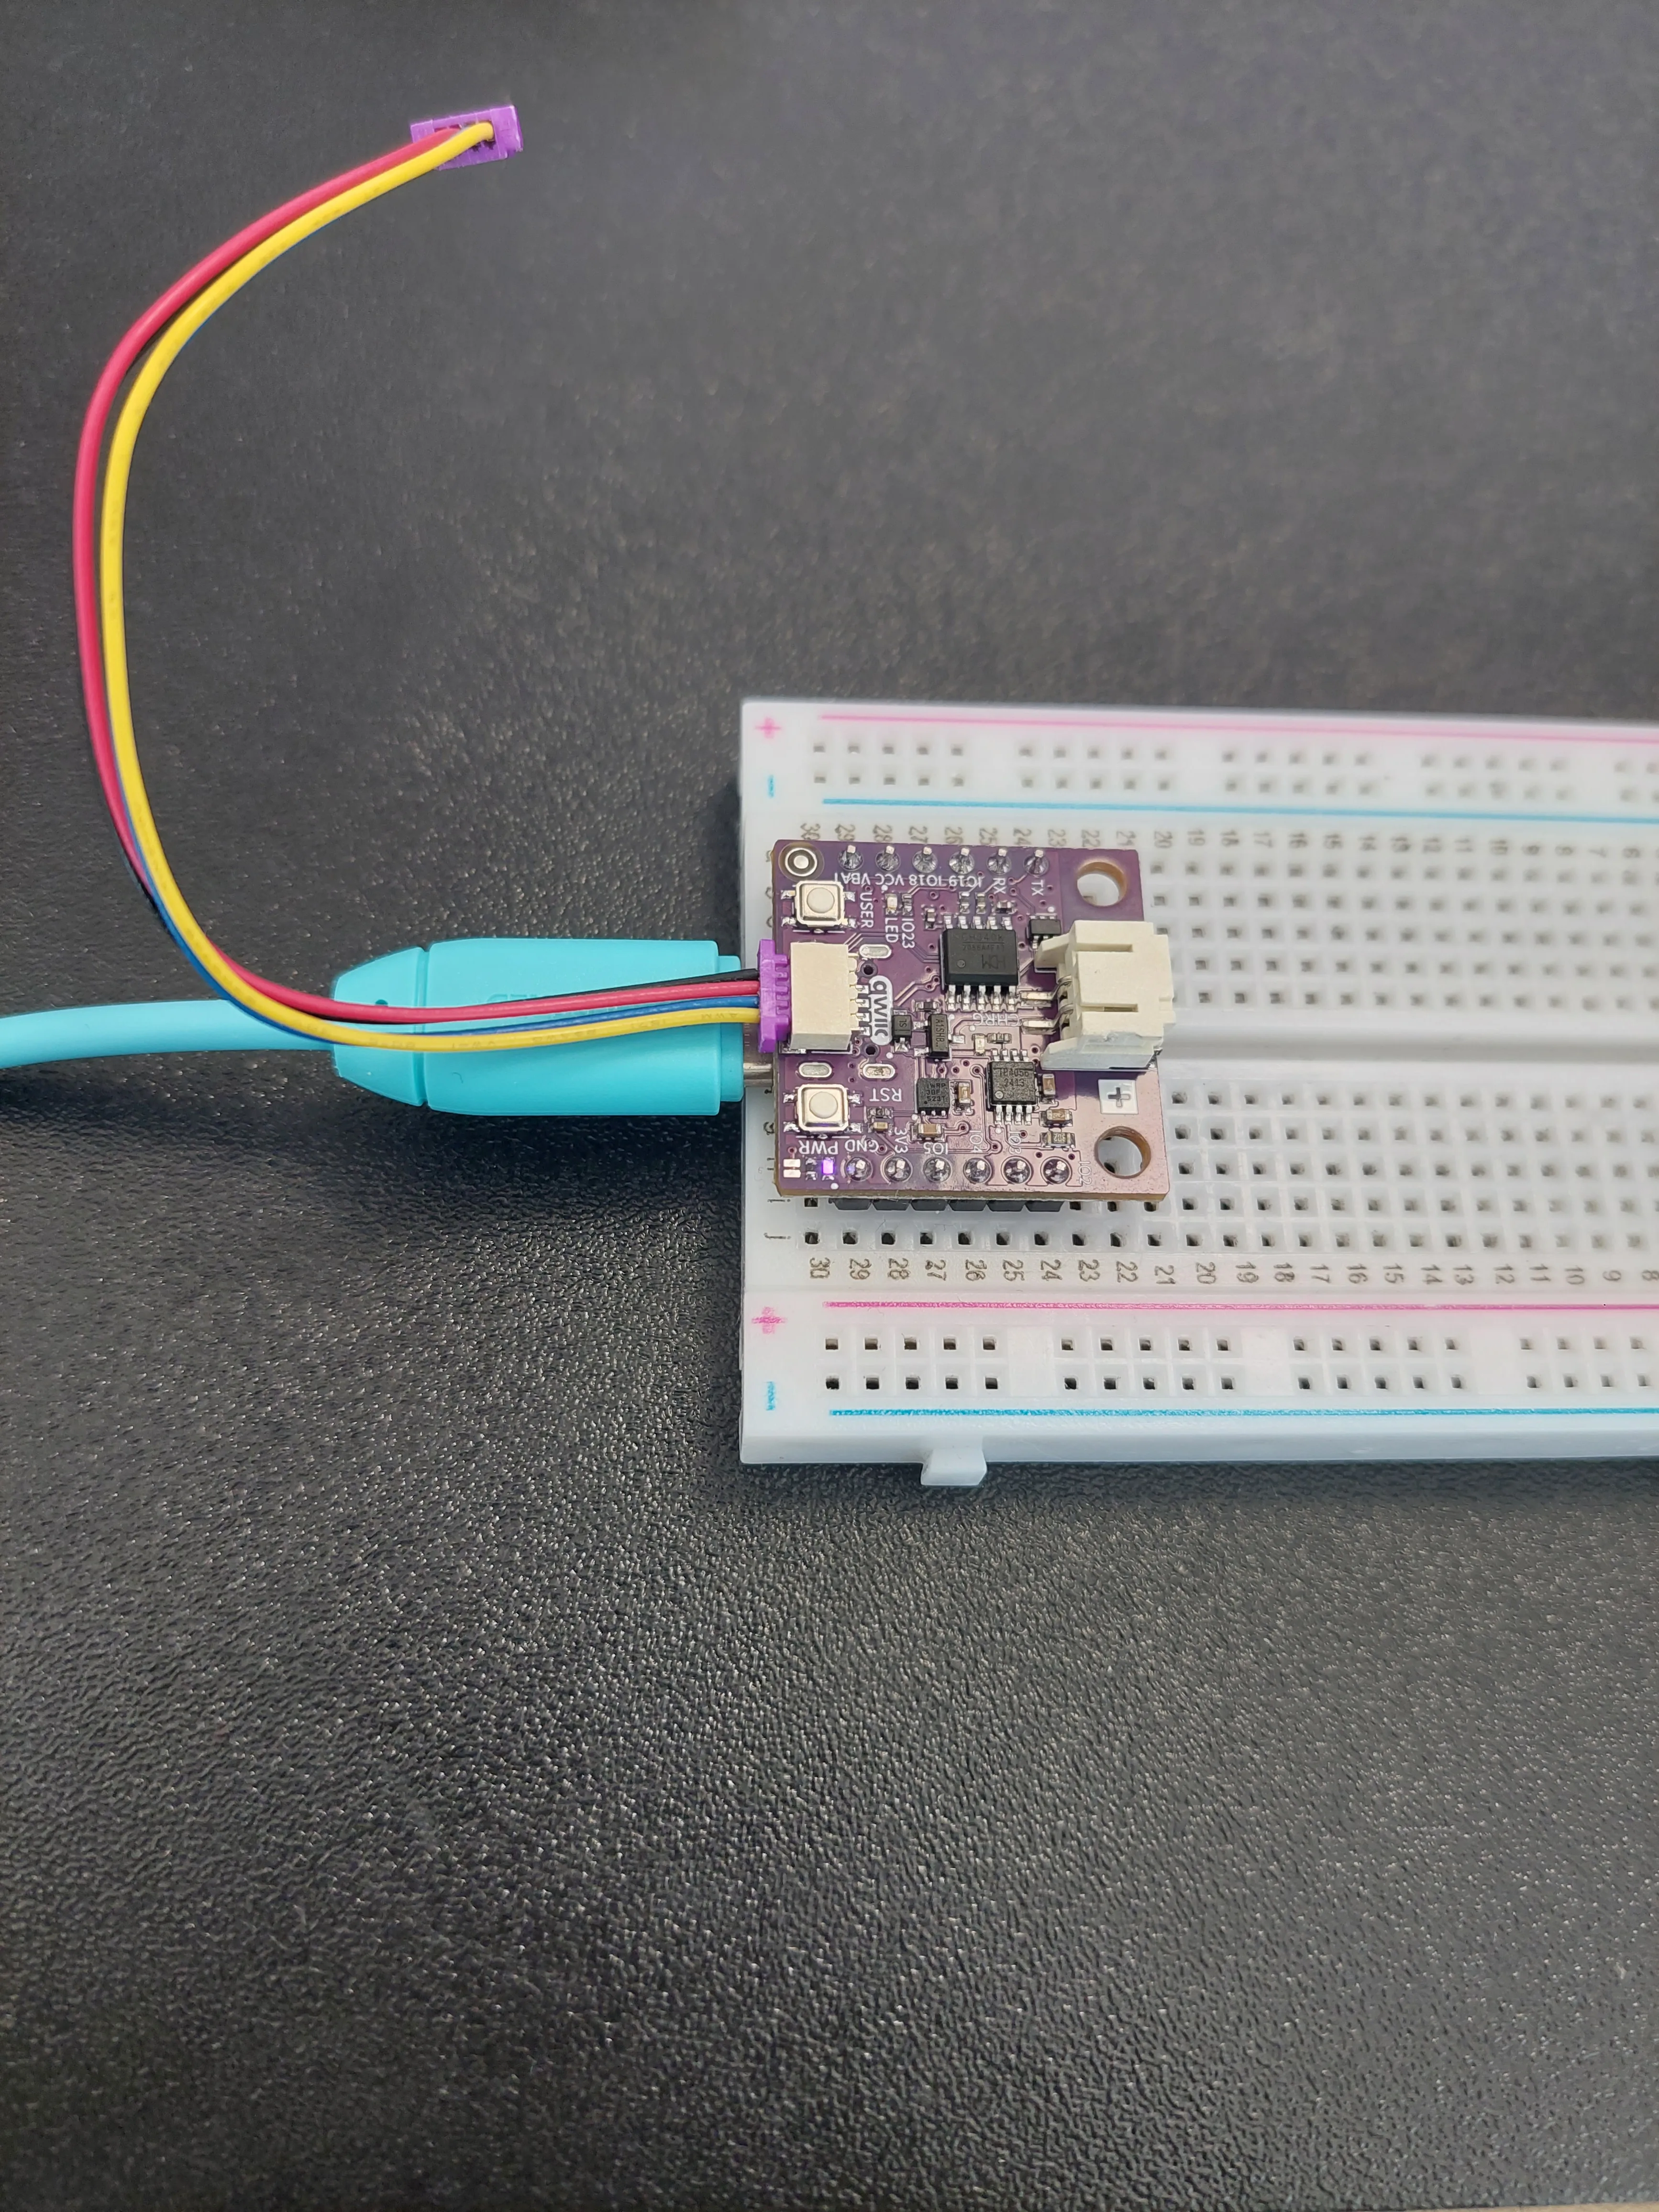
- and +. That one is the battery connector, and a Qwiic cable will not fit it.PWR light is on. It makes no difference when you connect it. Qwiic modules are safe to plug in either way round and either way about.If you would like to see exactly which connector this is on a bare board, it is highlighted here:
3. Plug the other end into the sensor
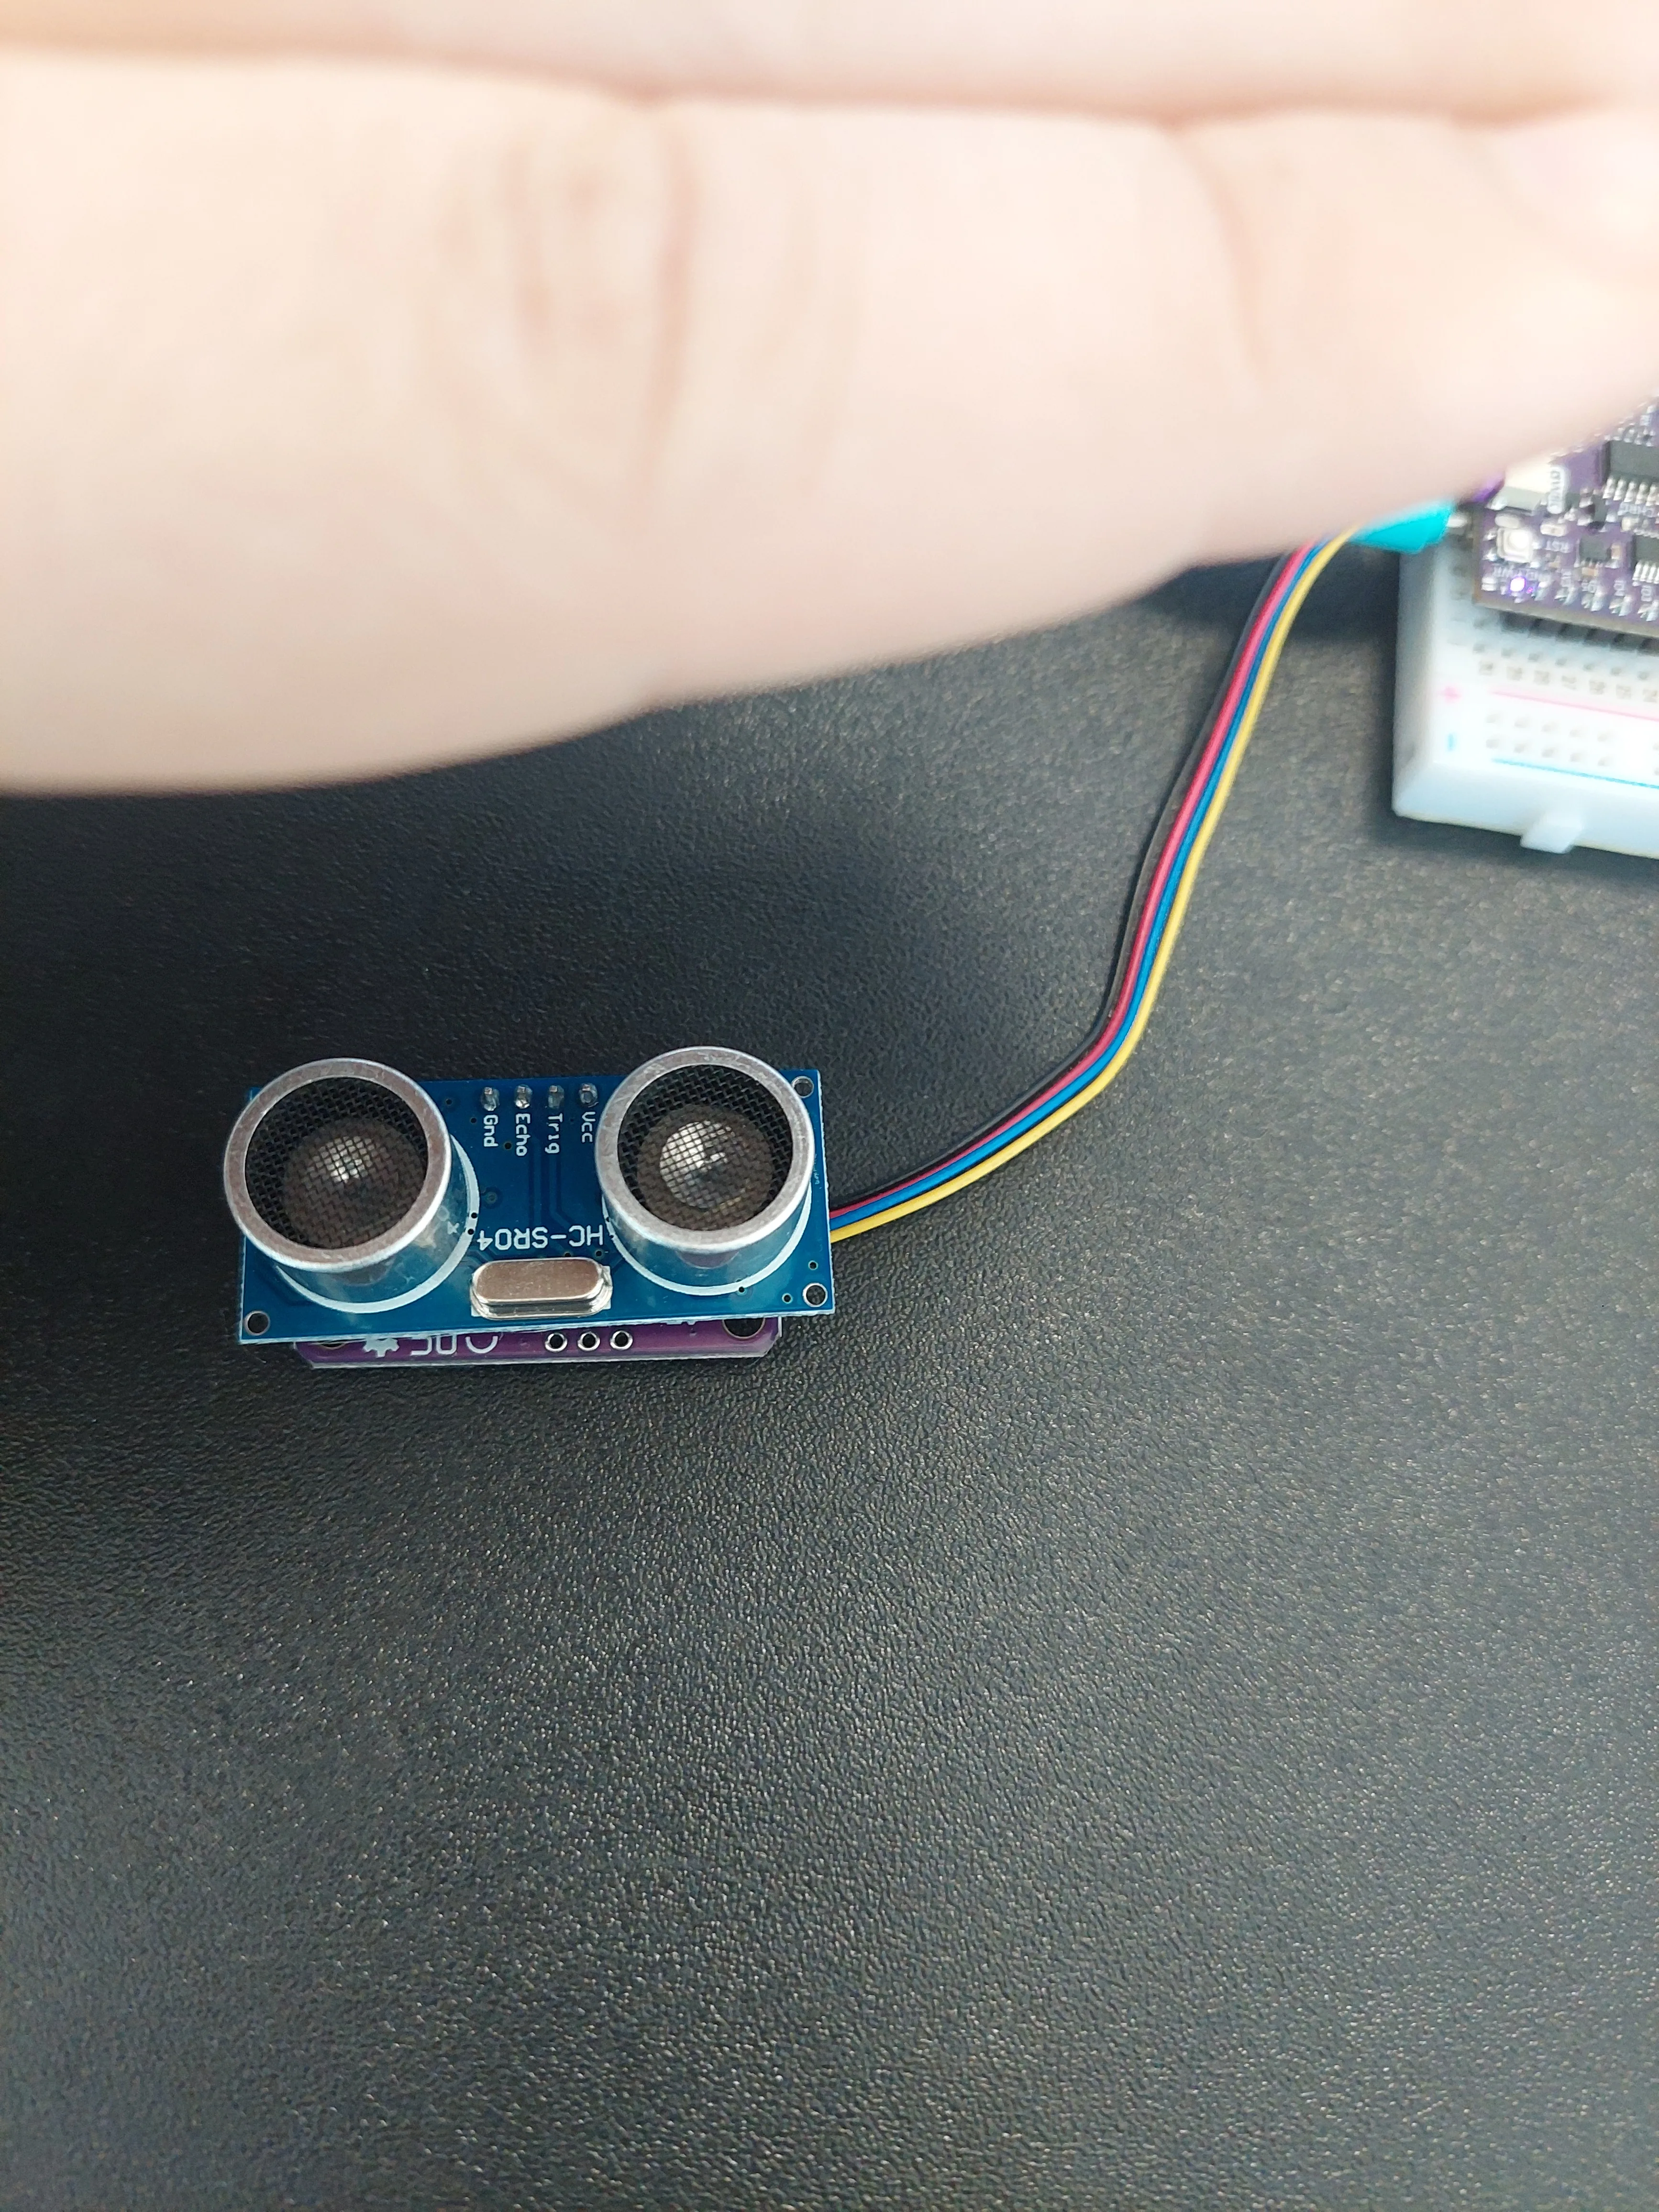
The sensor is two boards bolted back to back: the blue ultrasonic module carrying the two silver transducers, and a purple Soldered board carrying the electronics that do the talking. The purple board is silkscreened ULTRASONIC SENSOR QWIIC, and it has two Qwiic connectors, one at each end.
Plug the free end of the cable into either one. They are wired together, so it makes no difference which you pick. The second one is there so you can chain a further module onwards.
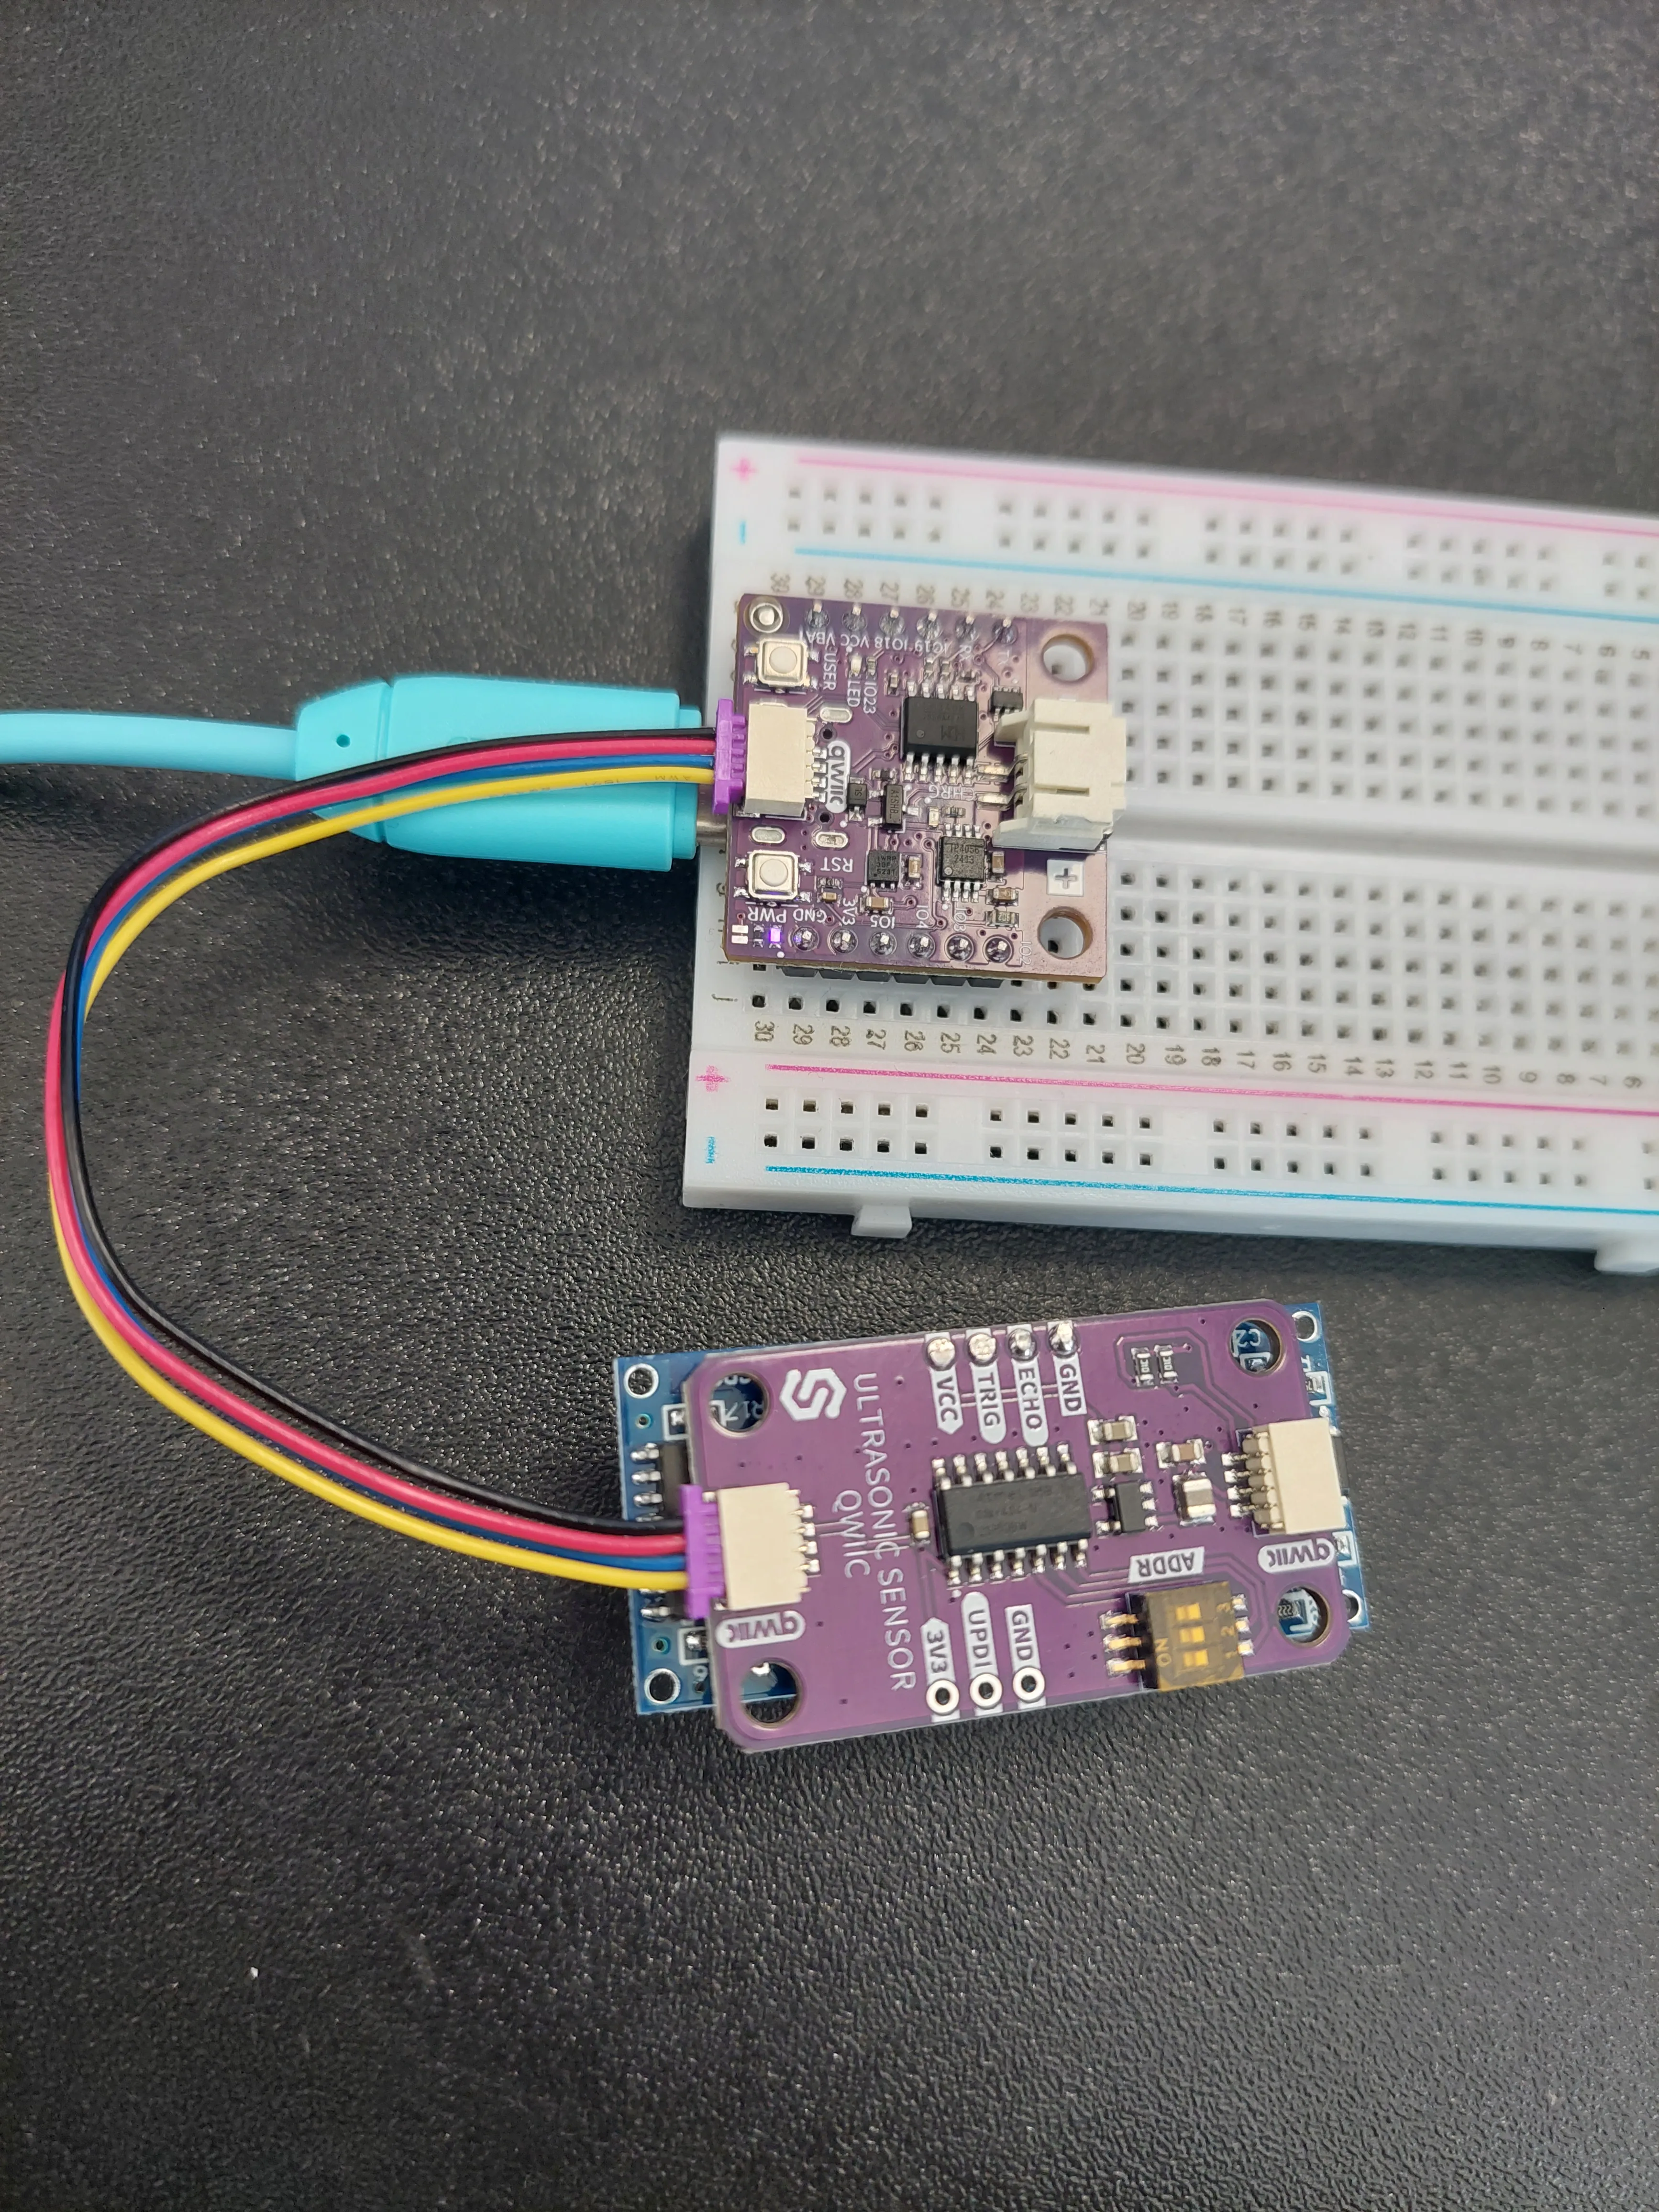
ON marking. It sets the address the sensor answers to, and the code expects the factory setting. You would only ever change it to put two of these sensors on the same cable.4. Point the sensor at open space
Turn the sensor over so the two silver transducers face out into the room, and keep the space in front of them clear. They are the parts that emit and hear the sound, so anything resting against them (the desk, the cable, your hand) is the only thing the sensor will ever find.
How the sensor measures distance
Sound travels at a known, steady speed through air: about 343 metres per second, which works out to 0.0343 centimetres every microsecond. That fixed speed is the whole trick. If you know how long a sound took to get somewhere, you know how far it went.
So the sensor emits a very short chirp at about 40 kHz, far too high for a human to hear, though a bat would have no trouble, and starts a stopwatch. The chirp travels out, hits something, and part of it bounces straight back. The moment the sensor hears it return, it stops the stopwatch.
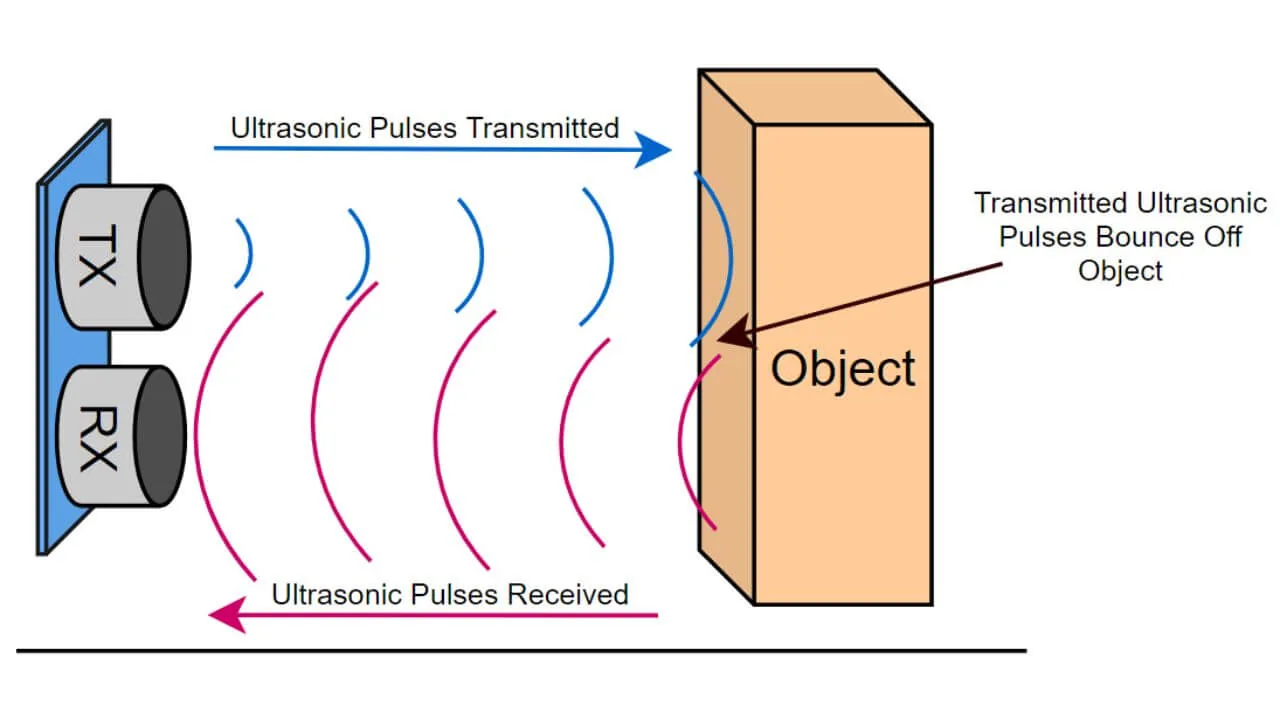
Turning that time into a distance takes one small correction:
Distance = (Time × 0.0343) ÷ 2
On this module you never have to do that sum yourself. The purple adapter board has its own small microcontroller which runs the stopwatch, does the arithmetic, and keeps the answer in centimetres ready for you to collect.
Why there are no pin numbers in this example
Look at the code below and you will notice something missing. Every example so far began by naming a pin, something like const int LED_PIN = 5;. This one names none, and the sensor object is created with empty hands:
Ultrasonic_Sensor hc;
That is because a Qwiic cable is not four separate wires you route wherever you like. It is a fixed bundle of four: 3.3 V, ground, and the two signal lines of a bus called I2C. On the NULA MINI those two signal lines are permanently wired to IO6 and IO7. They are not even brought out to the pin headers. There is nothing to choose, so there is nothing to tell the library.
What the library does need to know is which module on the cable it is talking to, because I2C lets several modules share one pair of wires. Each one answers to its own number, called an address, and this sensor's is 0x30. The library already knows that, which is why begin() takes no arguments either.
Installing the library
A library is somebody else's code that you borrow. Without one you would have to time the echo pulse and do the arithmetic yourself; with one you call getDistance() and get a number.
This example needs the Soldered Ultrasonic Distance Sensor Arduino library. If you followed Setting up the Arduino environment you already have it. If not, open Tools → Manage Libraries, search for it, and install the one published by Soldered Electronics.
fatal error: Ultrasonic-distance-sensor-easyC-SOLDERED.h: No such file or directory, the library is not installed. Install it and compile again. Nothing is wrong with the wiring or the board.Reading the sensor takes two steps
The sketch does not simply ask for a distance. It does this instead:
hc.takeMeasure();
delay(MEASURE_WAIT_MS);
int distance = hc.getDistance();
Three lines where you might have expected one, and the reason is that measuring takes real time. takeMeasure() tells the sensor to go and do the work: send the chirp, listen, run the stopwatch, store the answer. That request comes back immediately. The board has only sent an instruction, not waited for a result.
The sensor then needs a moment. It gives up listening after about 38 milliseconds if no echo ever arrives, so a measurement can take that long in the worst case. The sketch waits 50 ms, comfortably longer, before getDistance() collects the finished answer.
Not every number is a real measurement
This sensor works from about 2 centimetres out to about 4 metres. Past that the sound comes back too faint to recognise, and the sensor has no way of telling you so. It has no "not found" answer. It simply hands over a number anyway.
In practice that number comes out very large, somewhere close to 1000 cm, and it drifts about by a few centimetres from reading to reading. Ten metres is well outside anything this sensor can genuinely hear, so treat a reading of a few hundred centimetres or more as "nothing found" rather than as a distant object.
The same thing happens even with an object well within range, if that object happens to be soft, or angled steeply away from the sensor. Cushions, curtains and jumpers absorb the sound; a hard flat surface facing the sensor square-on reflects it best.
0 and prints No echo received, nothing in range. instead of a distance. That guard is there for a sensor that answers with nothing at all, which is a different fault: an unplugged or faulty module rather than an empty room. In normal use you will not see that message, so do not go looking for it as proof that things are working.Code
/**
 **************************************************
 *
 * @file        3.1_Measuring_Distance.ino
 * @brief       Example that shows how to measure distance using the Soldered Ultrasonic Distance Sensor.
 *              The sensor sends out a short ultrasonic pulse and then listens for its echo. It measures how long the
 *              echo took to come back, works out the distance from that time, and hands us the answer over easyC.
 *              The measured distance is printed in centimeters to the Serial Monitor.
 *              For details, connection diagram and more, check out the example documentation at: <link placeholder>
 * @author      Soldered
 ***************************************************
 */

/*
Including a library gives us access to ready-made functions that do the hard work for us. Here we include the
Soldered library for the Ultrasonic Distance Sensor, so we don't have to calculate the distance from raw timings
ourselves. If the Arduino IDE reports that this file cannot be found, install the library through
Sketch -> Include Library -> Manage Libraries and search for "Soldered Ultrasonic".
*/
#include "Ultrasonic-distance-sensor-easyC-SOLDERED.h"

/*
Here we create our sensor object, which we named "hc". An object is our way of talking to the sensor: every function
we call on it, we call through this name.
Notice that we do not pass any pin numbers. This sensor connects over easyC, which is Soldered's name for an I2C
connection over a single cable, and I2C always uses the same two pins on the board (IO6 and IO7 on the NULA board),
so the library already knows where to find it. Plug the Qwiic cable in and there is nothing to wire.
*/
Ultrasonic_Sensor hc;

/*
This is how long we wait after asking for a measurement, in milliseconds. The sensor needs a moment to send its pulse
out and listen for the echo, and it gives up after 38 milliseconds if no echo comes back. We wait a little longer than
that so the answer is always ready by the time we ask for it.
*/
const int MEASURE_WAIT_MS = 50;

void setup() {

  /*
  Serial.begin() establishes serial communication between your board and another device, in this example, to your
  computer via a USB cable. We use it here so we can print the measured distance on the Serial Monitor.
  */
  Serial.begin(115200);

  /*
  begin() prepares the sensor for use. For an easyC sensor this starts the I2C communication and tells the library which
  address to talk to, which for this sensor is 0x30. A sensor should always be initialized before we start reading
  from it.
  */
  hc.begin();

  //Print out the initial message so we know that the program started successfully.
  Serial.println("Ultrasonic Measuring Distance Example started!");
  Serial.println("Move an object in front of the sensor to see the distance change.");
}

void loop() {

  /*
  Reading an easyC sensor takes two steps. takeMeasure() is the first one: it asks the sensor to send out a pulse and
  time the echo. The sensor does that work on its own and remembers the answer, which is why we then have to wait
  before collecting it.
  */
  hc.takeMeasure();
  delay(MEASURE_WAIT_MS);

  /*
  getDistance() is the second step: it fetches the answer the sensor worked out and stored, already converted into
  centimeters. The value comes back as a whole number of centimeters, which is all the accuracy this sensor can
  honestly offer, so we store it in an int rather than in a decimal number.
  */
  int distance = hc.getDistance();

  /*
  The sensor answers with 0 when it heard no echo at all, which happens when nothing is in range or when the surface in
  front of it scatters the sound away. That is not a real measurement, so we say so rather than reporting a distance of
  zero centimeters, which would suggest an object touching the sensor.
  */
  if (distance == 0) {
    Serial.println("No echo received, nothing in range.");
  } else {

    /*
    Serial.print() prints data to the Serial Monitor without skipping to the next line, while Serial.println() prints
    the data and then skips to the next line. By combining them we can build one readable line out of several pieces.
    */
    Serial.print("Distance: ");
    Serial.print(distance);
    Serial.println(" cm");
  }

  /*
  delay() is a function that starts a pause in the code. Without this pause the readings would scroll by far too
  quickly to read, and it also lets the echoes of the last pulse die out before we ask for the next one.
  Feel free to experiment with this value.
  */
  delay(500);
}
What you should see
Upload the sketch, then open Tools → Serial Monitor and set the baud rate to 115200. After the two startup lines you get a fresh reading twice a second.
Point the sensor across the room and wave your hand about in front of it, and the numbers follow whatever is nearest:

Most of these readings sit around 52 cm, which is where the nearest object was sitting still. The values that jump (160 cm, 96 cm, 39 cm) are the moments when something moved through the sensor's field of view, or when the sound found something further away instead.
int rather than in a decimal number.Now aim the sensor at empty space, or straight up at the ceiling, and the picture changes completely:

Nearly every line now reads somewhere between 996 and 1000 cm. That is the sensor's way of finding nothing at all, as described above, not an object ten metres away. Seeing this cluster is a useful thing to recognise, because it tells you the board and the sensor are talking to each other perfectly well and the problem is only where the sensor is pointed.
Try it yourself: change the delay(500) at the end of the loop to delay(100) and upload again. Readings now arrive about six times a second instead of twice, and following a moving hand becomes much smoother. Shorten it much further, though, and each new chirp goes out while the echoes of the last one are still bouncing around the room, which makes the numbers jump about.
Full example
Check out the full example code on the link below:
3.1_Measuring_Distance.ino
Example that reads the Qwiic ultrasonic distance sensor and prints the distance in centimetres to the Serial Monitor.