0.2 Setting up the Arduino environment
Before you can upload anything to the board, your computer needs three things: the Arduino IDE, support for the NULA Mini ESP32-C6 inside it, and the libraries the later examples use. This page sets all three up once. You will not have to repeat any of it.
By the end of this page you will have:
- The Arduino IDE installed
- The ESP32 boards package installed, with the NULA Mini selected
- The board showing up as a port your computer can talk to
- All three Soldered libraries installed
1. Install the Arduino IDE
Download the Arduino IDE
Official download page. Pick version 2.x for your operating system.
Download it, run the installer and accept the defaults. If you already have the Arduino IDE, you can skip ahead.
2. Add the ESP32 boards package
Out of the box the Arduino IDE only knows about Arduino's own boards. The NULA Mini uses an ESP32-C6 chip, so the IDE needs Espressif's boards package added before it can see it.
- Open File → Preferences.
- Find the field named Additional boards manager URLs and paste in this address:
https://espressif.github.io/arduino-esp32/package_esp32_index.json
- Click OK.
- Open Tools → Board → Boards Manager.
- Search for
esp32and install esp32 by Espressif Systems.
3. Select the NULA Mini
The NULA Mini is part of Espressif's official package, so once the download above has finished it is already in the board list. You do not need to add anything else.
Go to Tools → Board → esp32 and pick Soldered NULA Mini ESP32C6.
nula into the board selector at the top of the IDE window is faster than scrolling.Leave every other setting in the Tools menu at its default. The defaults are correct for this board, and the examples in this documentation are written against them.
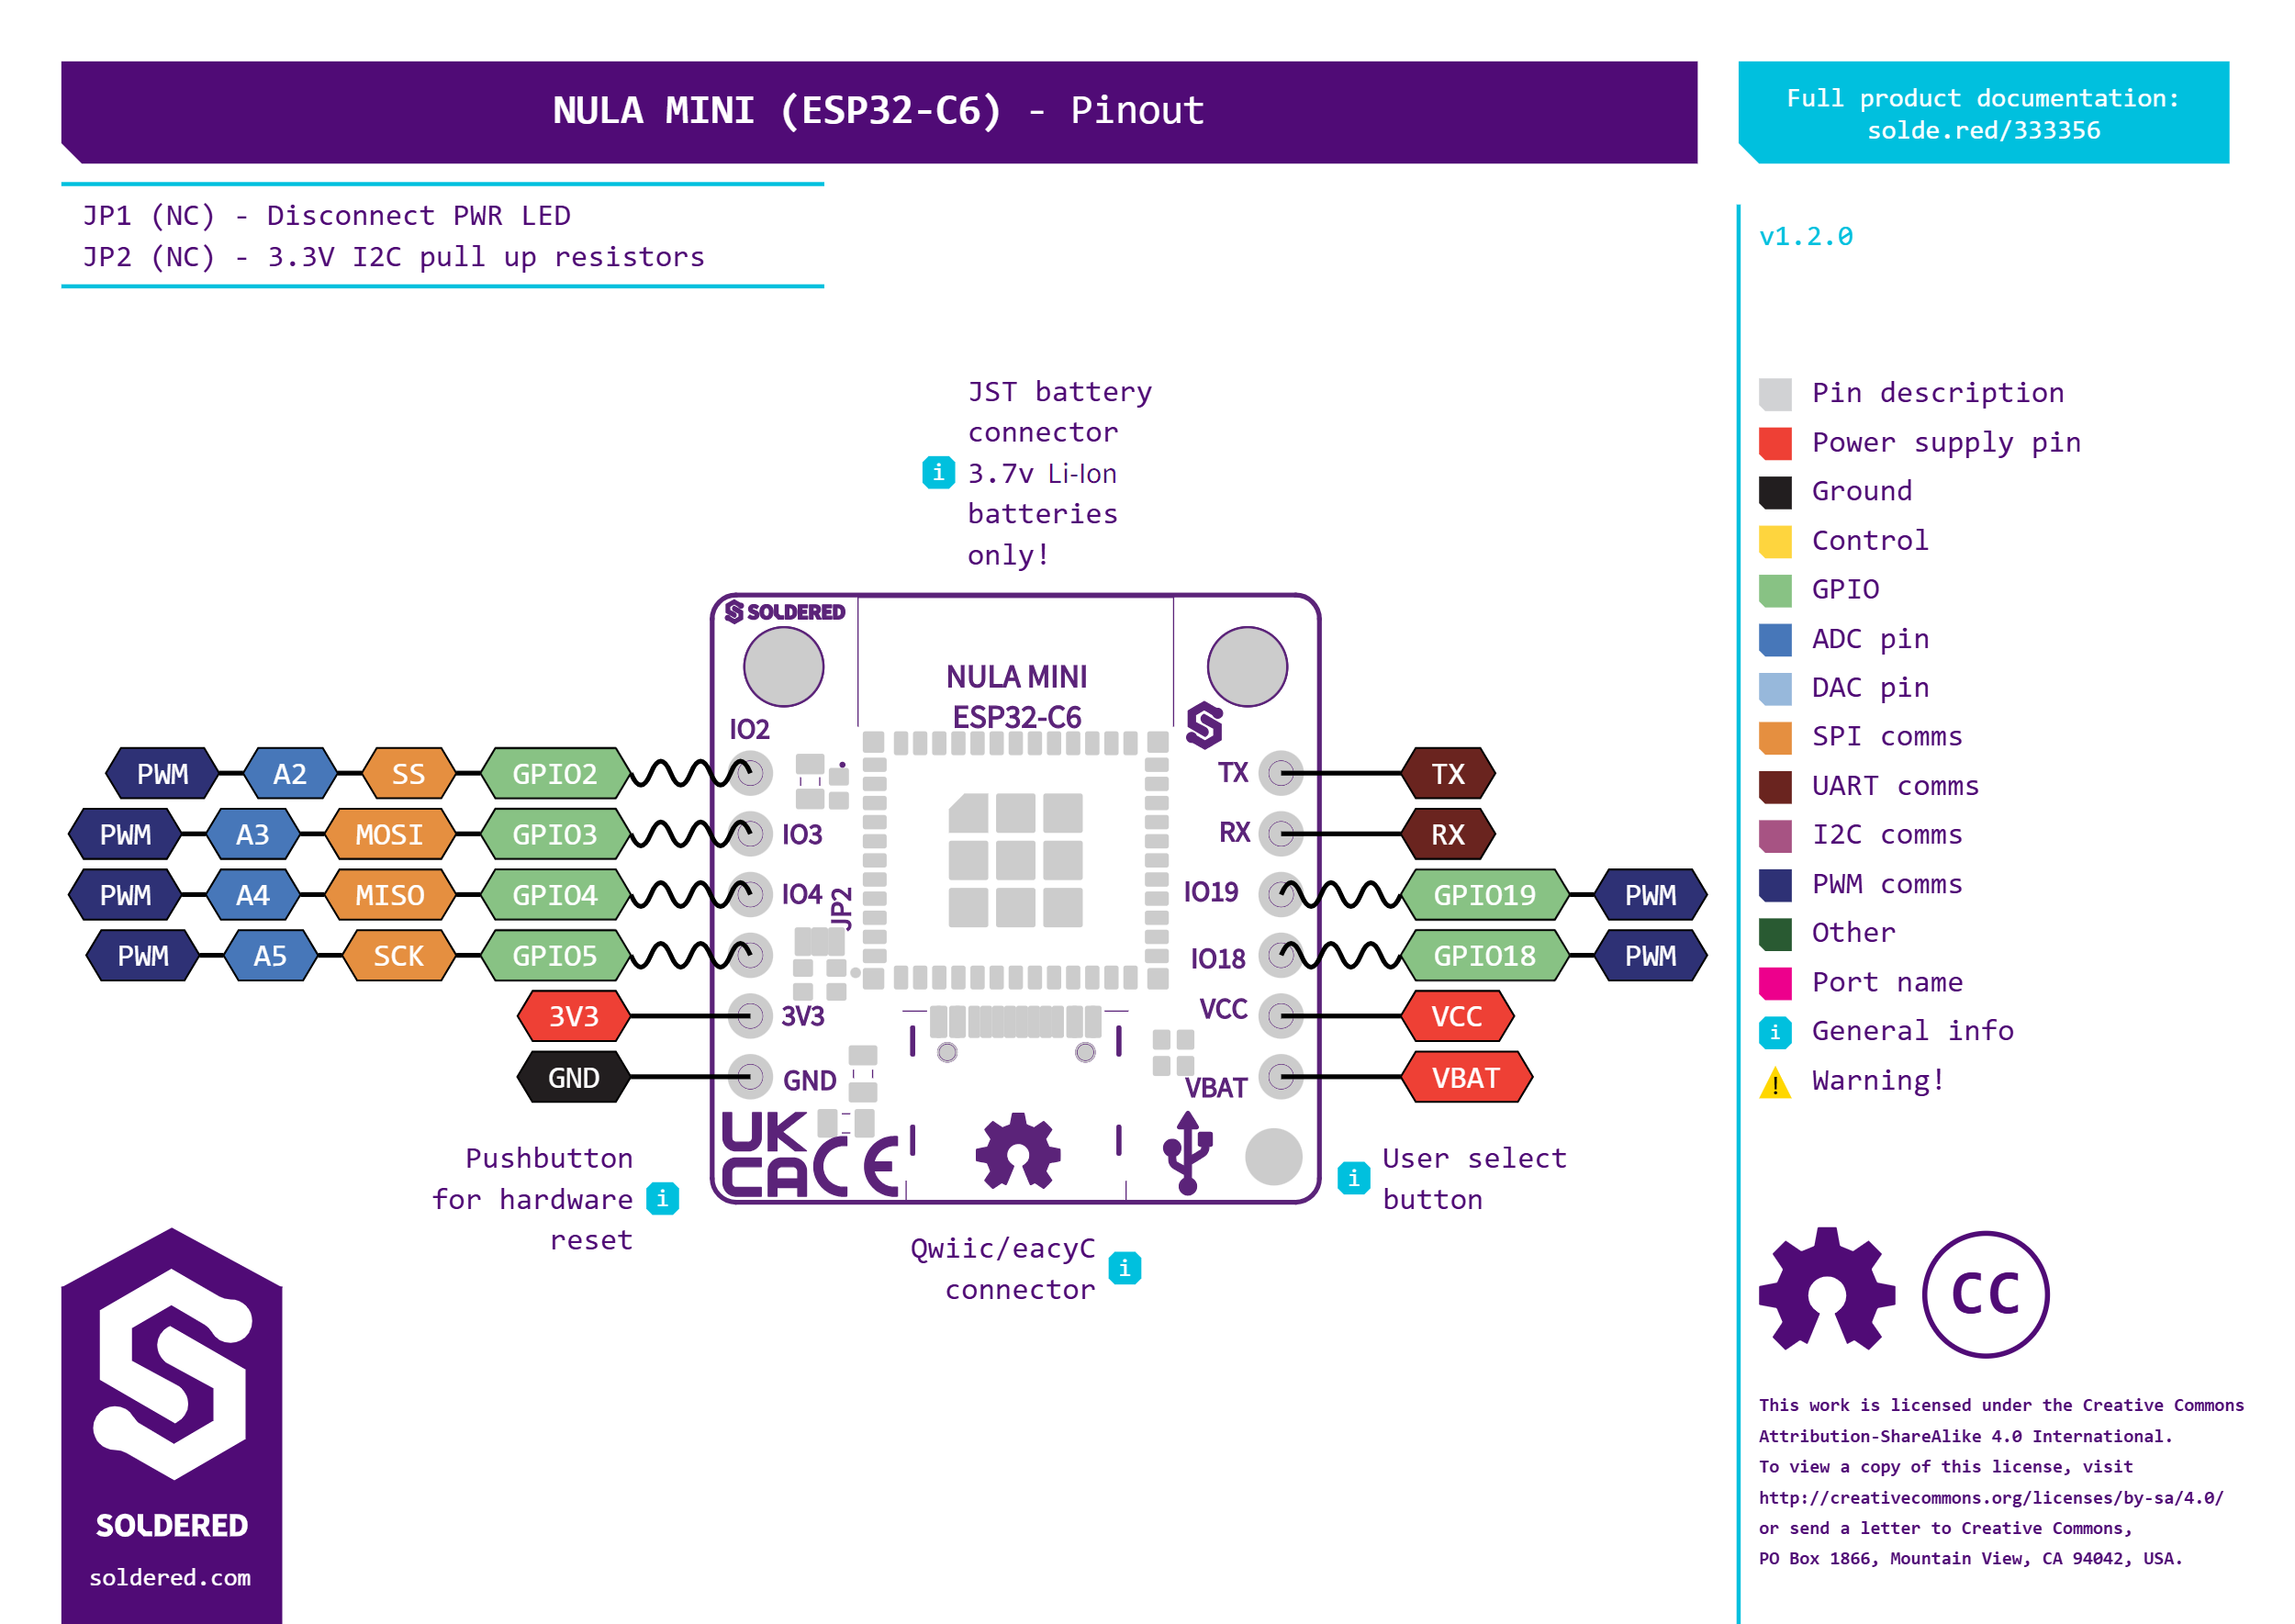
4. Connect the board and find its port
Connect the NULA Mini to your computer with a USB-C cable, then open Tools → Port.
If a new port appeared when you plugged the board in, select it and move on to the next step.
If no new port appeared, your computer is missing the driver for the board's USB chip. This is the single most common thing to get stuck on, and it is not a fault with the board.
CH340 drivers
Installing the driver on Windows, macOS and Linux, and what to do when the board still is not detected.
5. Install the libraries
Some of the later examples talk to the three Qwiic modules in the kit: the LCD, the distance sensor and the temperature sensor. Each one needs its library installed. Sections 1, 2 and 6 need none of these, so if you only want to get started you can come back to this step later.
Open Tools → Manage Libraries, then search for and install each of these. All three are published by Soldered Electronics:
| Library | Needed by | Provides |
|---|---|---|
| Soldered LCD | 4.1, 4.2, 7.1, 7.7 | LCD-SOLDERED.h |
| SHTC3 Soldered Library | 5.1, 7.1 | SHTC3-SOLDERED.h |
| Soldered Ultrasonic Distance Sensor Arduino library | 3.1, 3.2, 7.3 | Ultrasonic-distance-sensor-easyC-SOLDERED.h |
fatal error: LCD-SOLDERED.h: No such file or directory, you have installed the other one.6. Check that it all works
The quickest way to confirm the whole chain is working is to upload something tiny and watch it report back.
- Open File → New Sketch and replace its contents with:
void setup() {
  Serial.begin(115200);
  Serial.println("Hello from the NULA Mini!");
}

void loop() {
}
- Click the Upload button (the arrow in the toolbar).
- Open Tools → Serial Monitor.
- Set the baud rate dropdown at the top right of the Serial Monitor to 115200.
- Press the RST button on the board.
You should see Hello from the NULA Mini! appear. Every example in this documentation uses 115200, so you can leave that dropdown alone from now on.
If the upload fails
Work through these in order. The first two account for nearly every failure:
| Symptom | What to check |
|---|---|
| No port to select in Tools → Port | The CH340 driver, then the USB cable. See step 4. |
| Upload starts but fails partway | Close any other program using the port, including a Serial Monitor in another window. |
A fatal error occurred: Failed to connect | Hold USER, tap RST, then release USER. That puts the board into download mode; upload again. |
| Wrong board name in the error text | Go back to step 3 and confirm Soldered NULA Mini ESP32C6 is the selected board. |
Next
With the environment set up, you are ready for the first example.
1.1 Hello World
Print your first message from the board to your computer.